INTERNAL DOOR TRIM AND WOOD FINISHER INSTALLATION
Document Number: SS39
Author: Thomas Sloan Kirton
Date Created:
Revision Number: v1.0.0
Document Approved by:
NOTE. Document is uncontrolled if printed
All instructions in this manual must be adhered to for this stage. Read all instructions carefully and study the photographs. While learning this procedure, quality of work is more important than speed of assembly.

- CARE POINT: Ensure the 2 dome head bolts (circled in yellow) are removed before door card fitment.
- Repeat on the opposite door.
- Use image as reference.
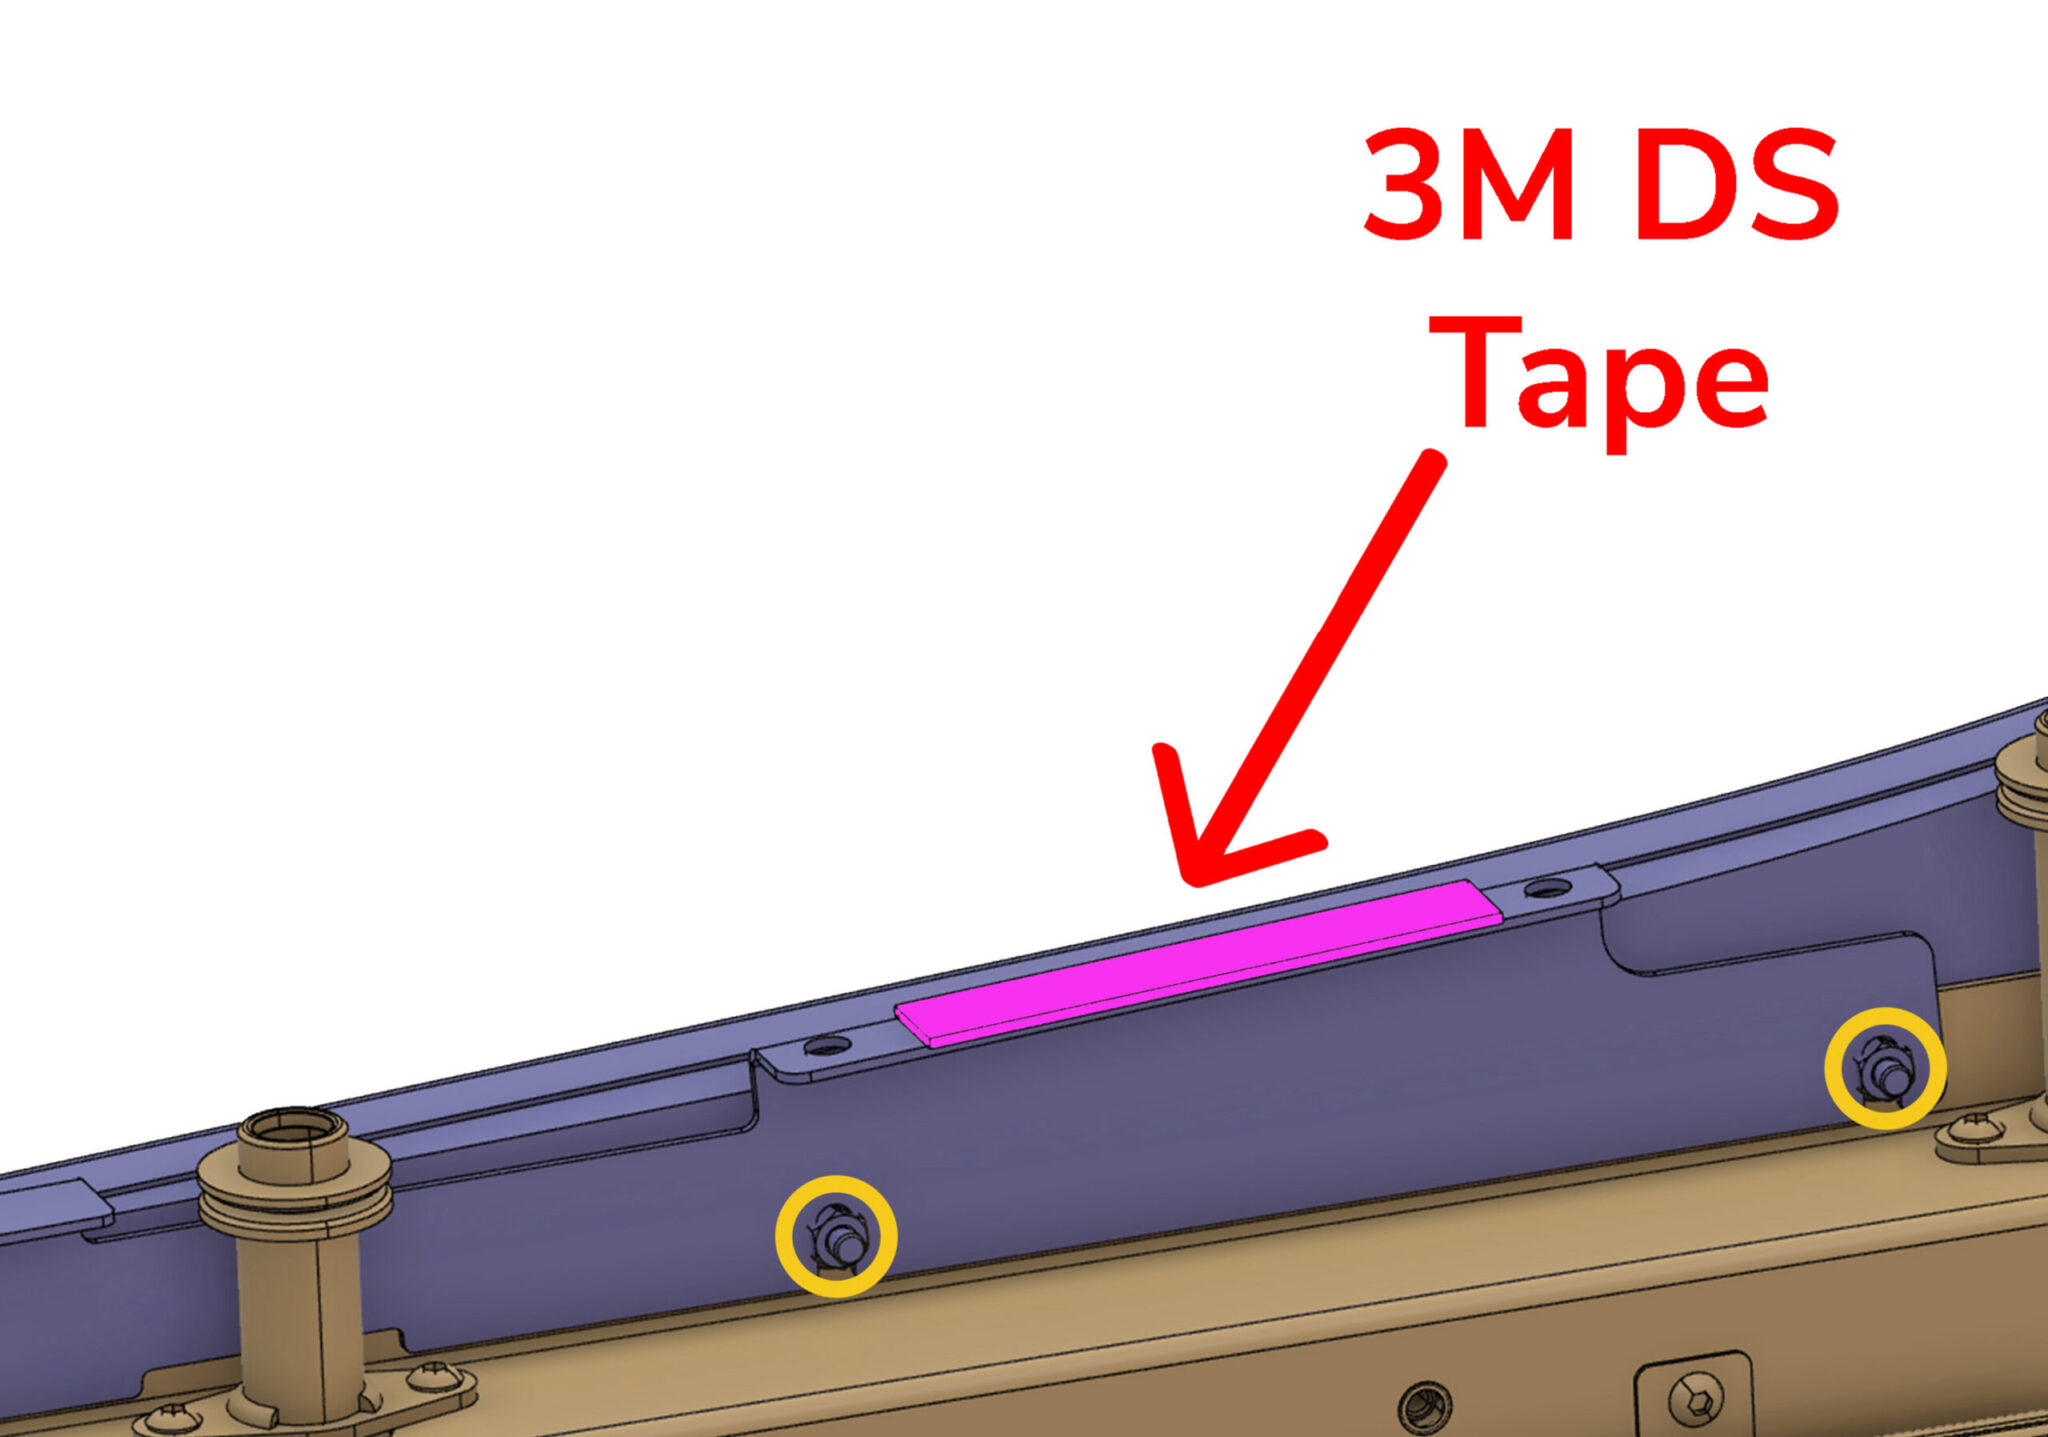
- Apply a 110mm length piece of 3M 80322 double sided tape to the area highlighted in pink.
- Repeat on the opposite door.
- Use image as reference.
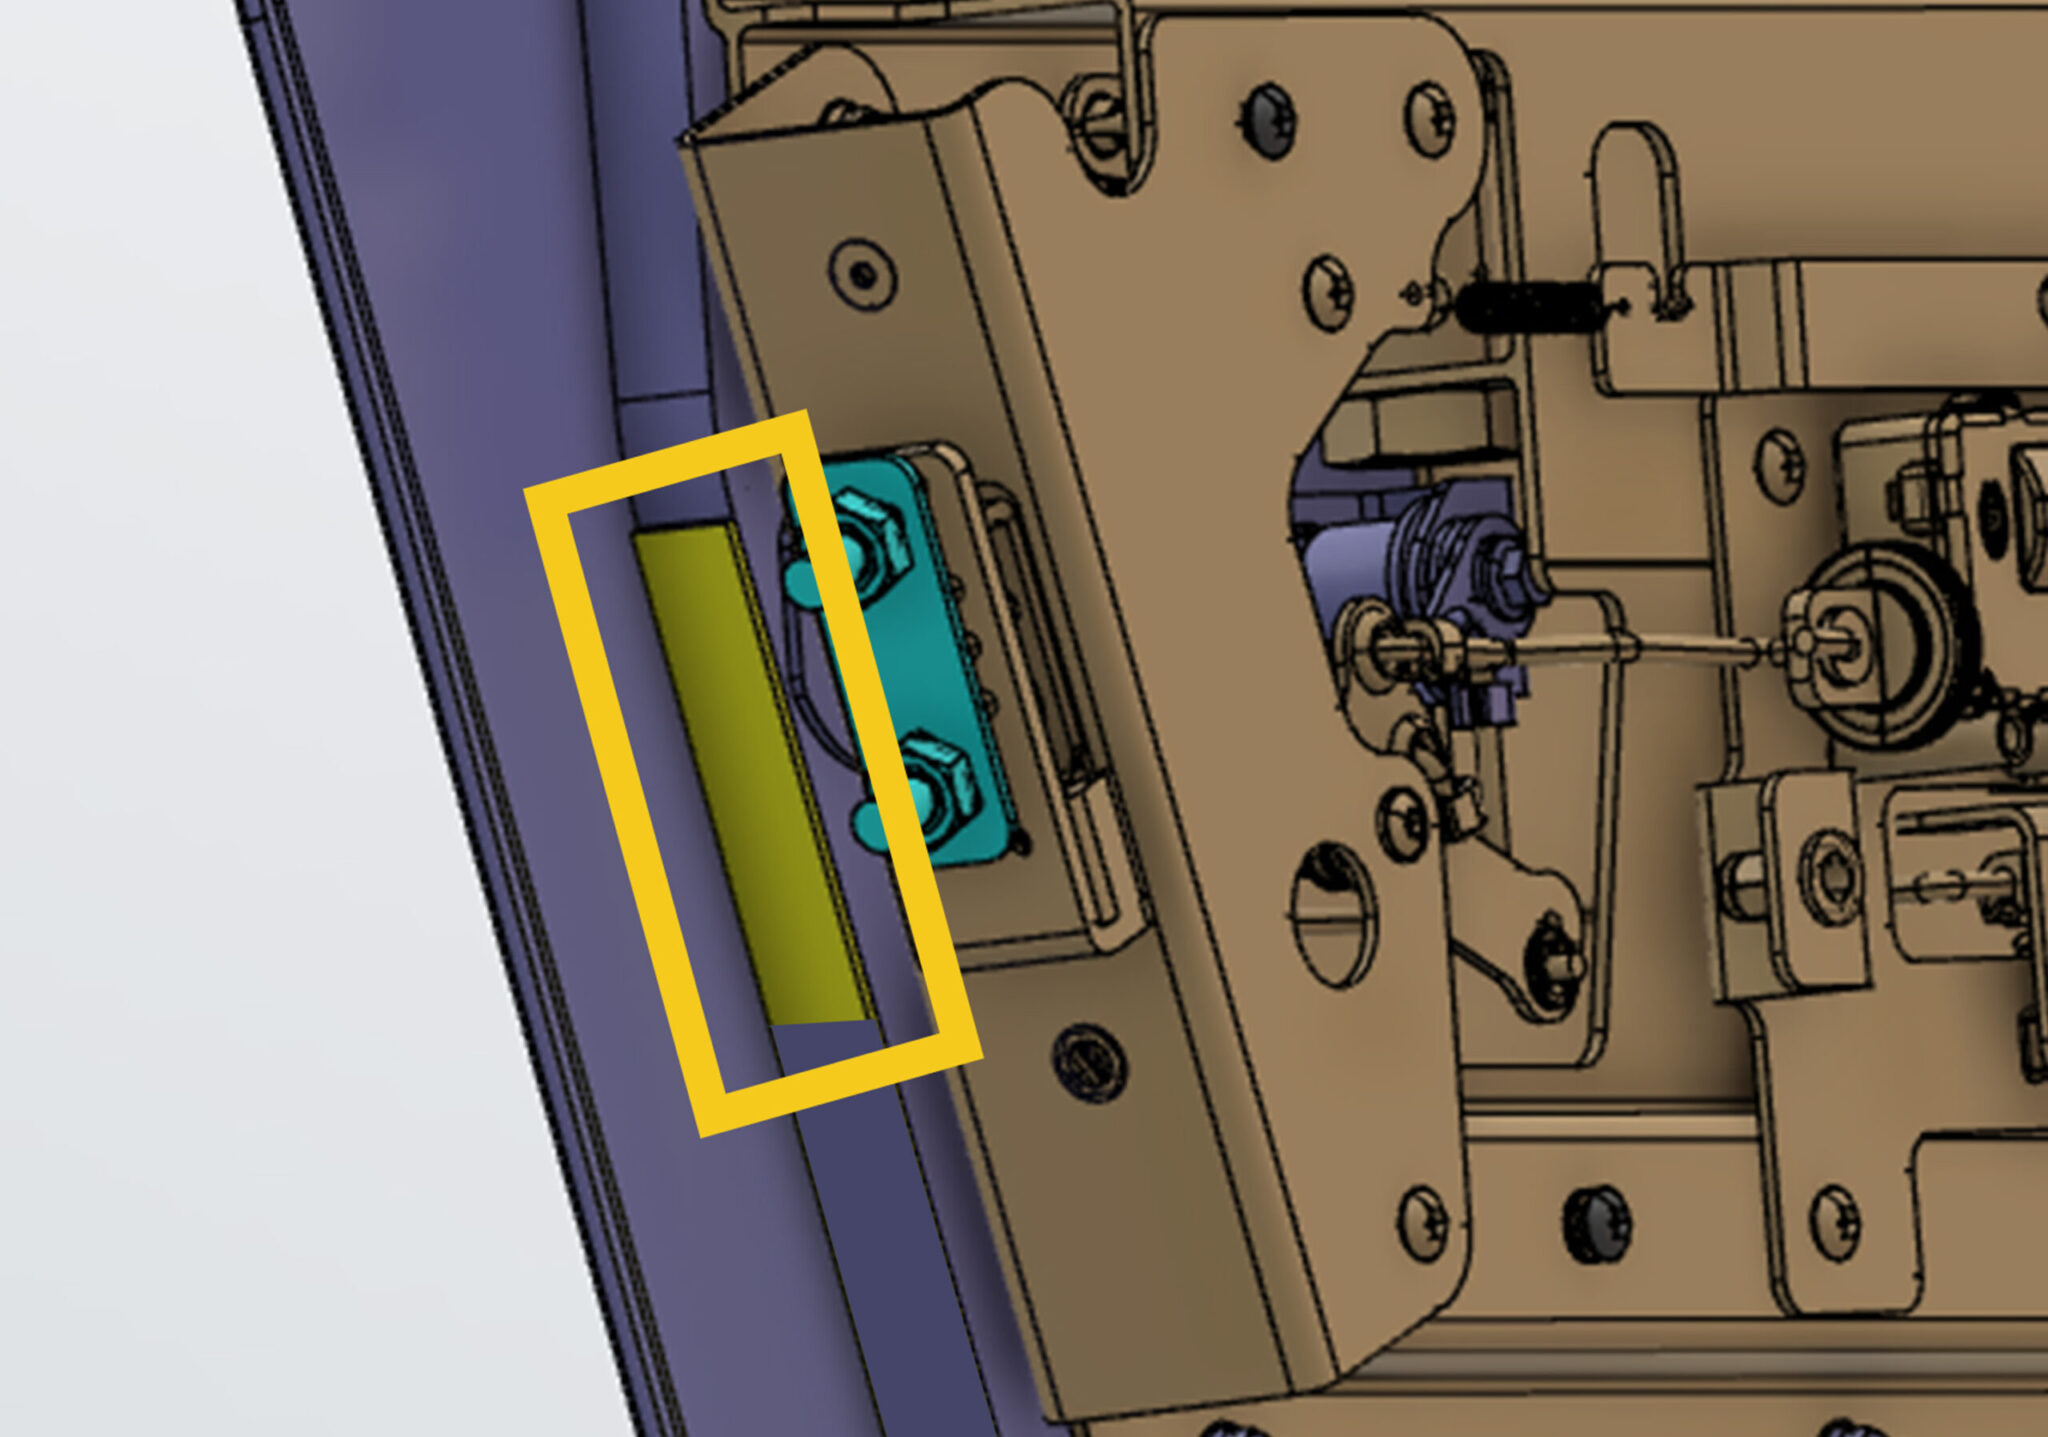
- Cut x2 80mm strip of adhesive backed foam (R371010), layer up and stick to the door skin wood behind the door mechanism striker. The foam applied may need trimming to the appropriate wood thickness on the door skin.
- Repeat on the opposite door.
- Use image as reference.

- Cut to fit sections of foam tape (R371010) and apply to areas marked in orange.
- Cut to fit sections of 3M 80322 and apply to areas marked in pink.
- Repeat on the opposite door.
- Use image as reference.

- CARE POINT: Ensure the trimmed section around the latch mechanism does not get damaged whilst fitting.
- Slot into the side screen socket gaps and clip into place on the front face and door card top.
- Once the door card is in the correct area fix to the door beam with x5 m6x16mm dome head bolt (MGS06303).
- Repeat on the opposite door.
- Use image as reference.
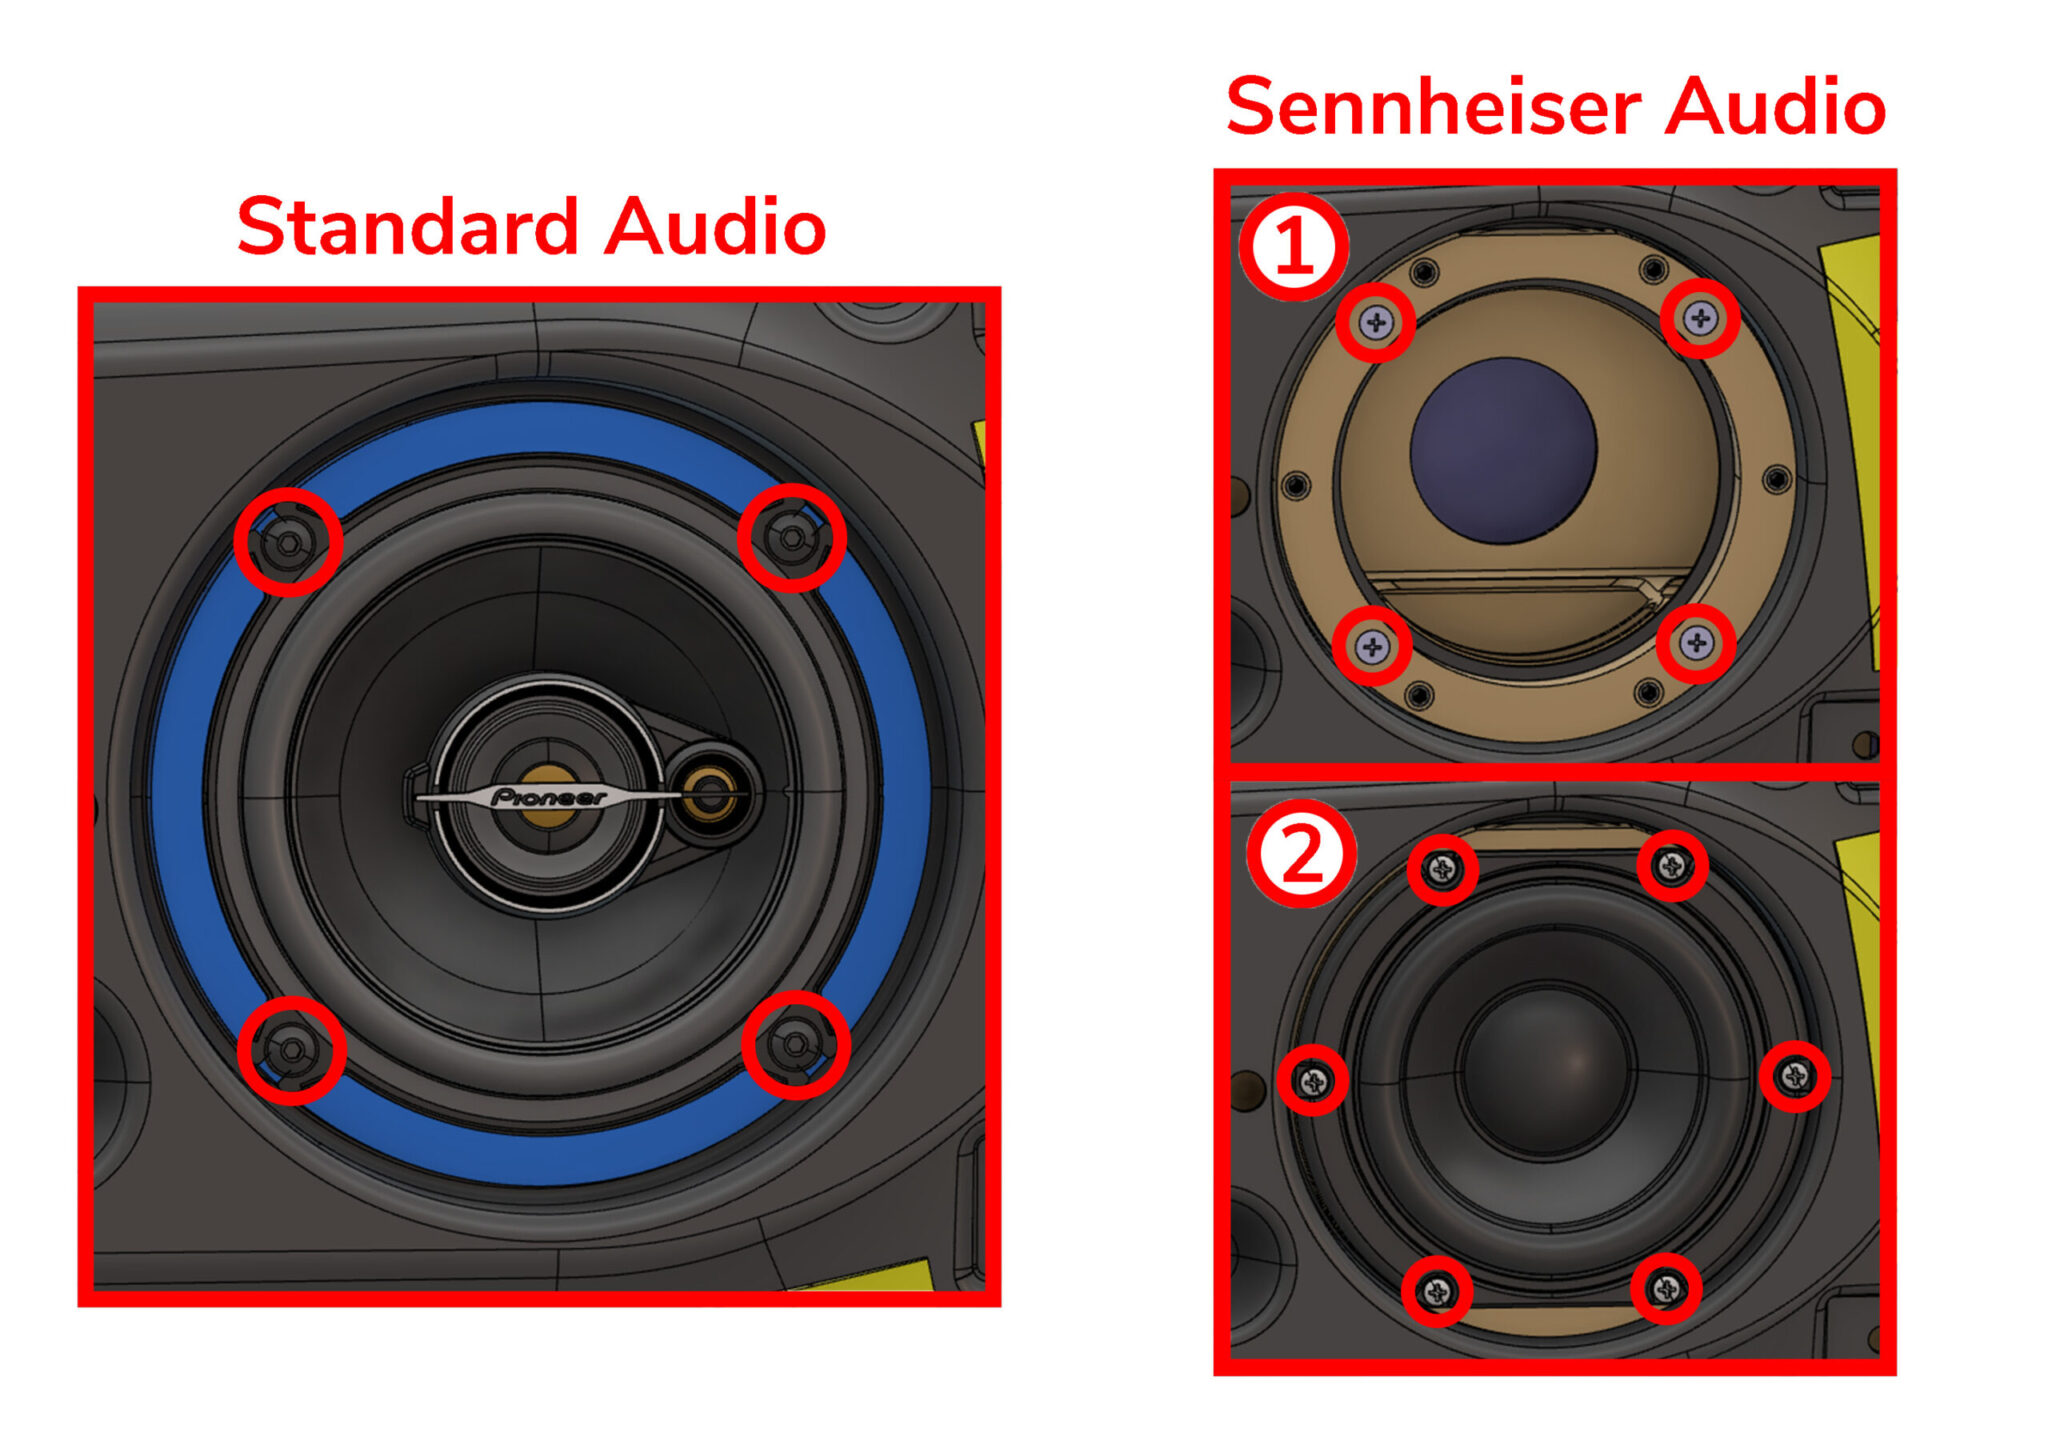
- CARE POINT: Use blue loctite (243) on all fixings.
- For fitment of a standard audio (see left diagram) system place the mounting ring and speaker onto the primary door card (after wiring the speaker to the door harness) and use x4 m5x25mm pozi pan head bolt to fix (MGS0915).
- Repeat on the opposite door.
- Use image as reference.
- For fitment of a Sennheiser system, first fit the speaker mounting ring with x4 m5x25mm pozi countersunk bolts (MGS1100).
- Mount the speaker onto the primary door card (after wiring the speaker to the door harness) and use x6 m4x12mm bolts (F011229)).
- Repeat on the opposite door.
- Use image as reference.

- Apply 3M 80322 double sided tape to the areas highlighted pink.
- Note that the numbers shown on the diagram relate to the layers of tape.
- E.g. 1 = 1 layer & 3 = 3 layers of tape applied.
- Repeat on the opposite door.
- Use image as reference.
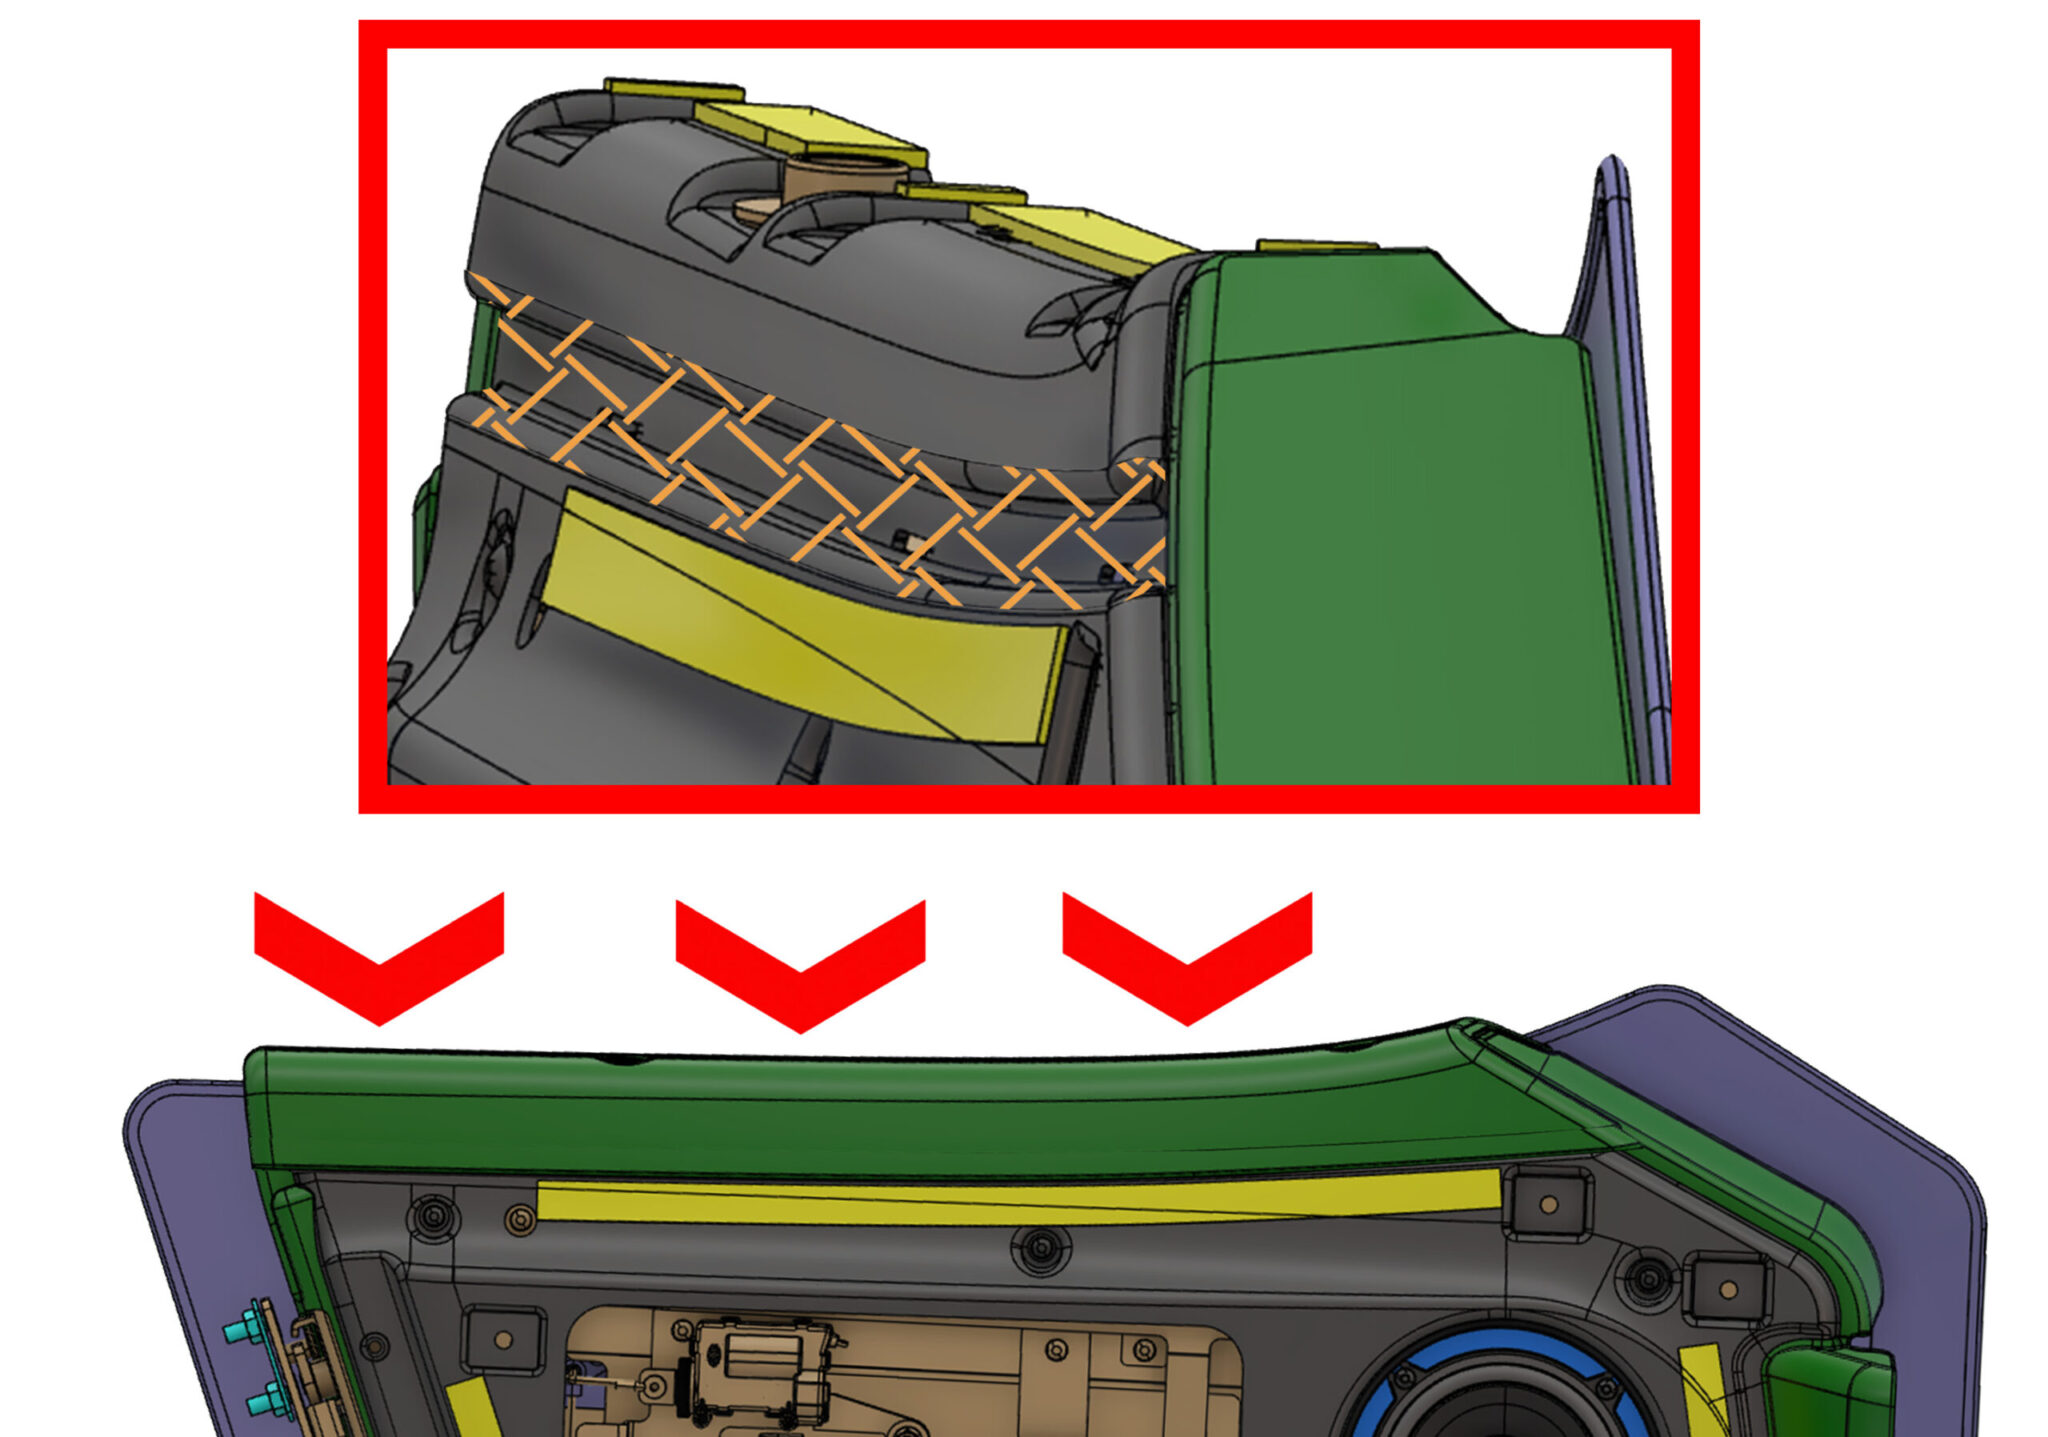
- Apply Alpha S758 adhesive to area crosshatched & elbow leather before fitting to the car.
- Fit the elbow to the primary door card using the 3 clips.
- Fit the excess leather to the primary door card rebate & trim excess from the door card.
- Repeat on the opposite door.
- Use image as reference.

- Remove any double sided tape film and push fit the secondary door cap to the assembly.
- CARE POINT: Ensure that the gap hider is in the correct position to allow the door mechanism to work correctly.
- Repeat on the opposite door.
- Use image as reference.
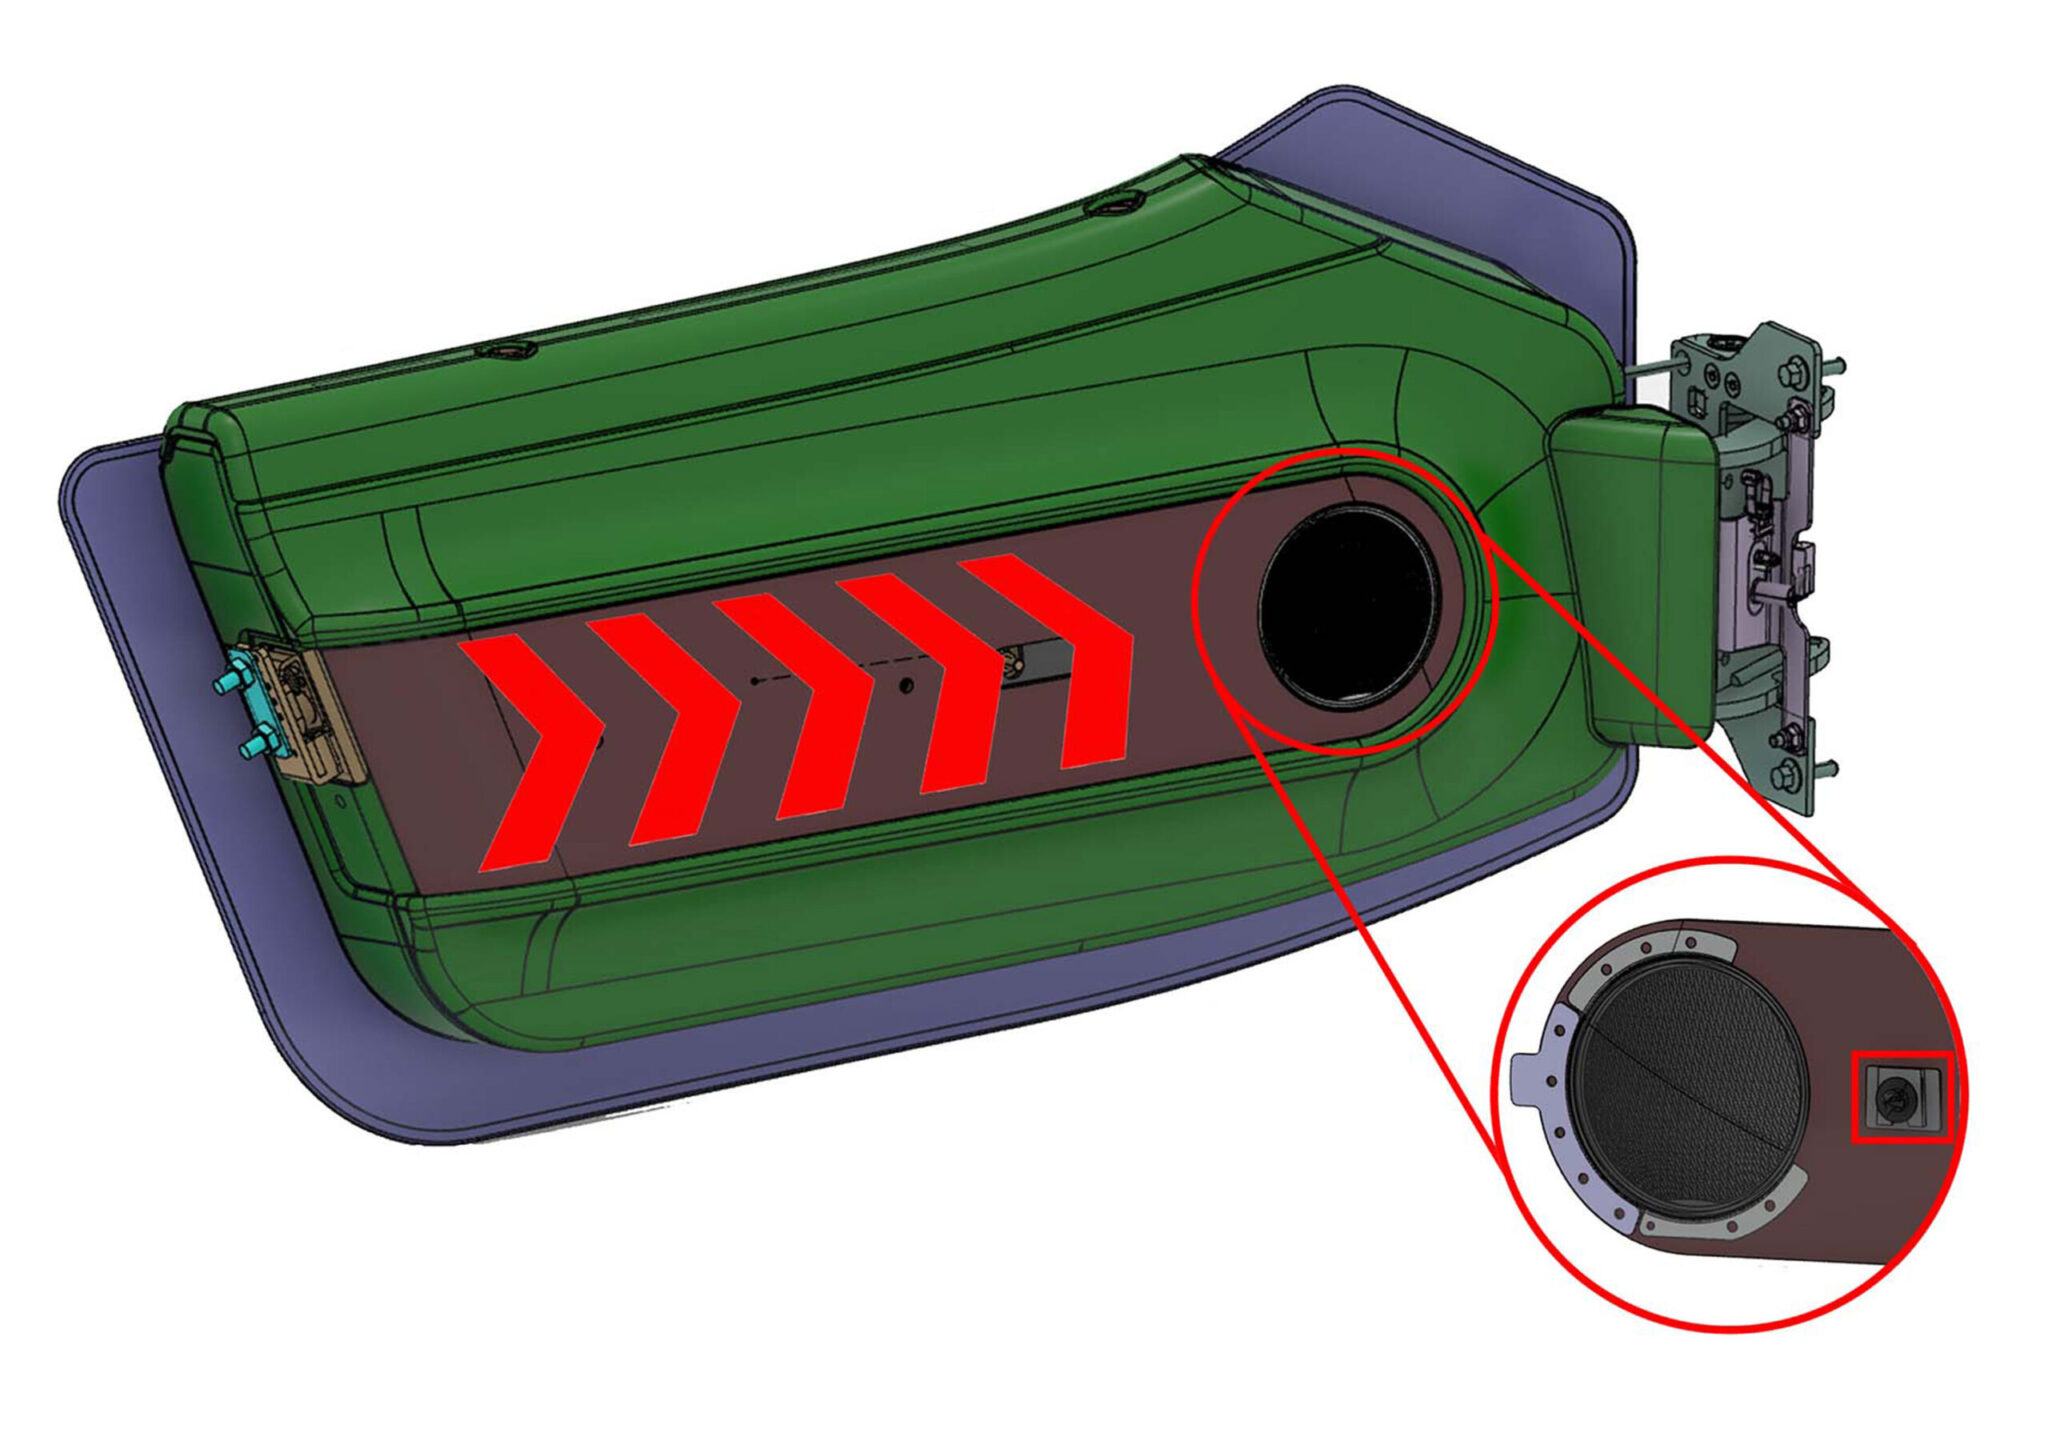
- Fit the door wood finisher to the door card & clip into place.
- Repeat on the opposite door.
- Use image as reference.
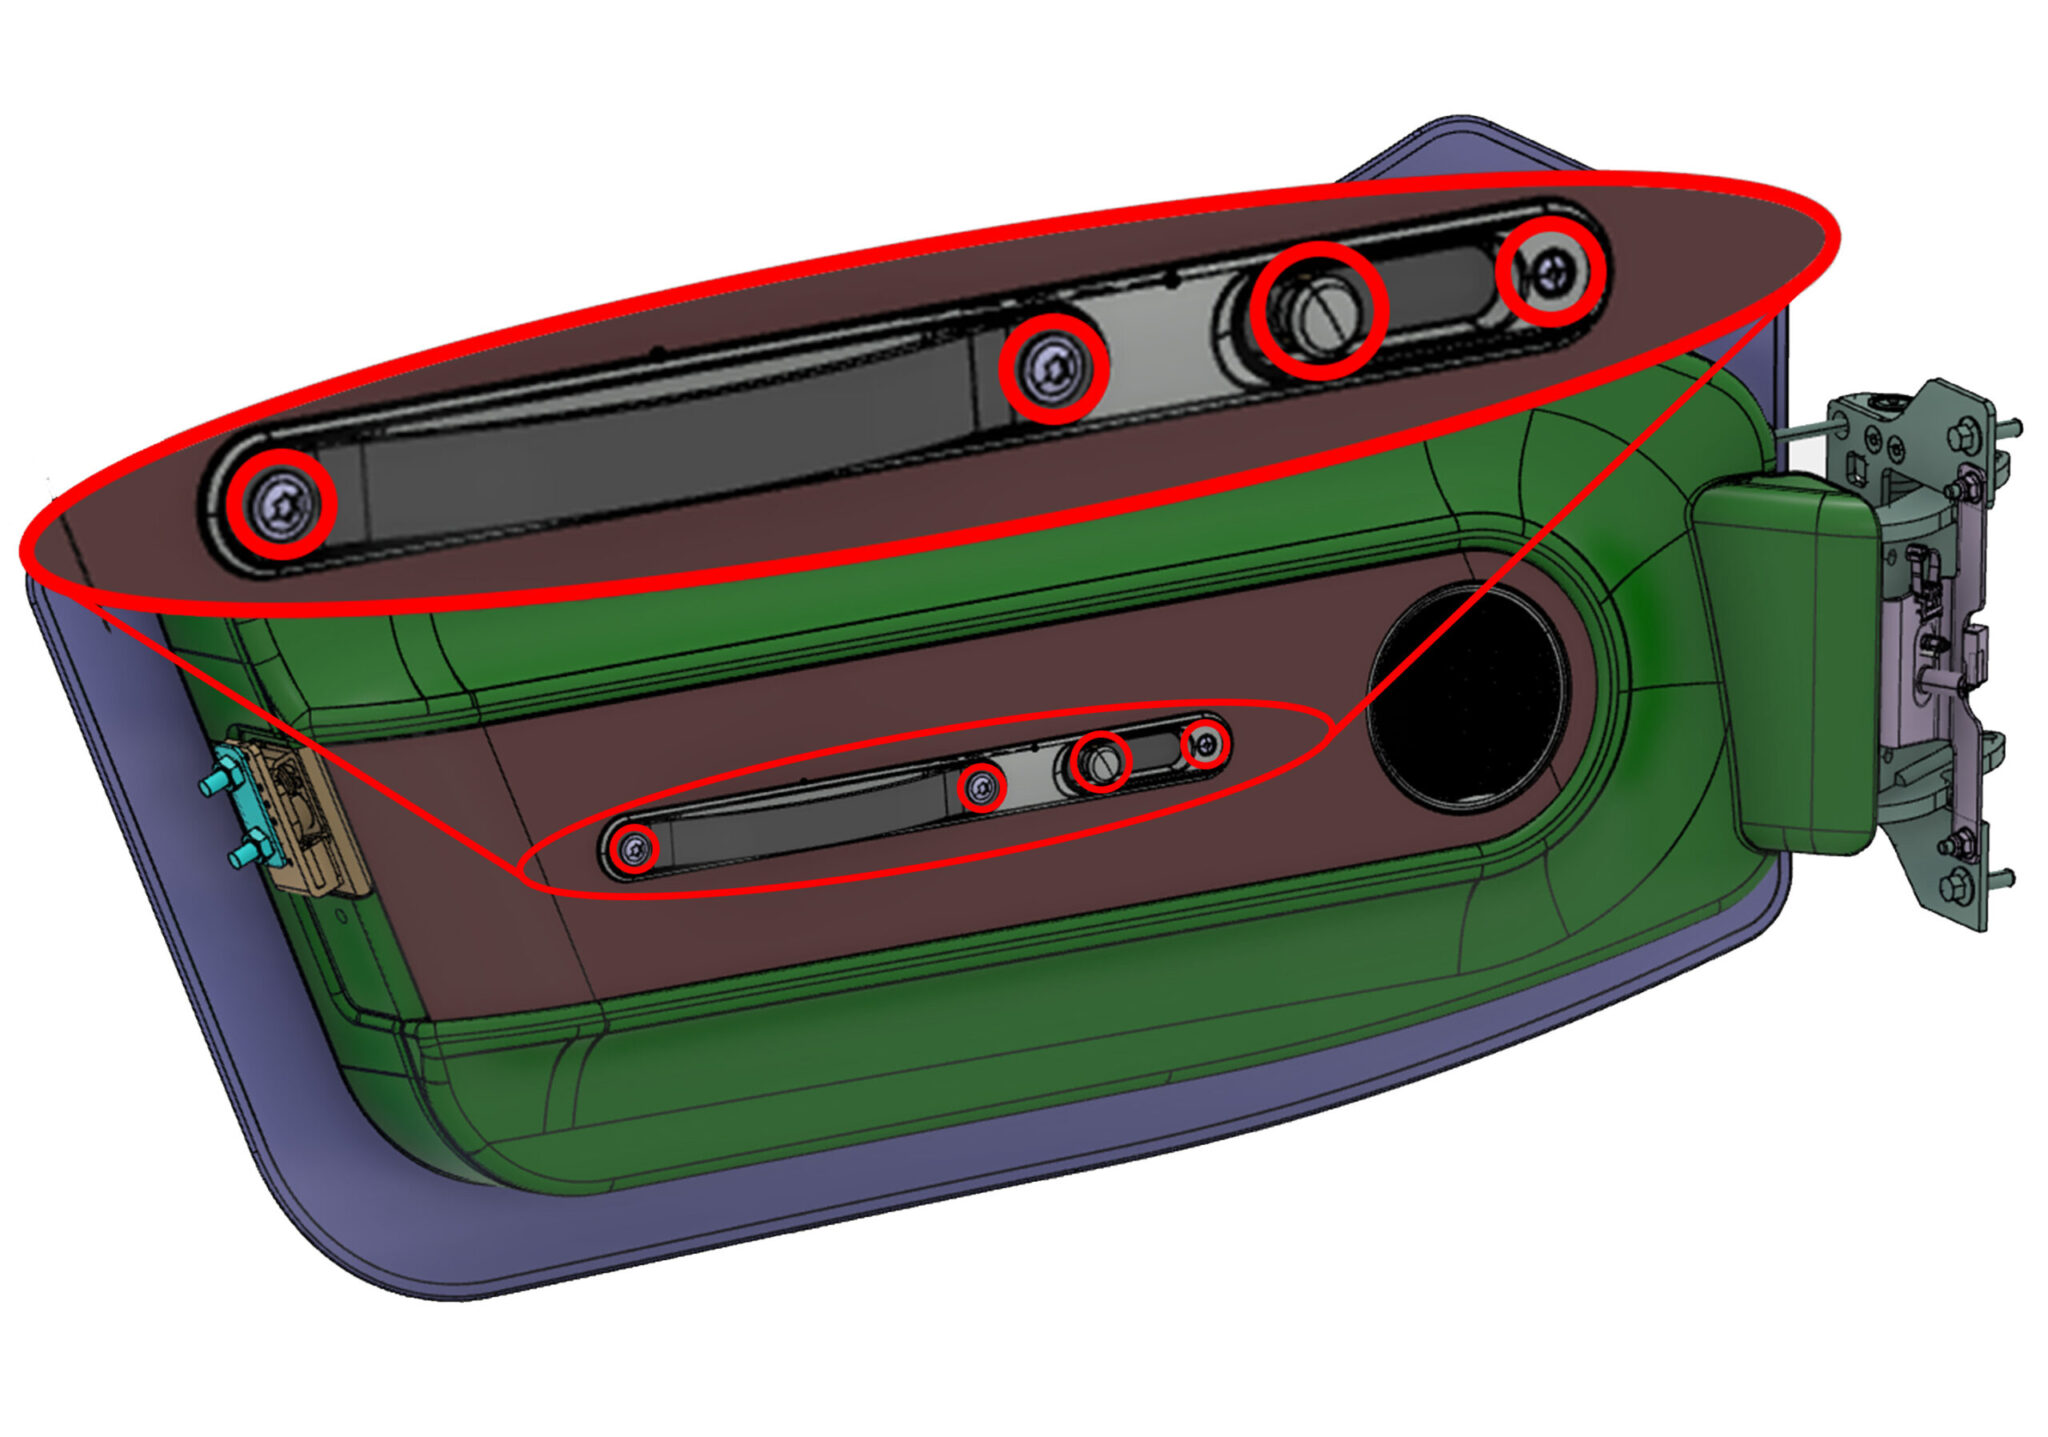
- The embellisher, leather strap and door release knob will finish the door wood.
- Use x1 m4x20mm T20 countersunk bolt (F011164) and x2 m6x30mm T30 flanged button head bolts (F011218), ensure the T30 bolts are inserted with blue loctite.
- Fit the door release knob with pink loctite.
- Repeat on the opposite door.
- Use image as reference.

- CARE POINT: Mask any painted panels and leather to avoid any surface damage.
- In the areas highlighted in red, produce x2 3mm pilot holes and fix the rear of the door card with x2 wood screws (MGS18000) & x2 m5 cup washers (F521014).
- Repeat on the opposite door.
- Use image as reference.

- CARE POINT: Mask any painted panels and leather to avoid any surface damage.
- Ensure the puddle light is in the correct position and finish the door fitment by fitting x2 wood screws (MGS18000) & x2 m5 cup washers (F521014) to the two points marked with triangles.
- Reference work instruction SS82 for the door seal fitment process once the door trim installation has been completed.
- Repeat on the opposite door.
- Use image as reference.