REAR ARMATURE SUB ASSEMBLY & INSTALL
Document Number: SS26
Author: Thomas Sloan Kirton
Date Created:
Revision Number: v1.0.0
Document Approved by:
NOTE. Document is uncontrolled if printed
All instructions in this manual must be adhered to for this stage. Read all instructions carefully and study the photographs. While learning this procedure, quality of work is more important than speed of assembly.
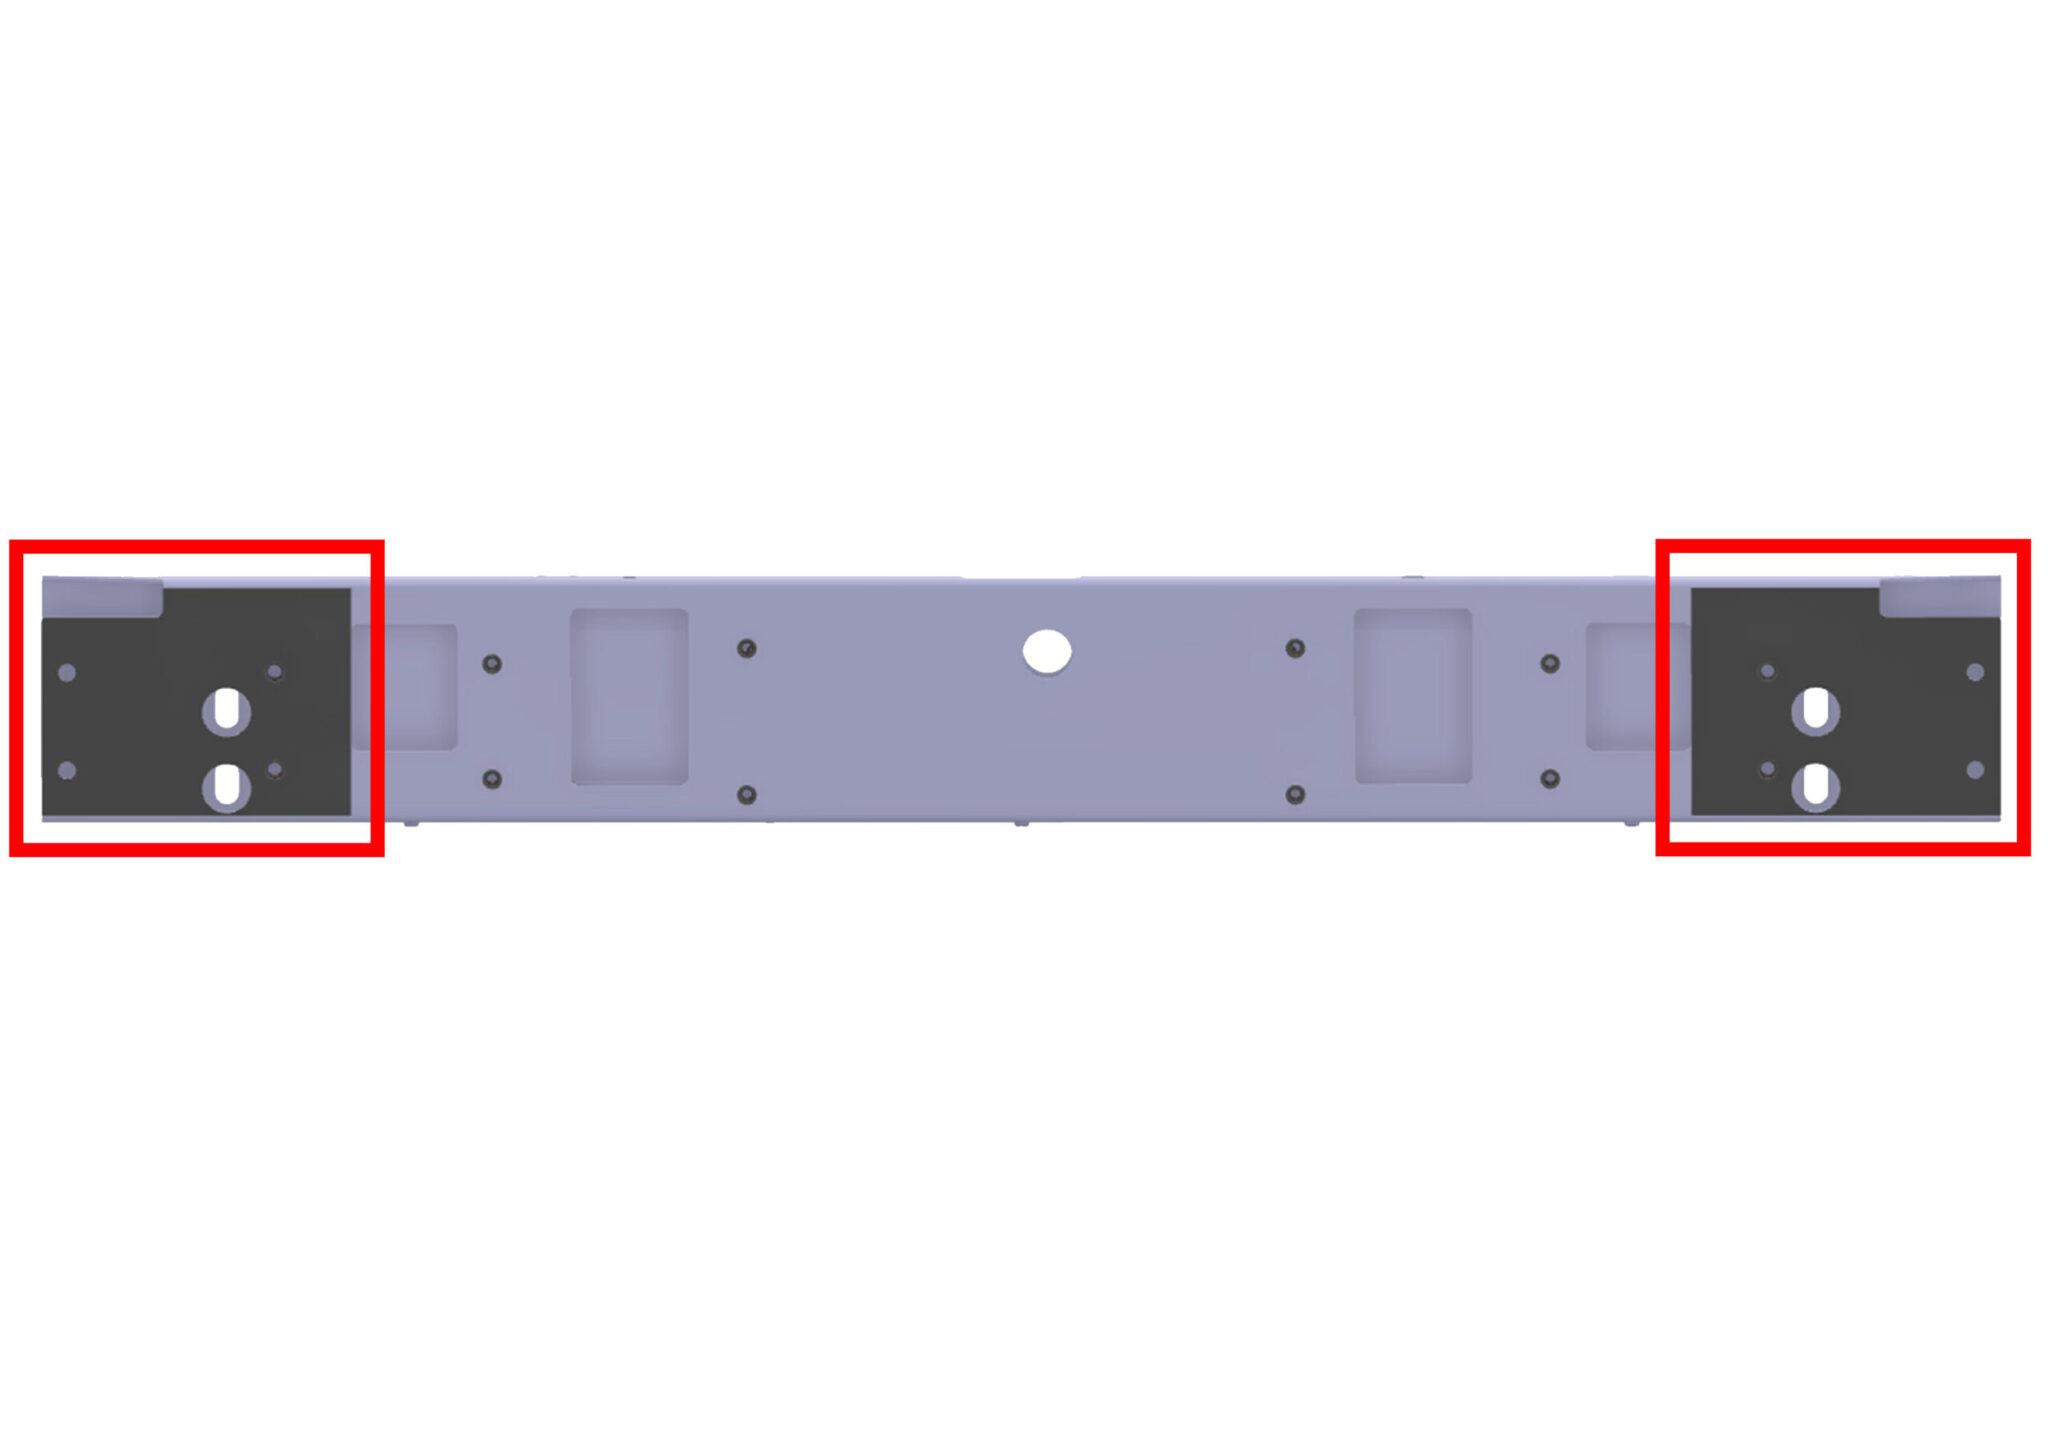
- Ensure the rear armature has been prepped with the areas highlighted painted black & relative rivnuts installed.
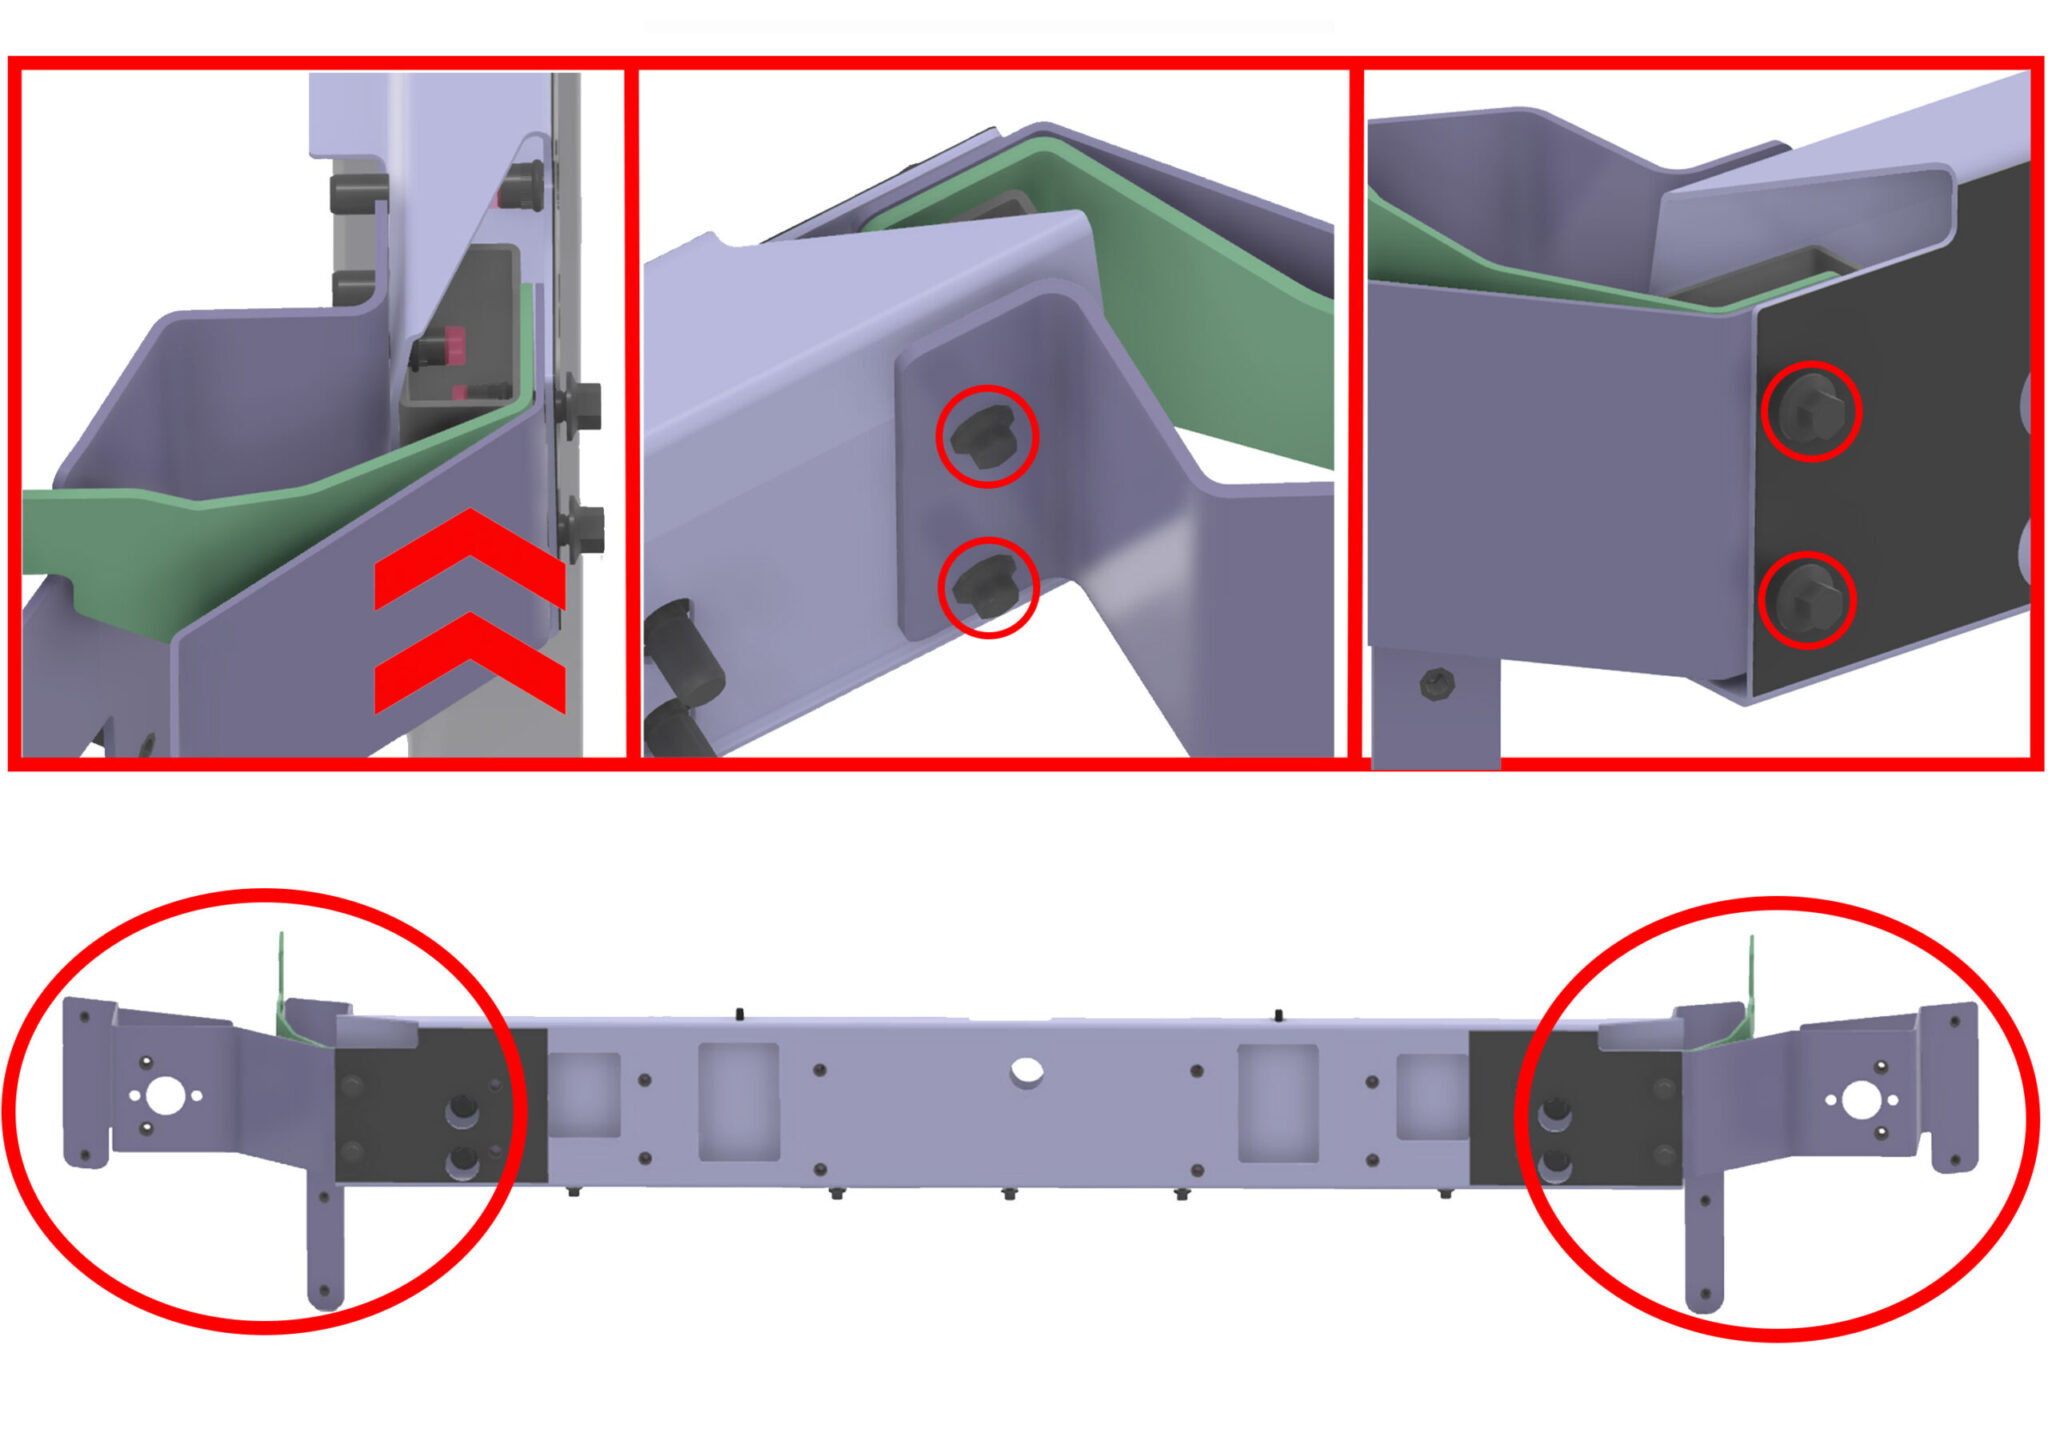
- CARE POINT: Use blue loctite on all fixings used in the assembly.
- Place all 3 bracket elements into the end of the armature.
- Use x2 M8x25mm black flanged hex bolts (U500064) to fix the brackets in the front side of the armature & x2 M6x16mm flanged hex bolts (U010026) to fix the back brackets in the rear side of the armature.
- Repeat this process for the opposite end of the armature.
- Use image for reference.

- CARE POINT: Use blue loctite on all fixings used in the assembly.
- Produce the rear wing support bracket with x2 m6 serrated nuts (MGN0024) & x2 m6 stainless washers (U011035). Repeat the process for the opposite side.
- Produce the armature support with x6 m8x20mm flanged hex bolts. Fit these fixings loosely to ensure the correct position of the armature sub assembly. Repeat the process for the opposite side.
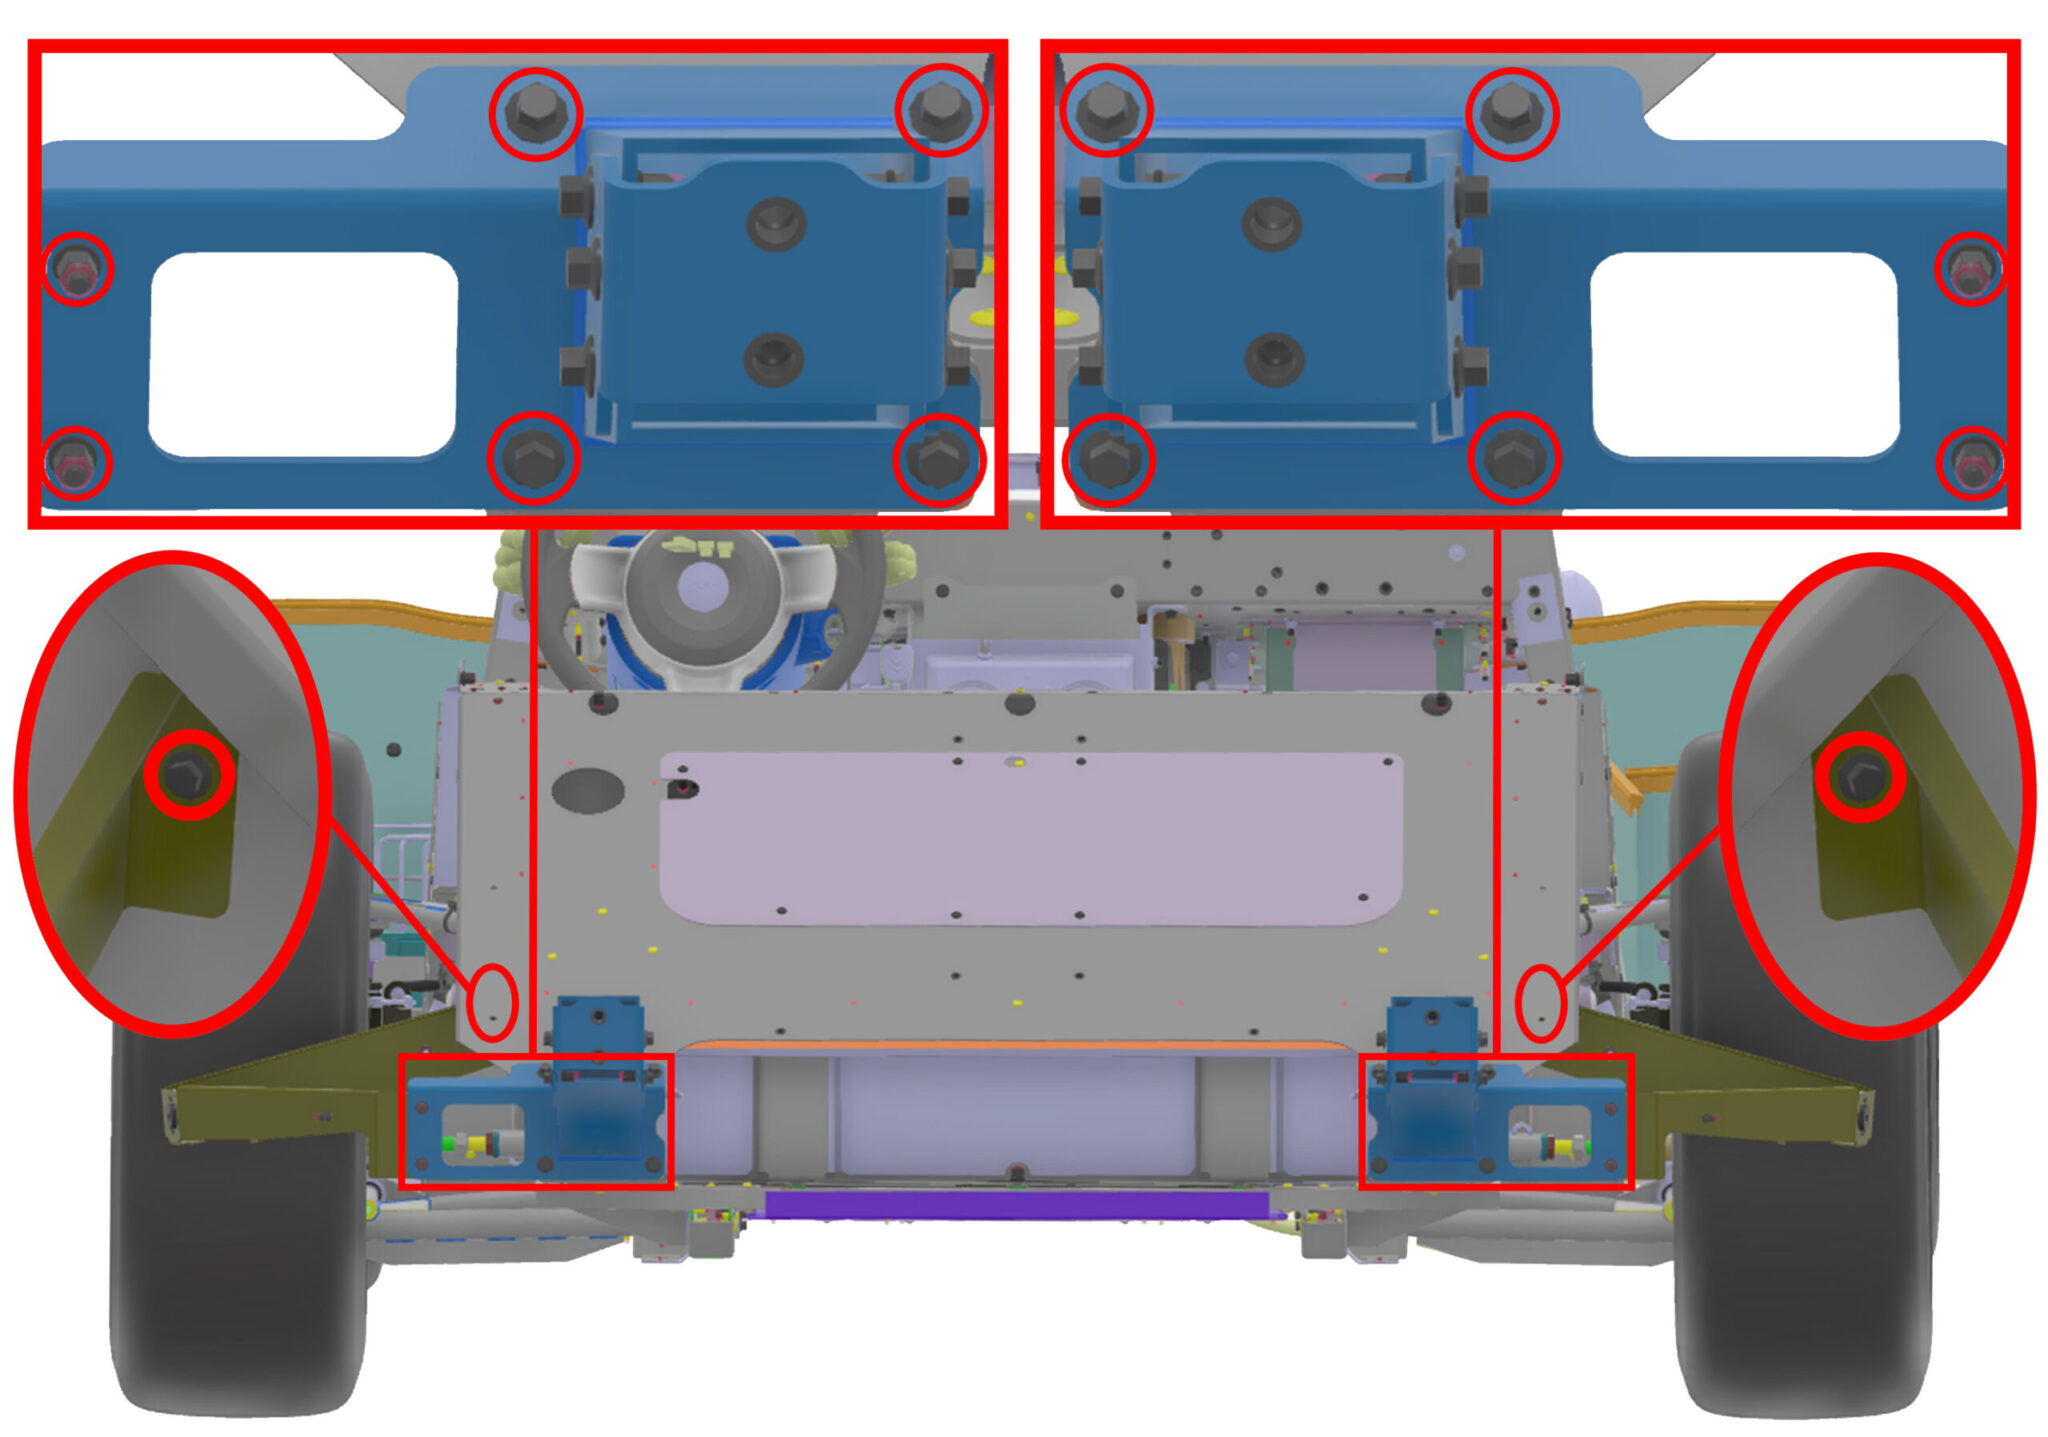
- CARE POINT: Use blue loctite on all fixings used in the assembly.
- Attach the armature supports to the chassis with x4 m8x20mm flanged hex bolt (U011027) per side.
- Attach the rear wing support brackets to the chassis & armature supports with x3 m6x20mm flanged hex bolts (U011017) per side.
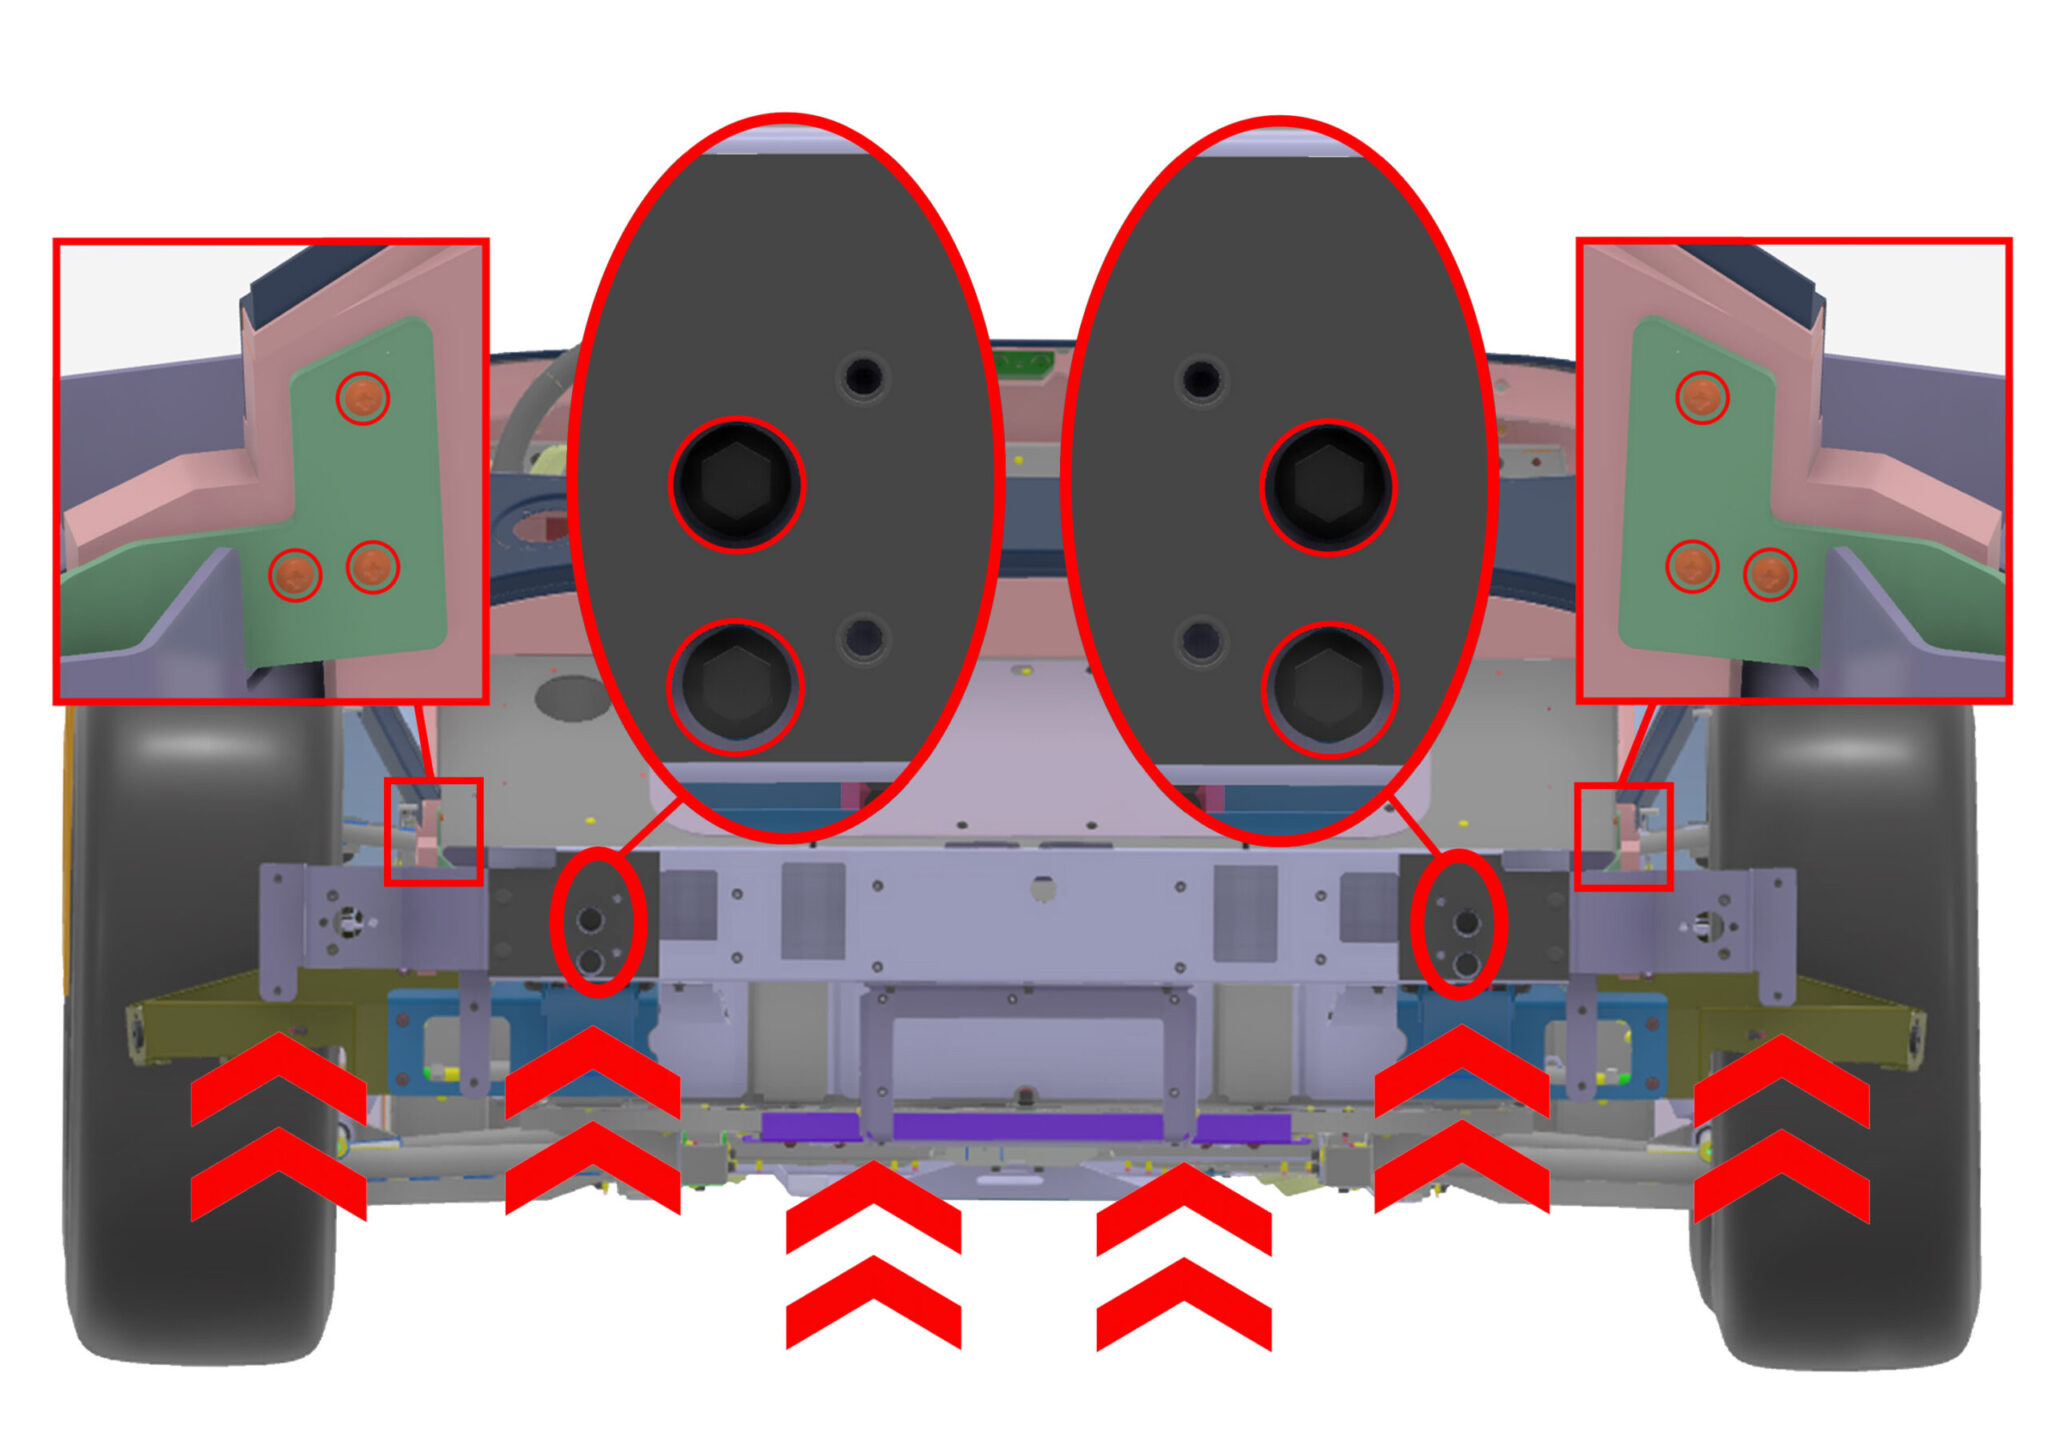
- CARE POINT: Use blue loctite on all fixings used in the assembly.
- Fix the armature support assembly to the chassis with x4 m10x20mm black flanged hex bolts (U501033).
- Push the whole assembly up and fix into place by torqueing up the x12 loosely fitted fixings.

- CARE POINT: Use blue loctite on all fixings used in the assembly.
- Fit the bottom wooden rail to the wooden body (ensure a 4mm pilot home is produced beforehand) with x2 m5x35mm pozi countersunk wood screws & x2 m6x16mm flanged hex head bolts (U010026) under the central area of the wood.
- Push the whole assembly up to the wood and pull towards the rear of the car. Fix into place by torqueing up the x12 loosely fitted fixings (mentioned in instruction 4).

- CARE POINT: Use blue loctite on all fixings used in the assembly.
- Fix the boot latch to the mounting bracket using x2 m6x40mm flanged hex bolts & x1 spacer plate in between the latch mechanism and mounting bracket.
- Fix the sub assembly to the armature with x2 black m6 steel washers (F011030) & x2 flanged button head bolts (U541061).
- CARE POINT: Use blue loctite on all fixings used in the assembly.
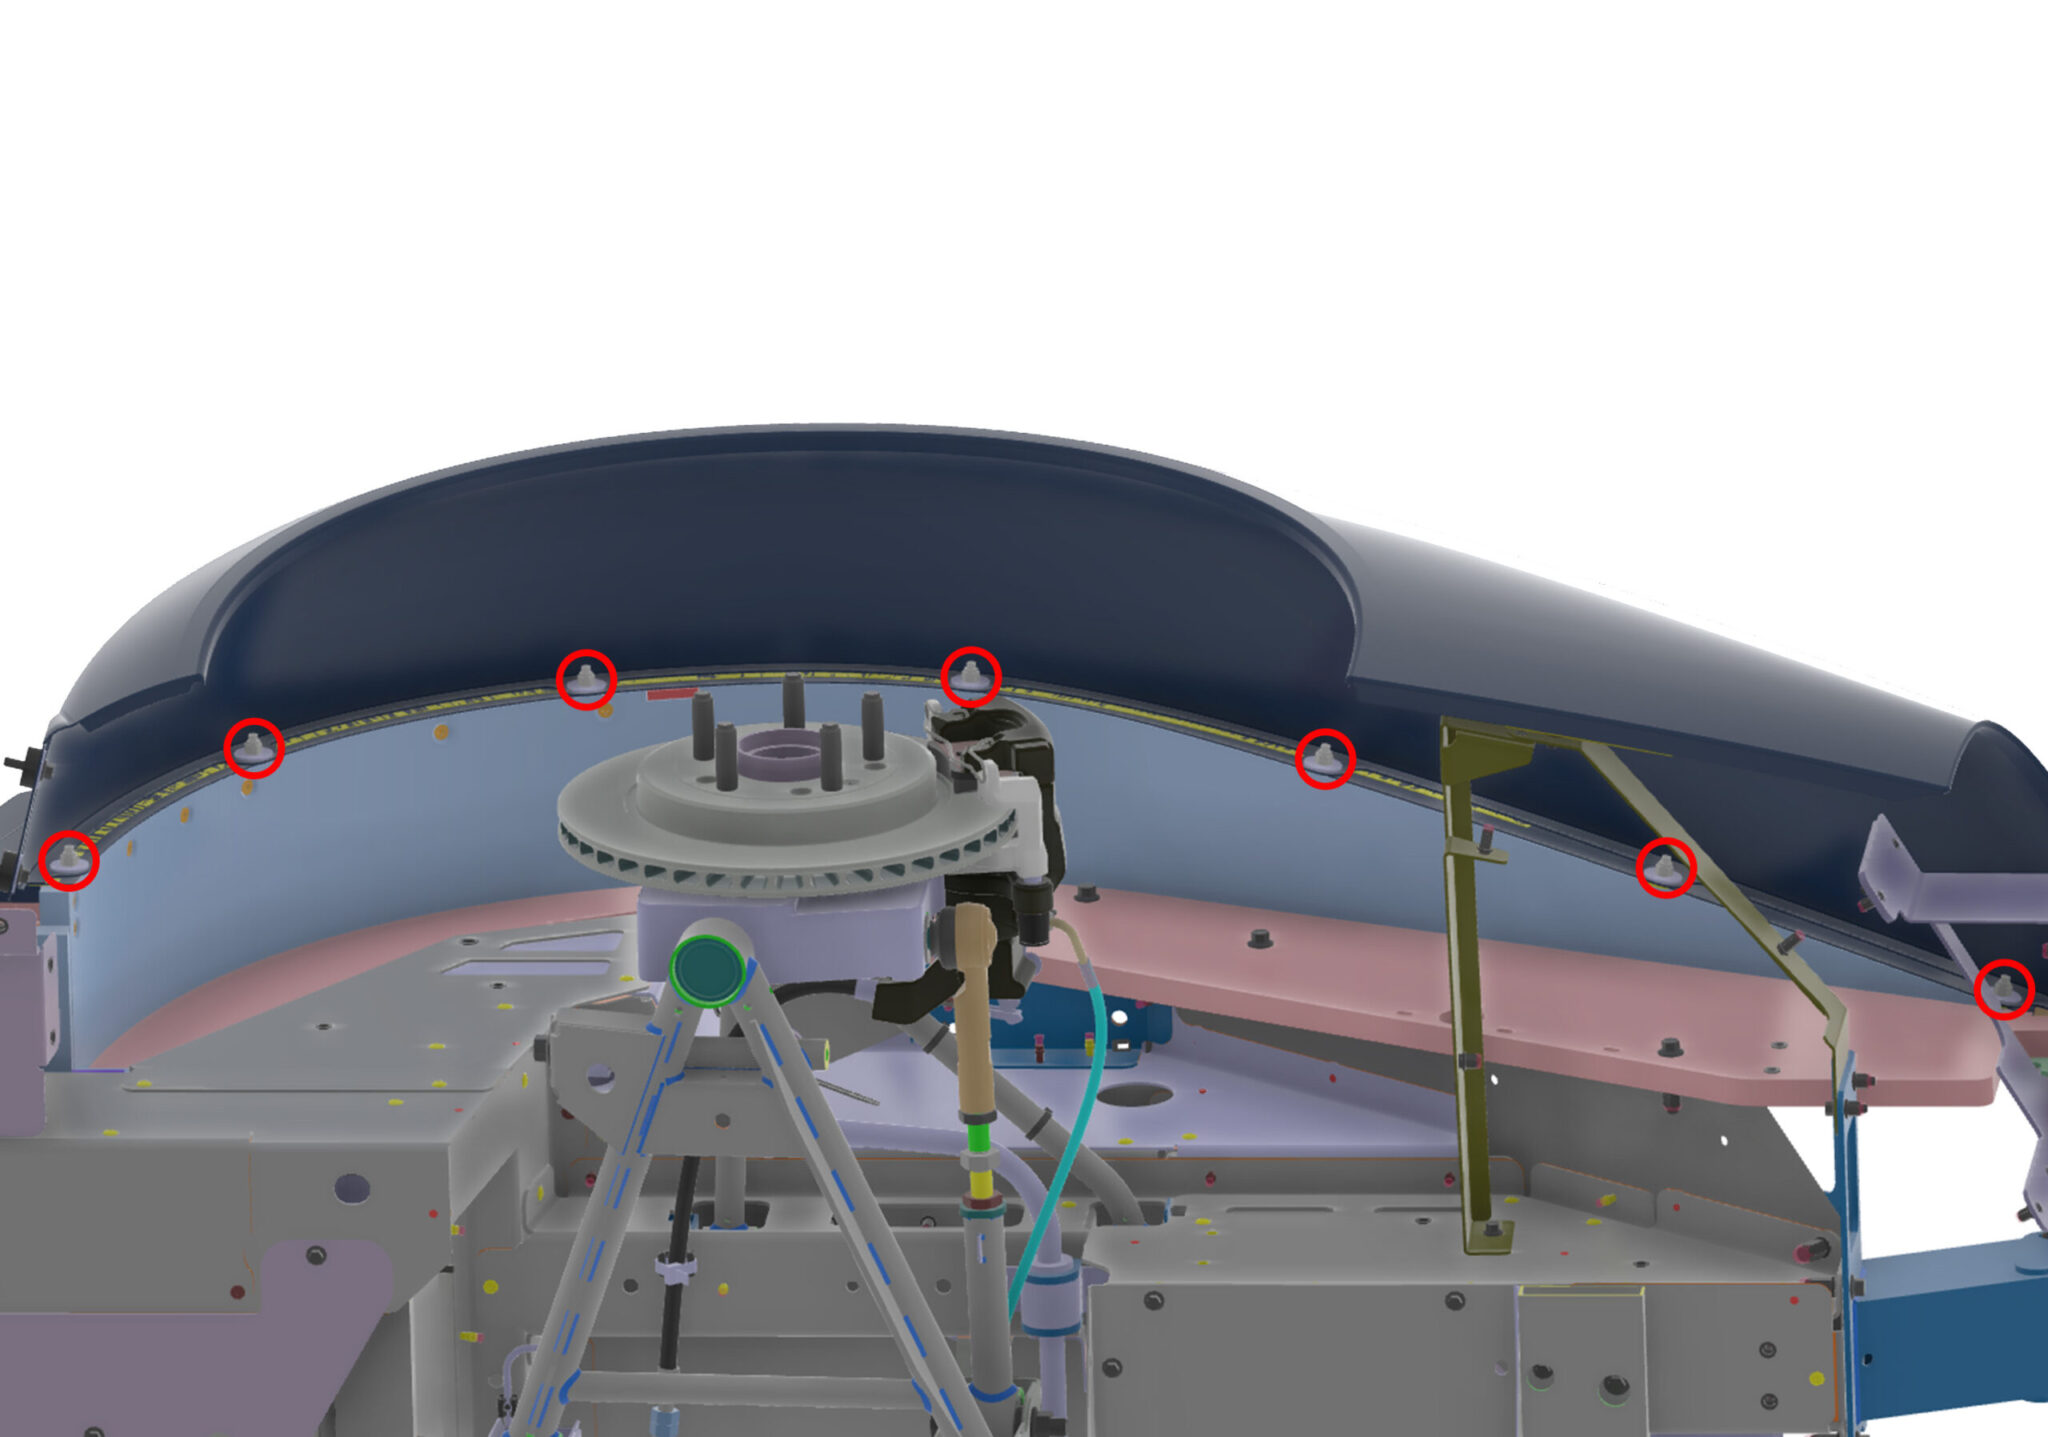
- Loosely fit the rear wing sub assemblies using x7 m6 penny washers (MGW0106) & x7 m6 serrated nuts (MGN0024).
- Repeat the process for the opposite side.
- Rear wings are subject to move in the boot fit stage.

- The finished assembly will look like this.

- CARE POINT: Use blue loctite on all fixings used in the assembly.
- IF LUGGAGE RACK OPPTION IS PICKED:
- Fit the luggage rack brackets with:
- x4 m10x25mm black hex socket cap bolt (F011237) & x4 m10 black steel washer (F011238).
- x8 m8x25mm flanged hex bolt (U500064).
- Ensure the spacer plate & boot release switch is attached to the left side of the armature whilst building.
- Use image for reference.