FRONT WING FITMENT
Document Number: SS9
Author: Thomas Sloan Kirton
Date Created:
Revision Number: v1.0.0
Document Approved by:
NOTE. Document is uncontrolled if printed
All instructions in this manual must be adhered to for this stage. Read all instructions carefully and study the photographs. While learning this procedure, quality of work is more important than speed of assembly.
Tools Required:
- 10mm socket
- Ratchet
- Blue loctite

- CARE POINT: Instruction 1 & 2 from SS48 must be carried out before carrying out and instructions featured here.
- CARE POINT: Loosely fit all fixings at first.
- Fit the wing to the car in the relative areas.
- Fix wing to the bonnet release bracket with x2 m6 nylon washers (U521012) & x2 m6x16mm hex head bolts (U010026).
- See image for reference.

- CARE POINT: Loosely fit all fixings at first.
- Attach the wing to the splitter using the wing brackets provided.
- Use x3 penny washers (MGW0106) & x3 m6 serrated nut (MGN0024) with blue loctite.
- See image for reference.

- CARE POINT: Ensure the gap & flush document is used in conjunction with cars being built.
- CARE POINT: Loosely fit all fixings at first.
- Fit x2 rubber washers (MGW1000) between the front and rear wing per fixing. If a sufficient gap is not produced with x2 rubber washers use x3.
- Using x2penny washers (MGW0106 & x2 m6x25mm hex head bolt (U010024 with blue loctite) attach the front wing to the rear.
- See image for reference.
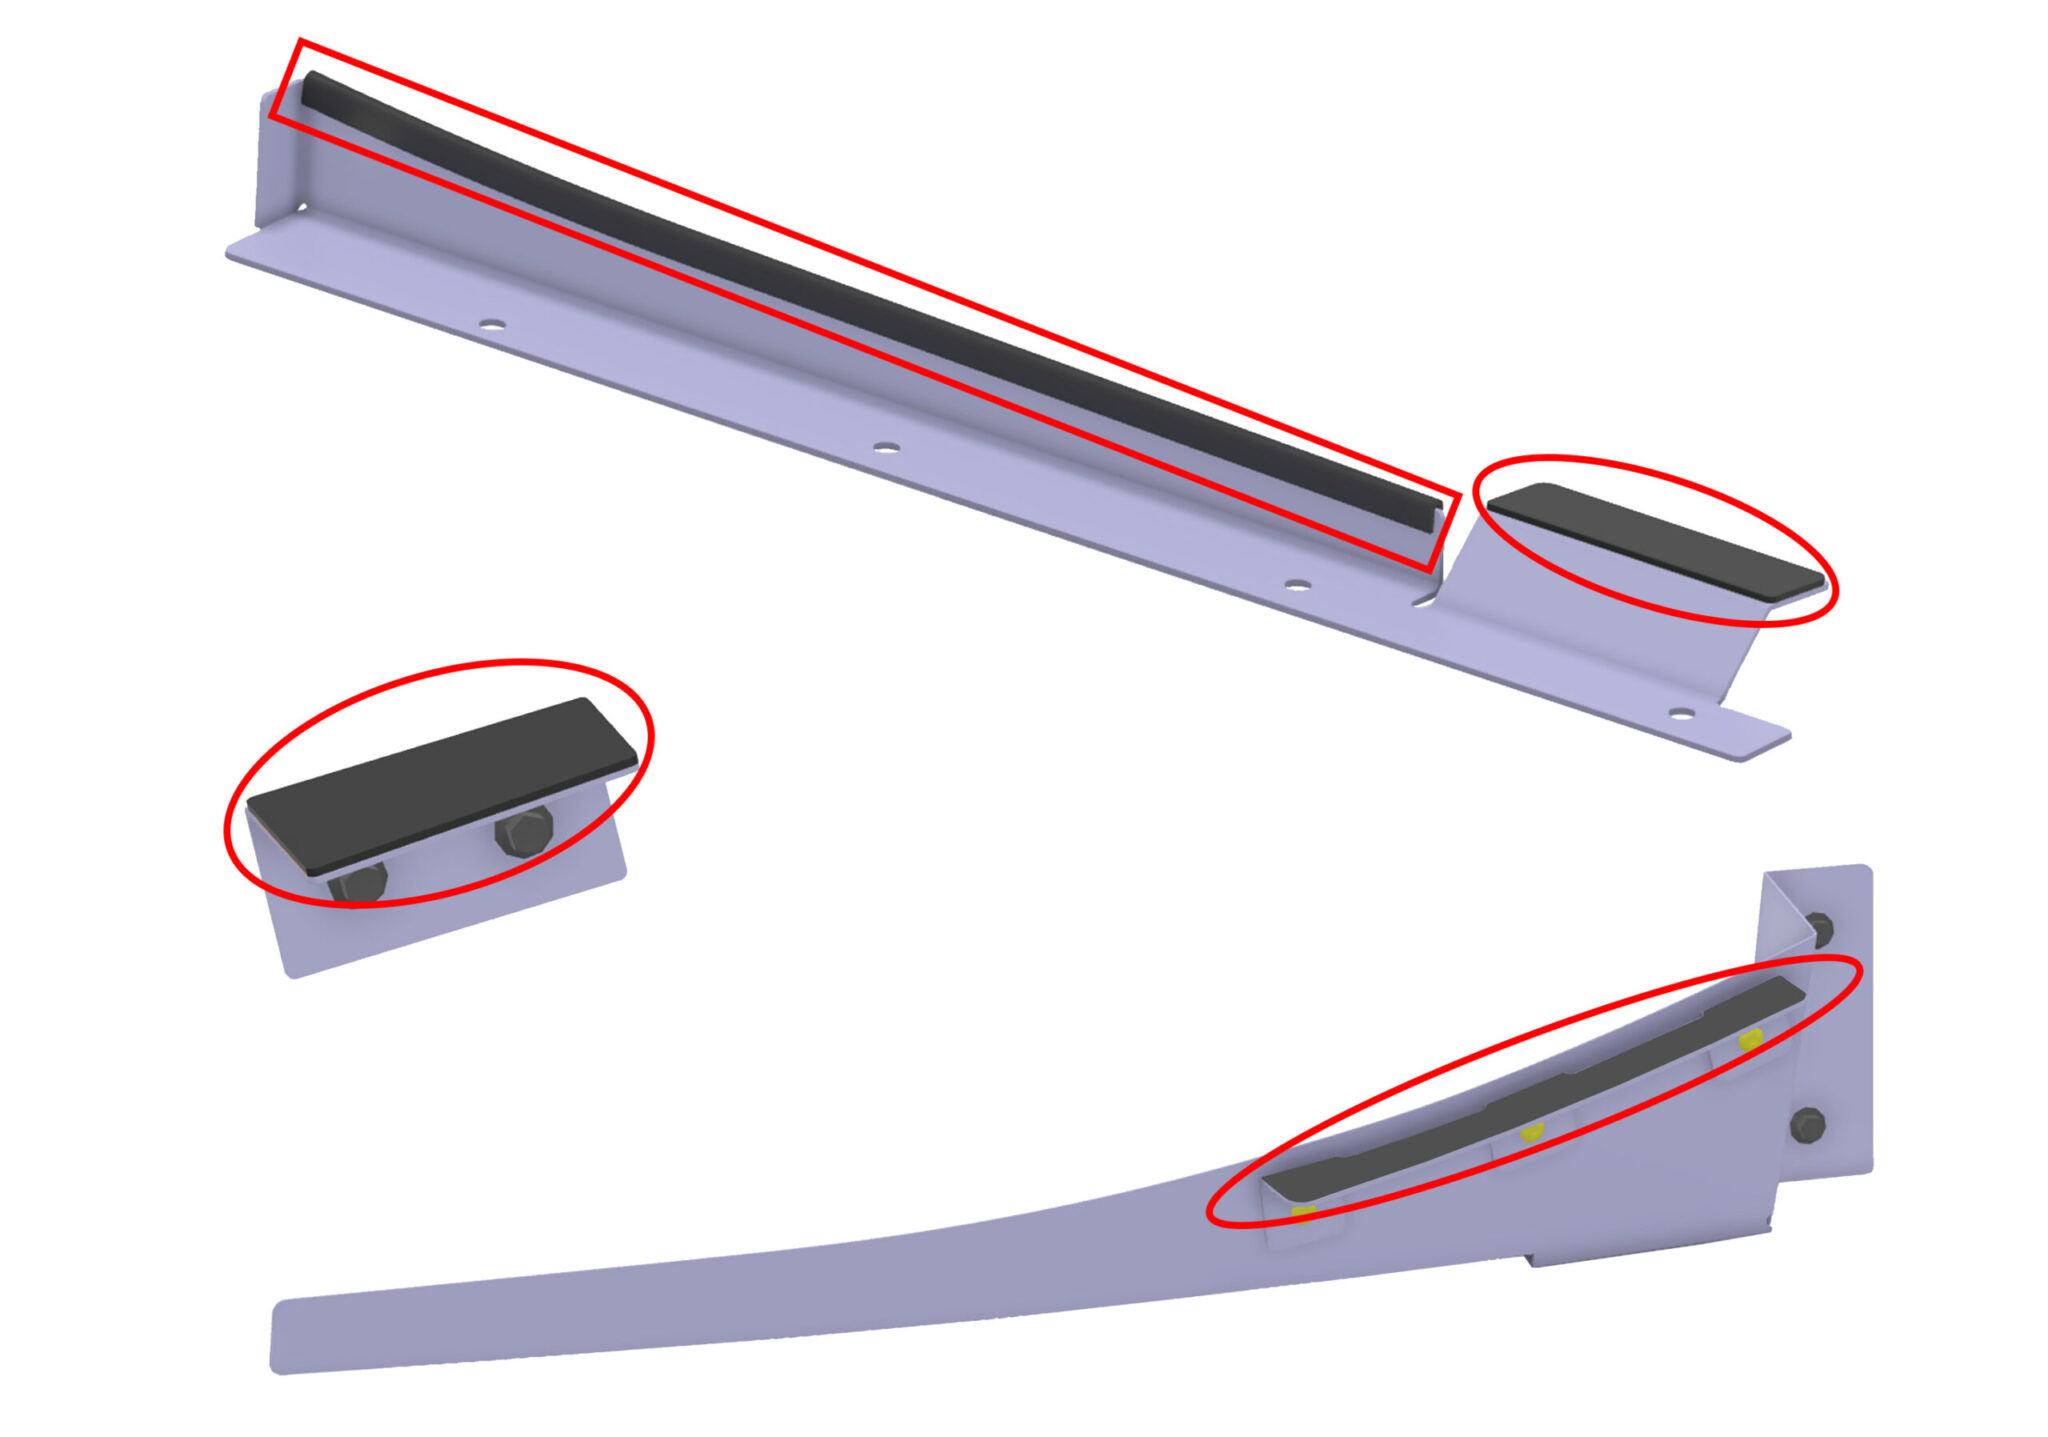
- Fit relevant adhesive backed foam to areas circled.
- Cut to size and glue the rubber beading onto the bracket in the area squared.
- Where numbered, double up x2 pieces of RUP0105 and place on the contact areas of the wing (for number 1) place on the bracket (for number 2).
- These parts are now ready to fit to the vehicle.
- See image for reference.

- CARE POINT: Loosely fit all fixings at first.
- Loosely fit each bracket in the numbered sequence shown using x8 m6x16mm hex head bolts (U010026) with blue loctite.
- Now go back to all previously fitted fixings and tighten up.
- Once all other fixings are tight, apply clear wax to the foam and gently push the wing into the body and tighten up each fixing using the numbered sequence.
- See image for reference.

- Repeat all instructions for the opposite side of the vehicle.
- Instruction SS48 can now be resumed.
- See image for reference.