BOOT INSTALLATION
Document Number: SS18
Author: Thomas Sloan Kirton
Date Created:
Revision Number: v1.0.0
Document Approved by:
NOTE. Document is uncontrolled if printed
All instructions in this manual must be adhered to for this stage. Read all instructions carefully and study the photographs. While learning this procedure, quality of work is more important than speed of assembly.
Tools Required:
- 10mm socket
- 13mm socket
- Ratchet
- 4mm hex driver
- PZ2 driver
- Drill
- 3mm drill bit
- Blue loctite
- Sealant Gun
- Teroson 934

- Butt the gas strut pilot hole jig to the rear section of the wooden body.
- Use a 3mm drill bit and produce 10mm deep holes.
- Repeat the process on the opposite side of the wooden body.
- CARE POINT: Use blue loctite on all fixings used in the assembly.
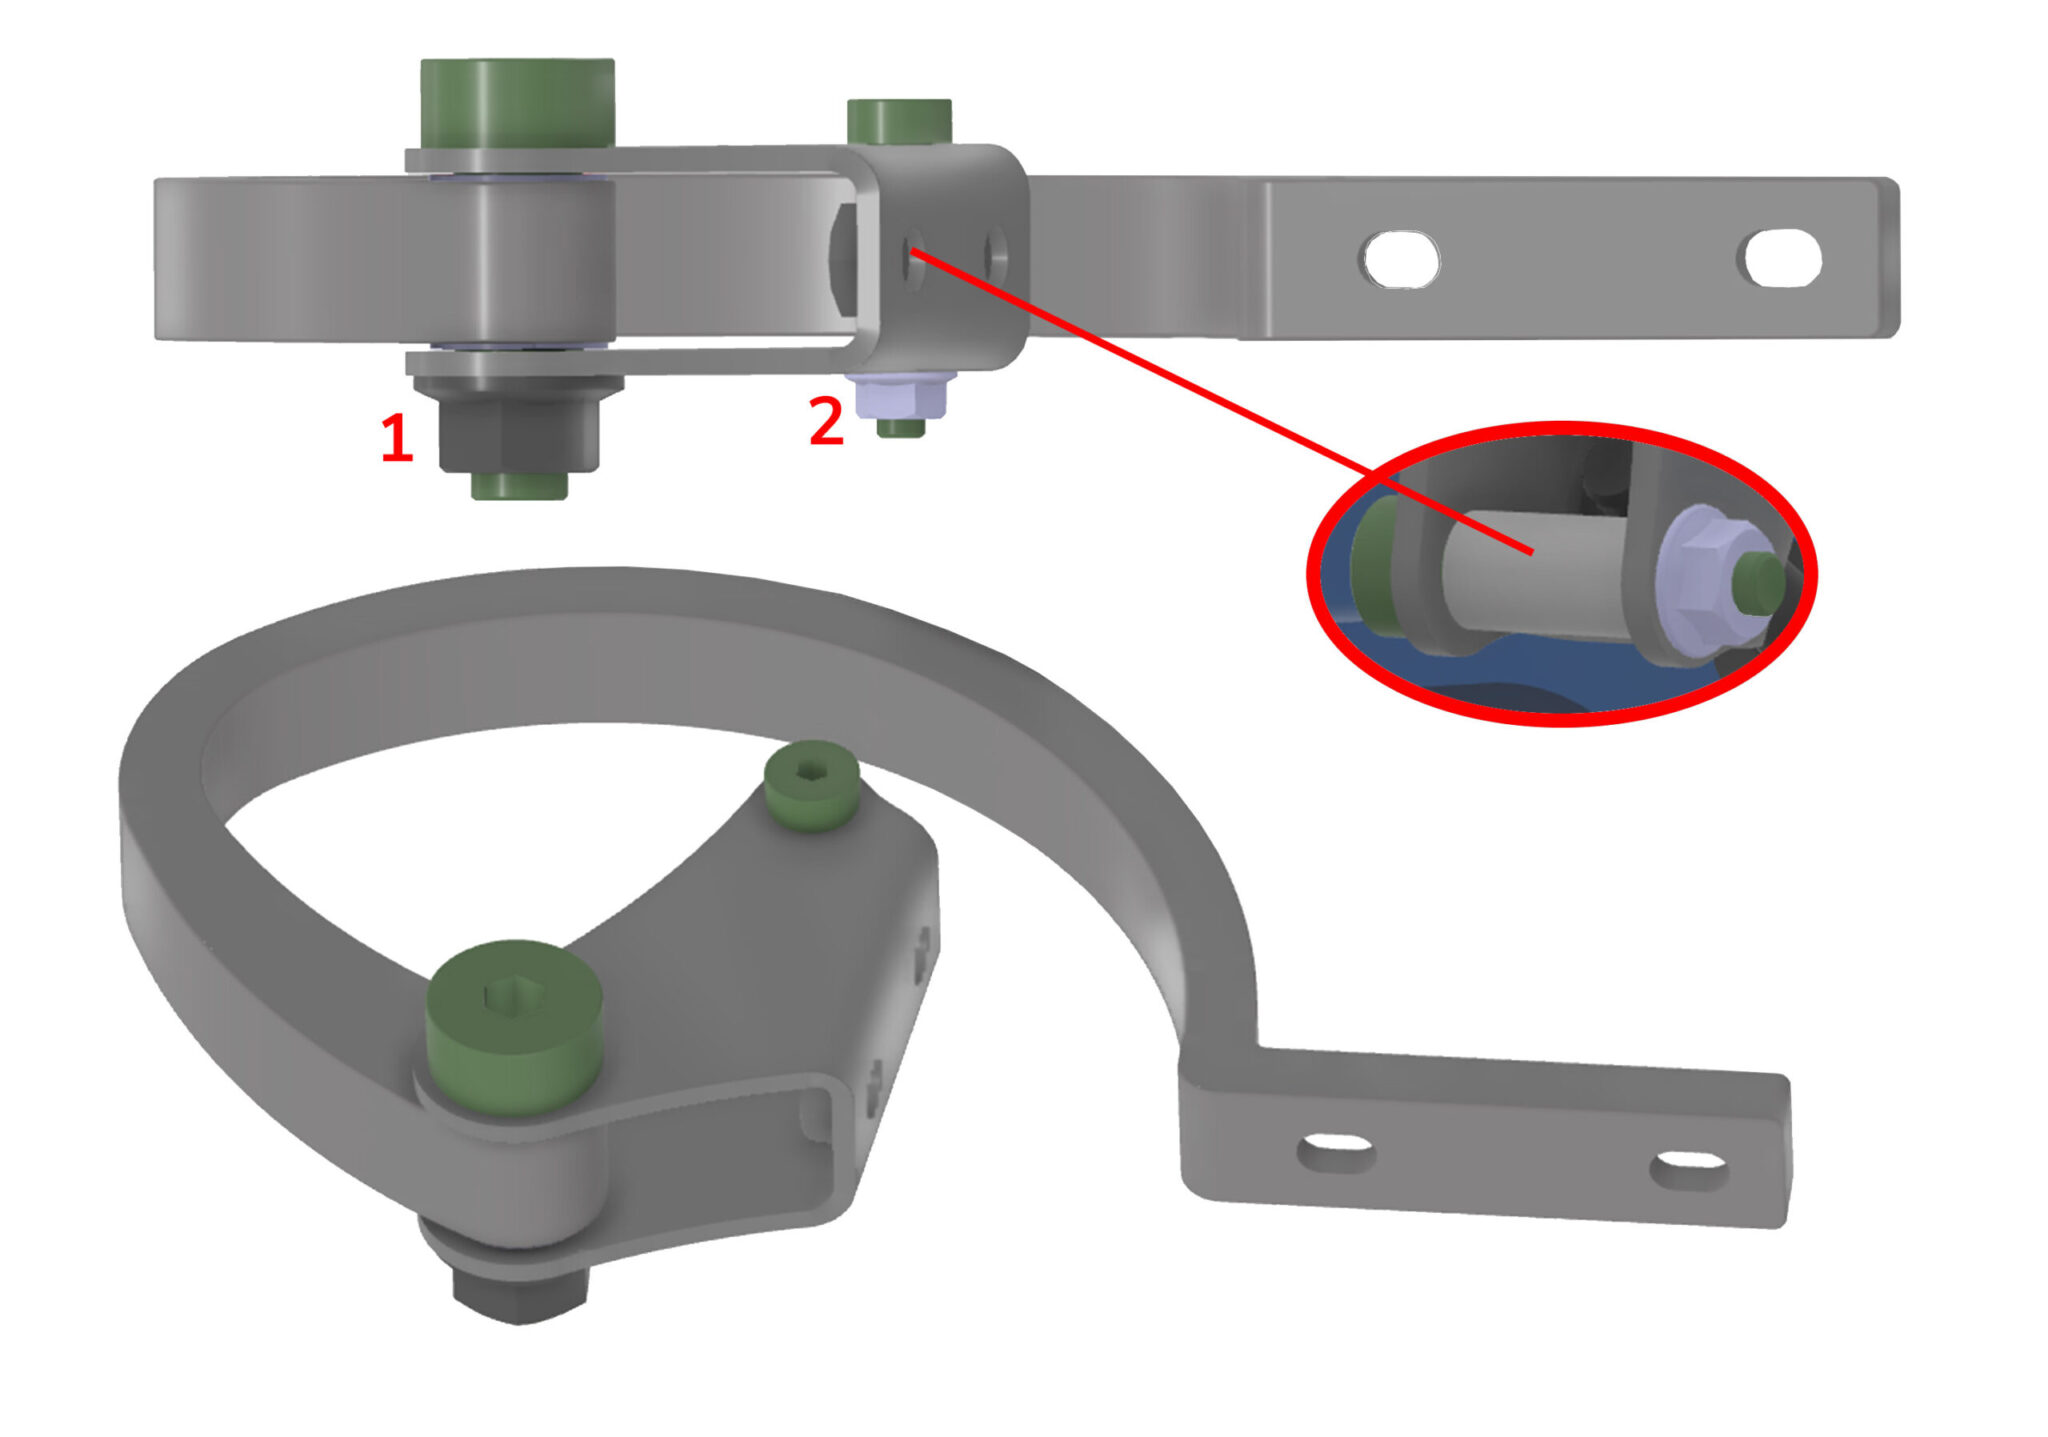
- Use SS1 boot hinge sub assembly instruction for the production of x2 hinge assemblies.
- CARE POINT: Use blue loctite on all fixings used in the assembly.
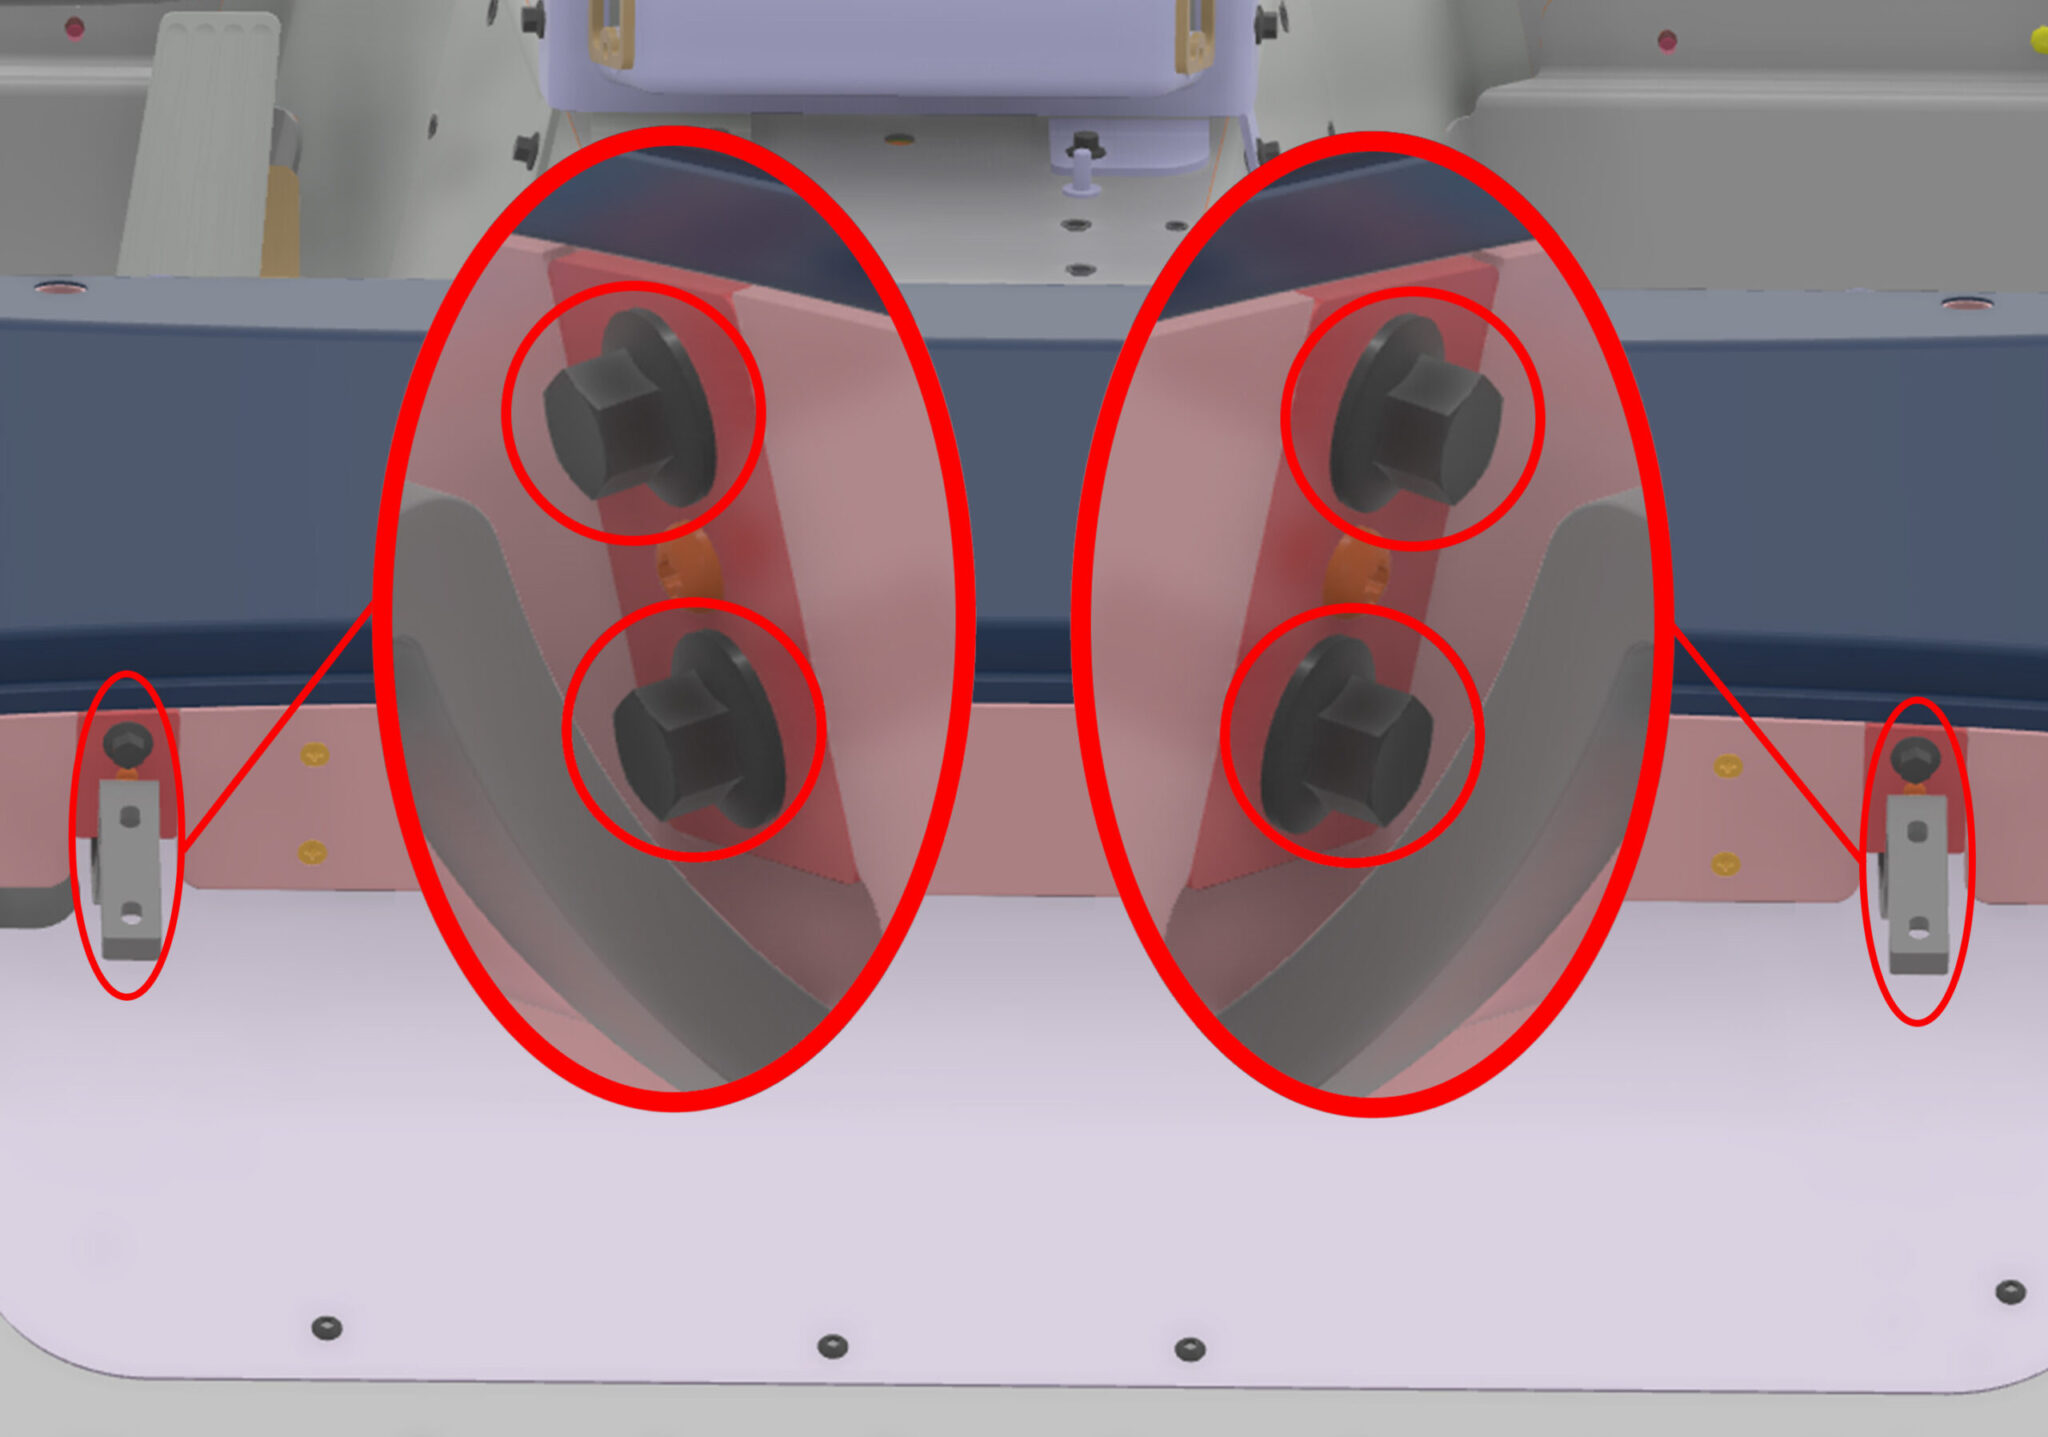
- Fit the hinge sub assemblies to the wooden body using x4 m8x35mm flanged hex head bolts.
- Once in place cover the bolt heads with x4 m8 nylon covers (MGB03851).
- Use the slot in the wooden body plate to adjust the height of the boot panel to the seal correctly.

- Using Teroson 934, seal the corners of the boot seal area shown in the diagram.
- CARE POINT: When sealing the folded area, use a spreading card to stop any overspill of sealant into the boot area.
- Clean up any overspill or excess sealent before fitting the boot seal.

- Fit the boot seal into the position (see area highlighted in red)
- See image for the correct seal seating position.
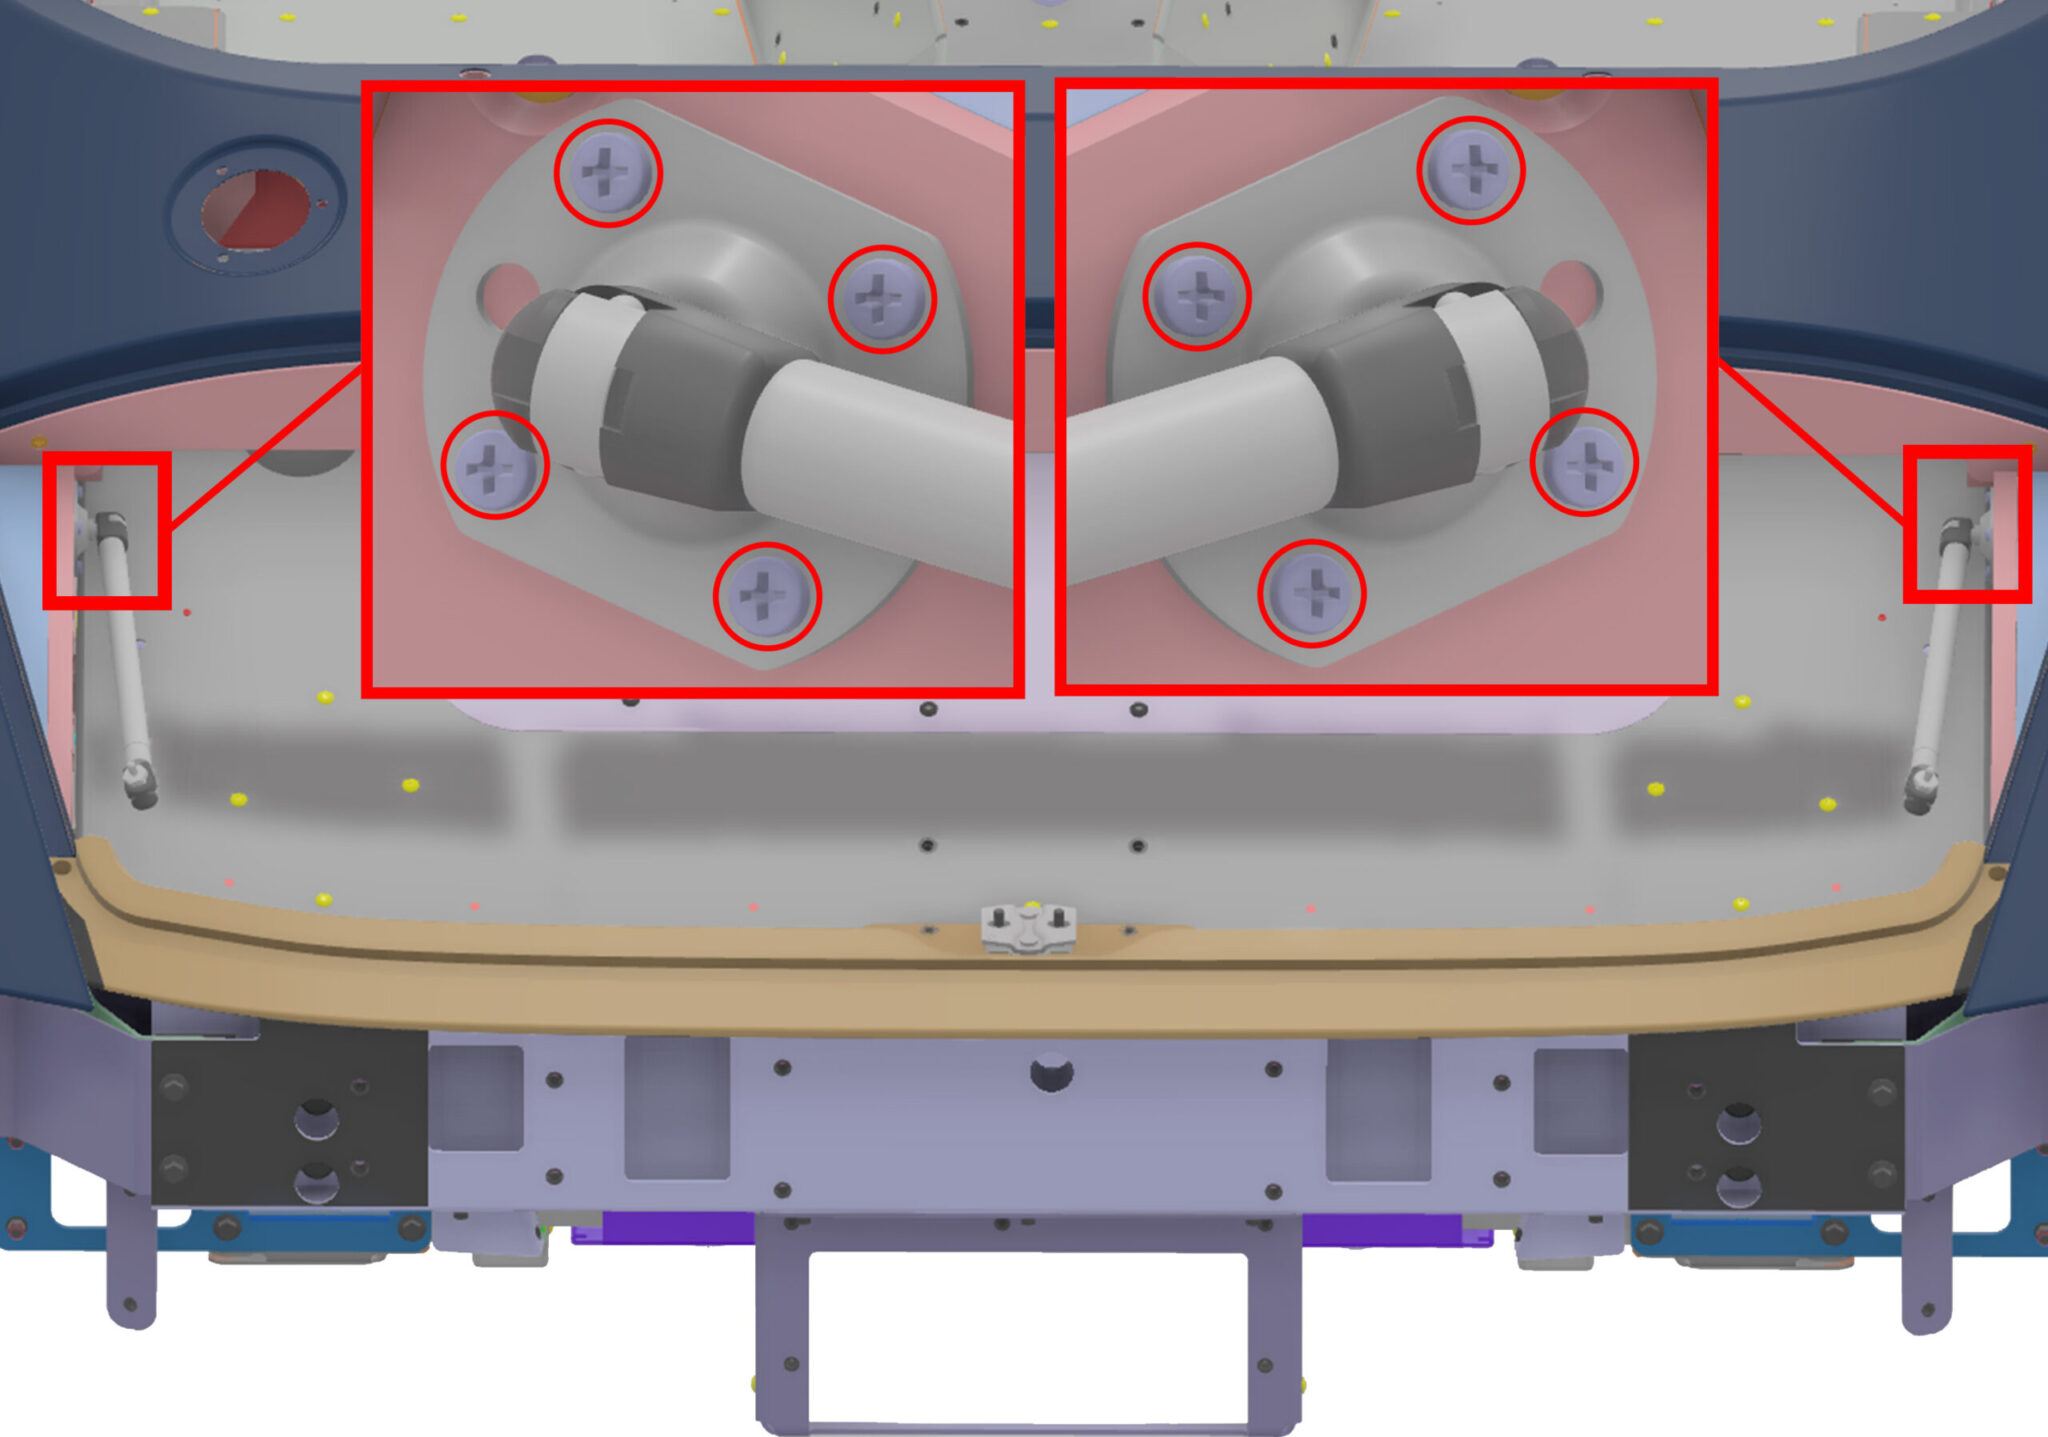
- Fix the gas strut fixing points to the wooden body using the holes made previously by the pilot hole jig.
- Use x4 m4x13mm pozi button head wood screws (MGS04000) to fix each part.
- Clip gas strut to the fixing point.

- CARE POINT: Use blue loctite on all fixings used in the assembly.
- Fit the U-Striker in a central position with x2 m6x12mm stainless button head bolts (F341034).
- With a china marker define the edges of the striker as reference for potential movement when setting the boot.

- CARE POINT: Use blue loctite on all fixings used in the assembly.
- Fit the boot lid to the hinges. At first a general fit will be done
- Use x2 m6x20mm flanged hex bolts (U010017) per hinge.
- x2 m6 bolt covers (F061009) will be fitted at the end of boot setting.
- Fit the gas strut to the location points on the boot lid.

- CARE POINT: Use the assembly shop measurement checking sheet for gapping checks.
- Close the boot and see where the boot lid is positioned in relation to the real wing corners.
- The panel relation should be flush and the gap between main body and boot lid should be consistent.
- Loosen the hinge bolts and move to set.

- CARE POINT: Use blue loctite on all fixings used in the assembly.
- Fit the boot closure panel into place and fix with x2 m6x20mm flanged button head bolts (U541061) & x2 m6 steel washers (U011035).
- Use x3 m5 flanged socket button head bolts (U541071) to fix the boot bottom to the armature.
- Once fixed into the correct position, produce x6 3mm pilot holes on each side of the wooden body.
- Then fix the closure panel with x12 m4x13mm pozi button head wood screws (MGS04000).
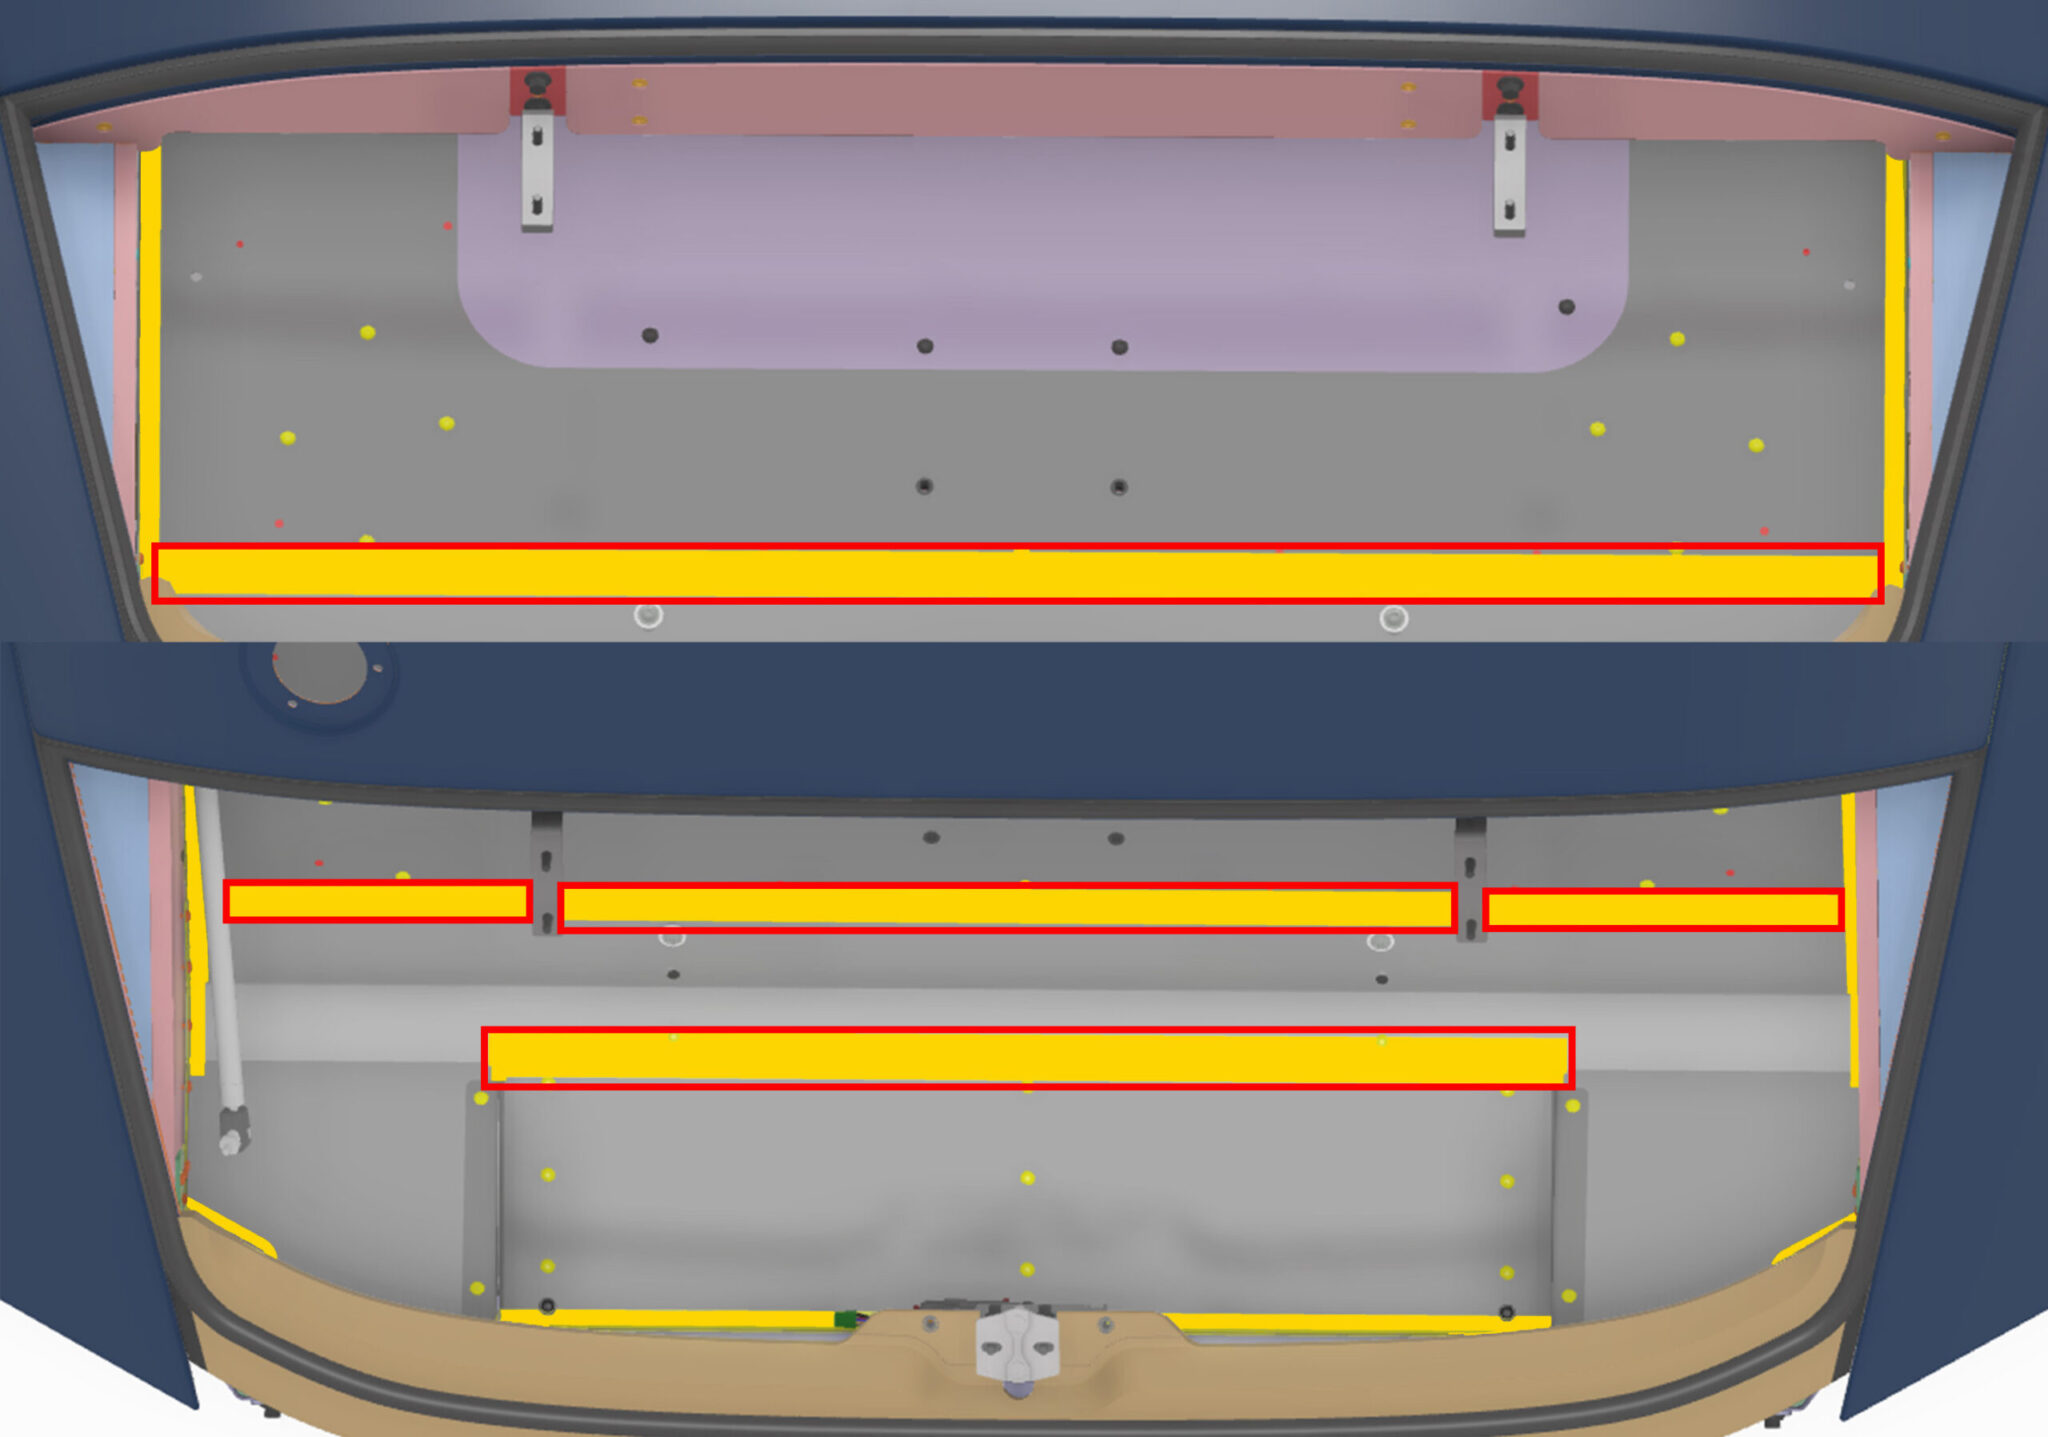
- CARE POINT: Ensure the rear armature wood is sufficiently covered during the sealing process to stop and potential damage.
- Apply Teroson M5939 to all other areas in yellow. This will take around an hour to cure.
- Place gafa tape in the areas highlighted in yellow and red.
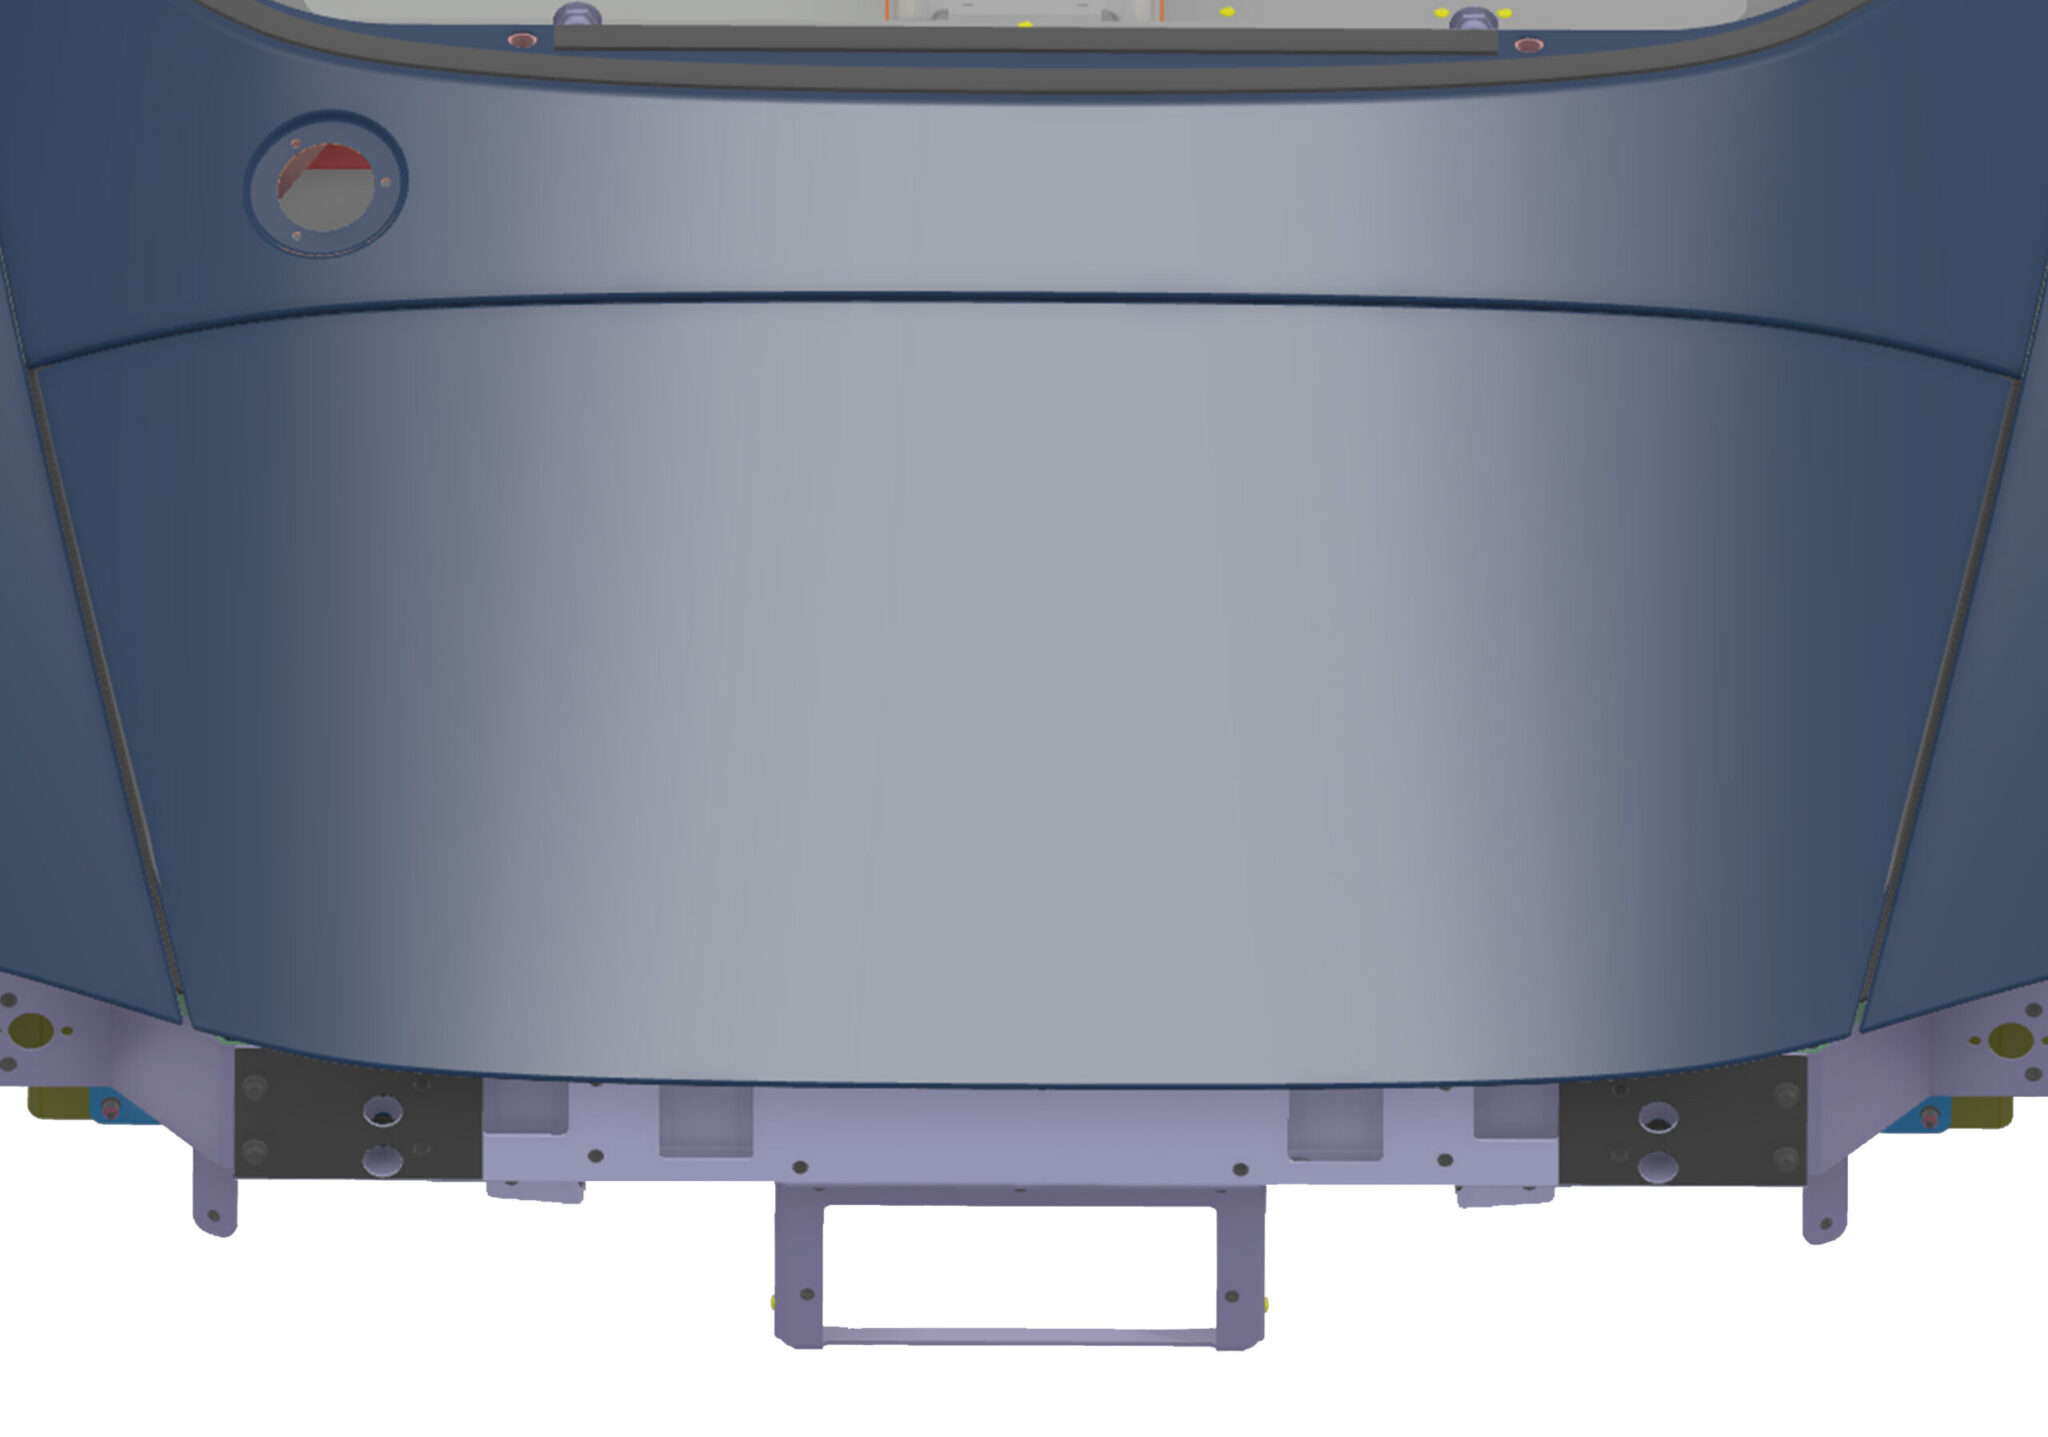
- The finished assembly will look like this.