REAR WING FIXTURE BONDING PROCESS
Document Number: SS22
Author: Thomas Sloan Kirton
Date Created:
Revision Number: v1.0.0
Document Approved by:
NOTE. Document is uncontrolled if printed
All instructions in this manual must be adhered to for this stage. Read all instructions carefully and study the photographs. While learning this procedure, quality of work is more important than speed of assembly.
Tools Required:
- Pneumatic Adhesive Gun
- VHB Surface Cleaner 8986
- Plexus MA320
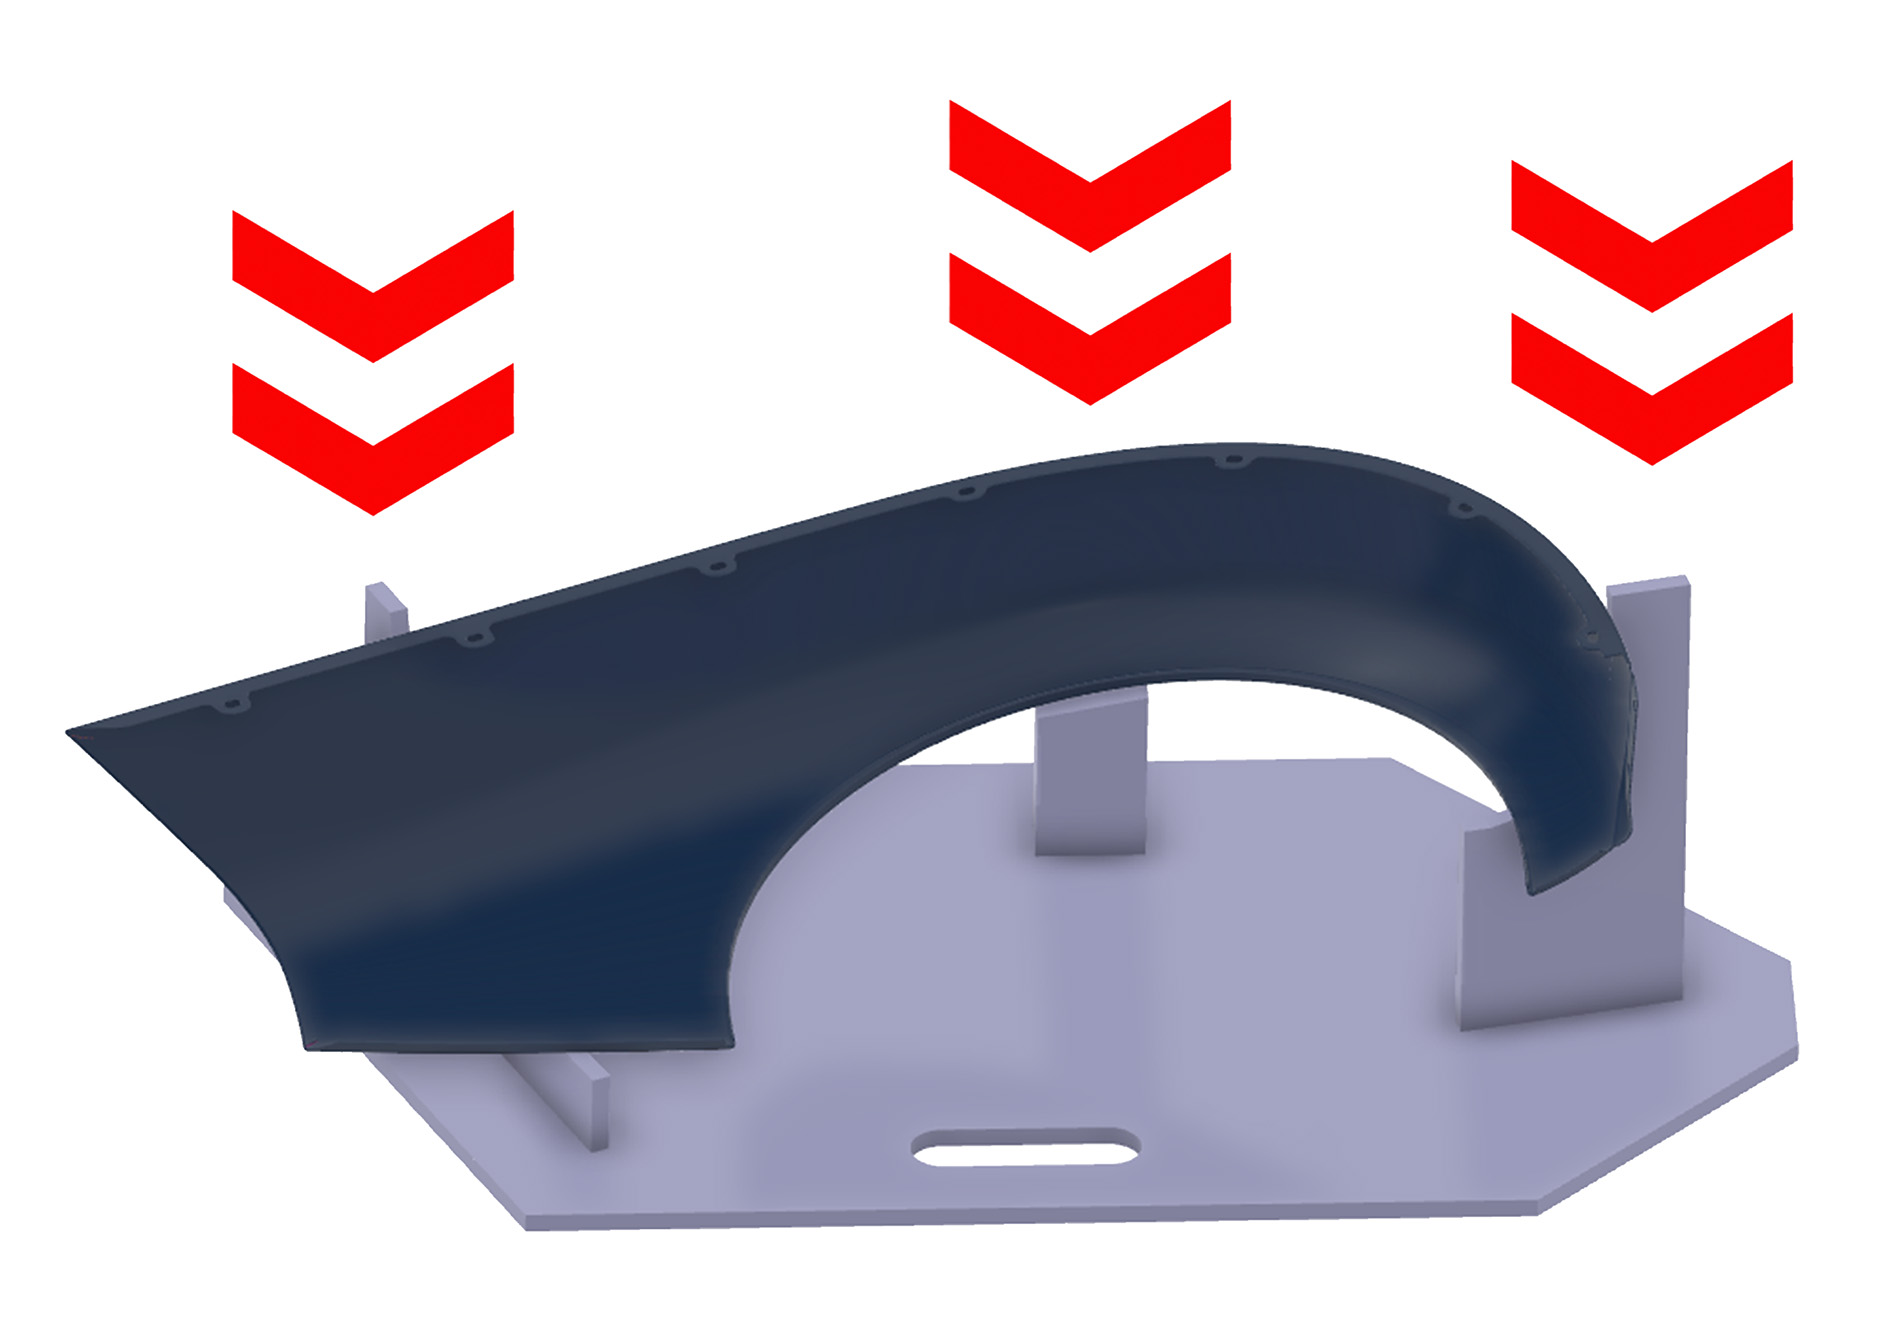
- Place the rear wing into the bonding jigs.
- Use image for reference.

- For the front section of the wing:
- Place the fixture bonding jig in area shown.
- Mark the areas in orange using the jig for reference.
- Remove the jig.
- Sufficiently prep the surface by keying the areas marked followed by panel wiping the area. This will ensure no contamination occurs.
- Use image for reference.

- Key the surface and apply adhesive to the areas highlighted on the bracket.
- Use image for reference.

- Once sufficient adhesive is applied, fit bracket in marked area and tape in place.
- Leave for 25-3- minutes to let adhesive cure.
- Once cured remove tape.
- Use image for reference.
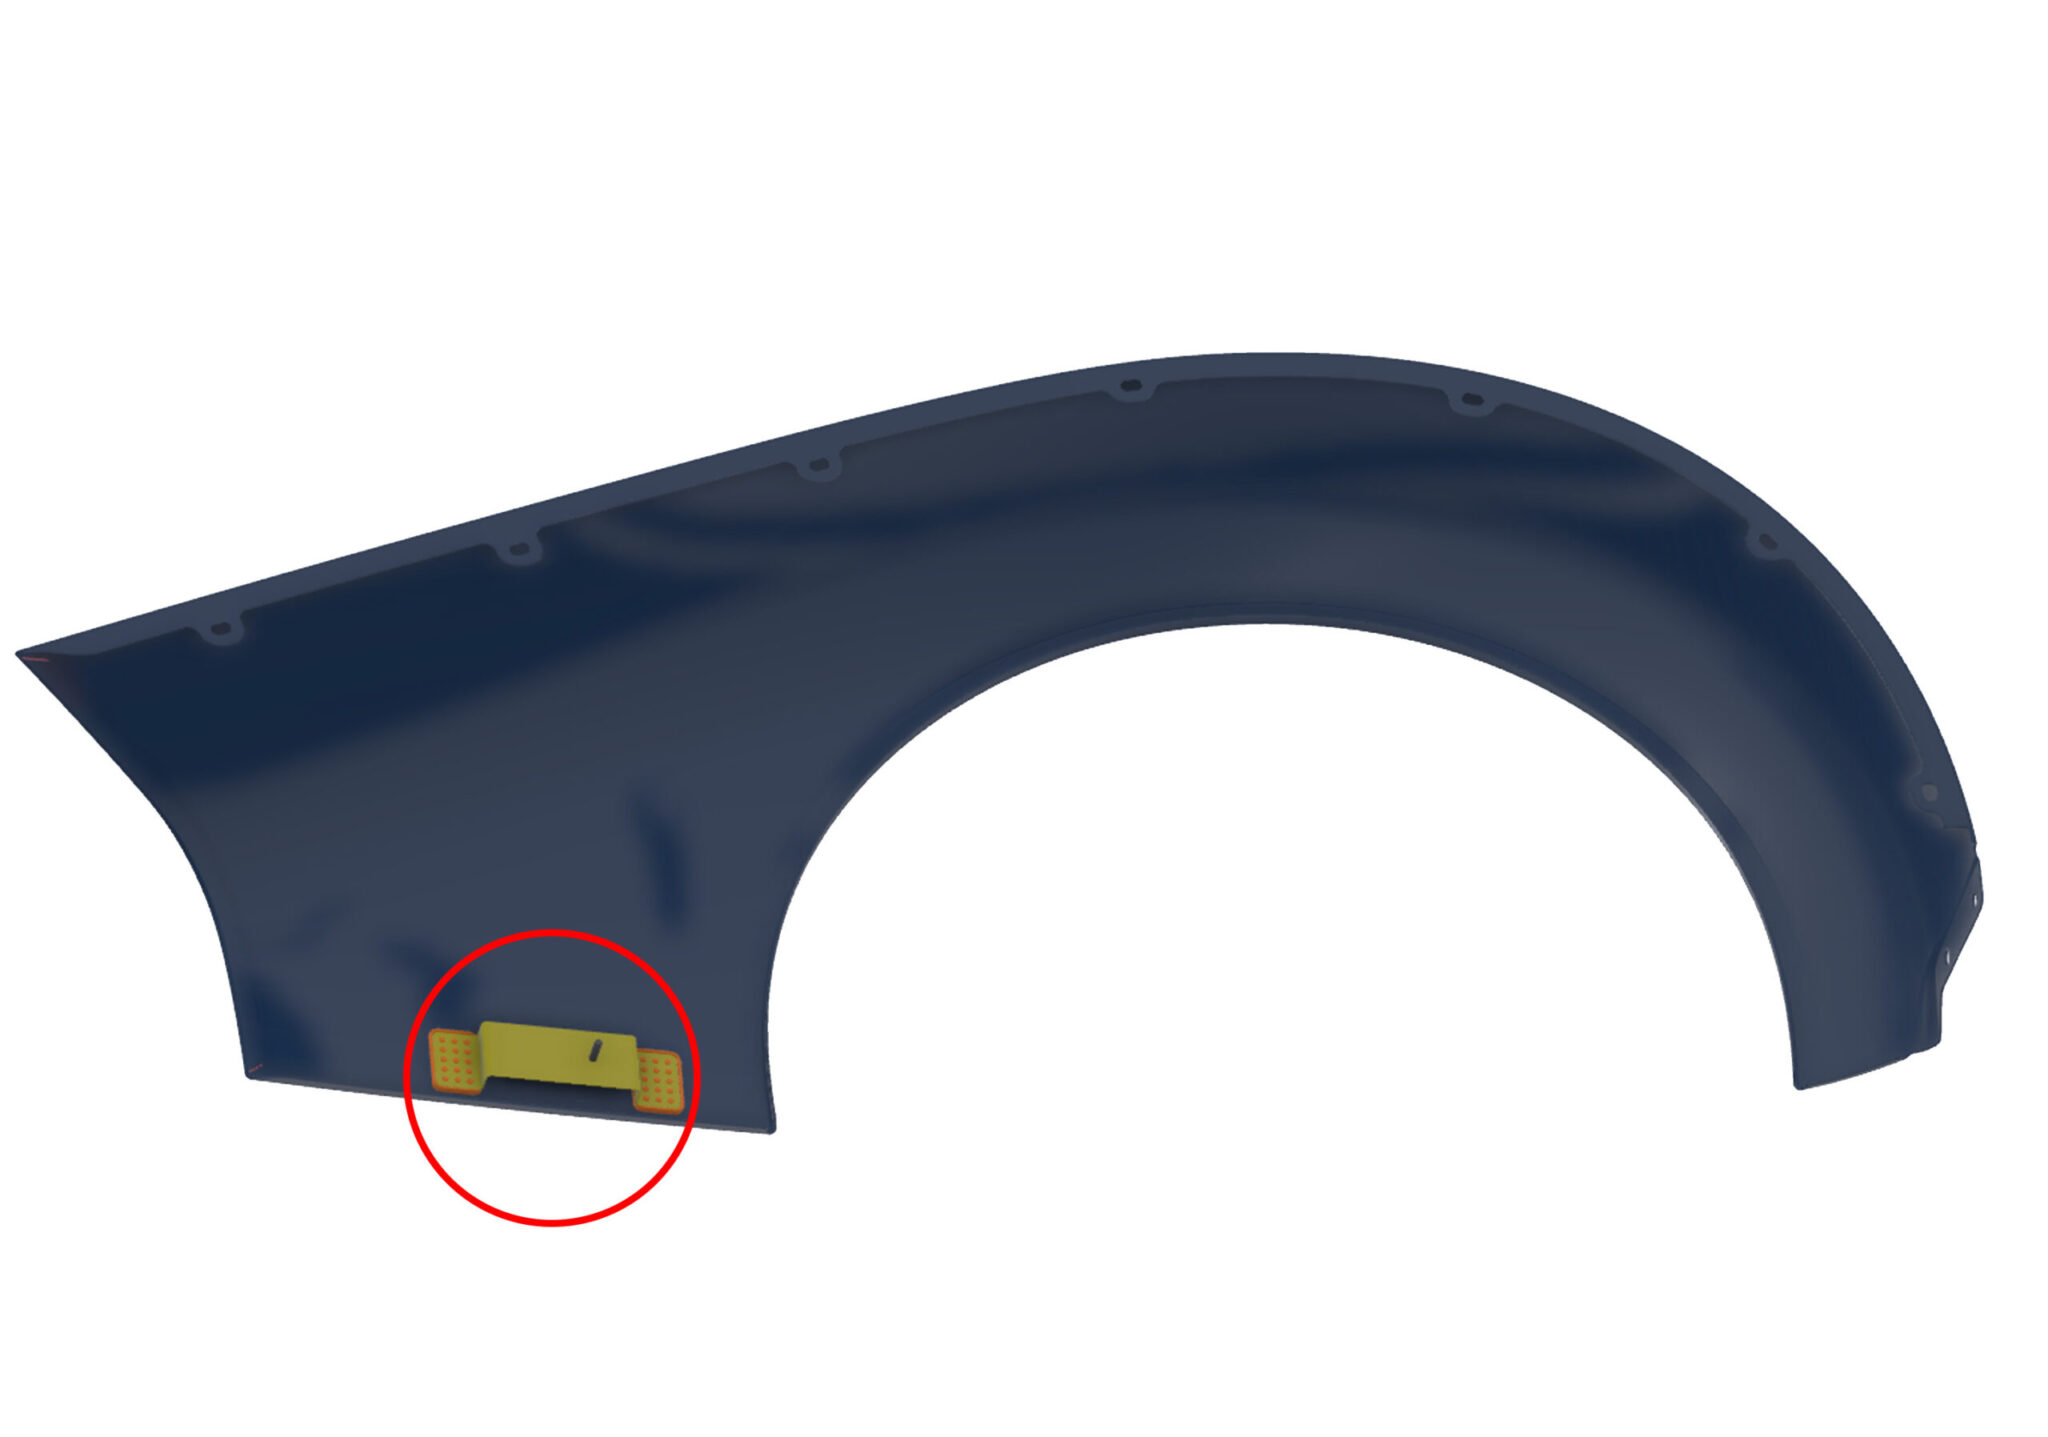
- The rear wing assembly will look like this.
- Apply all the same instructions to the opposite wing.
- Use image for reference.