DOOR INSTALLATION POST PAINT
Document Number: SS35
Author: Thomas Sloan Kirton
Date Created:
Revision Number: v1.0.0
Document Approved by:
NOTE. Document is uncontrolled if printed
All instructions in this manual must be adhered to for this stage. Read all instructions carefully and study the photographs. While learning this procedure, quality of work is more important than speed of assembly.
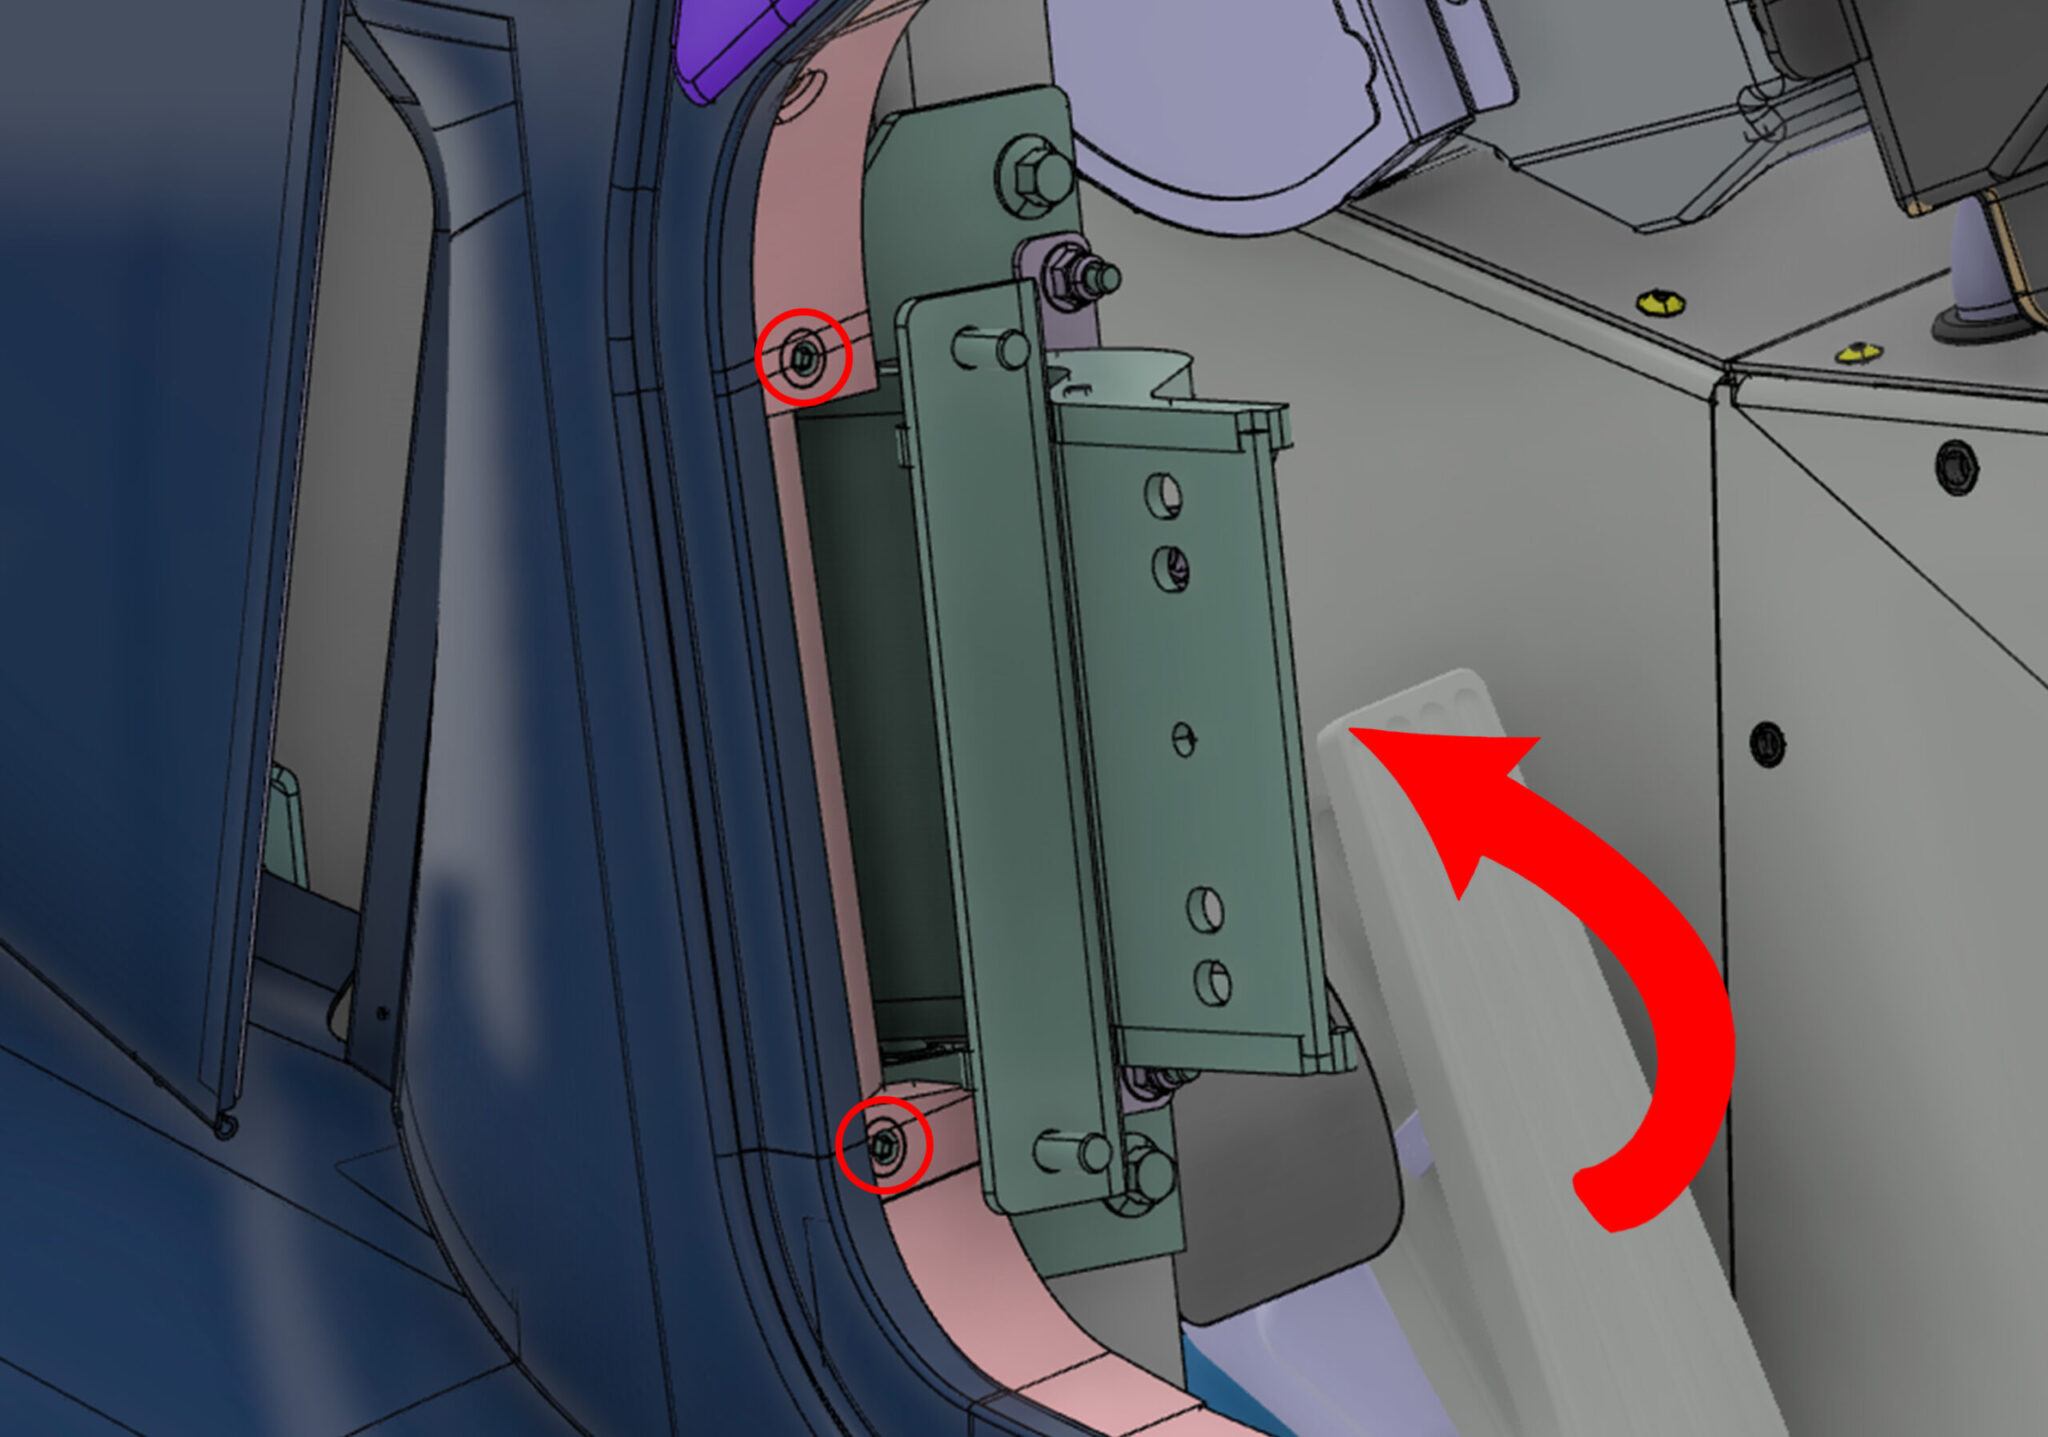
- Slot the door hinge into the correct position being careful not to damage the wooden body or the hinge.
- Fit x2 1mm door shims in between the hinge plate and wooden body.
- Lightly fix with x2 m6x70mm countersunk bolts (U501067) & x2 m6 cup washers (F411002)

- Using x2 1mm hinge shims to space out the hinge to the chassis connection.
- Fix down with x2 m8x25mm flanged hex bolts.
- In sequence, tighten the x2 m8 bolts and the x2 m6 countersunk bolts (see instruction 1 for reference)
- Repeat process on the opposite side of the car.
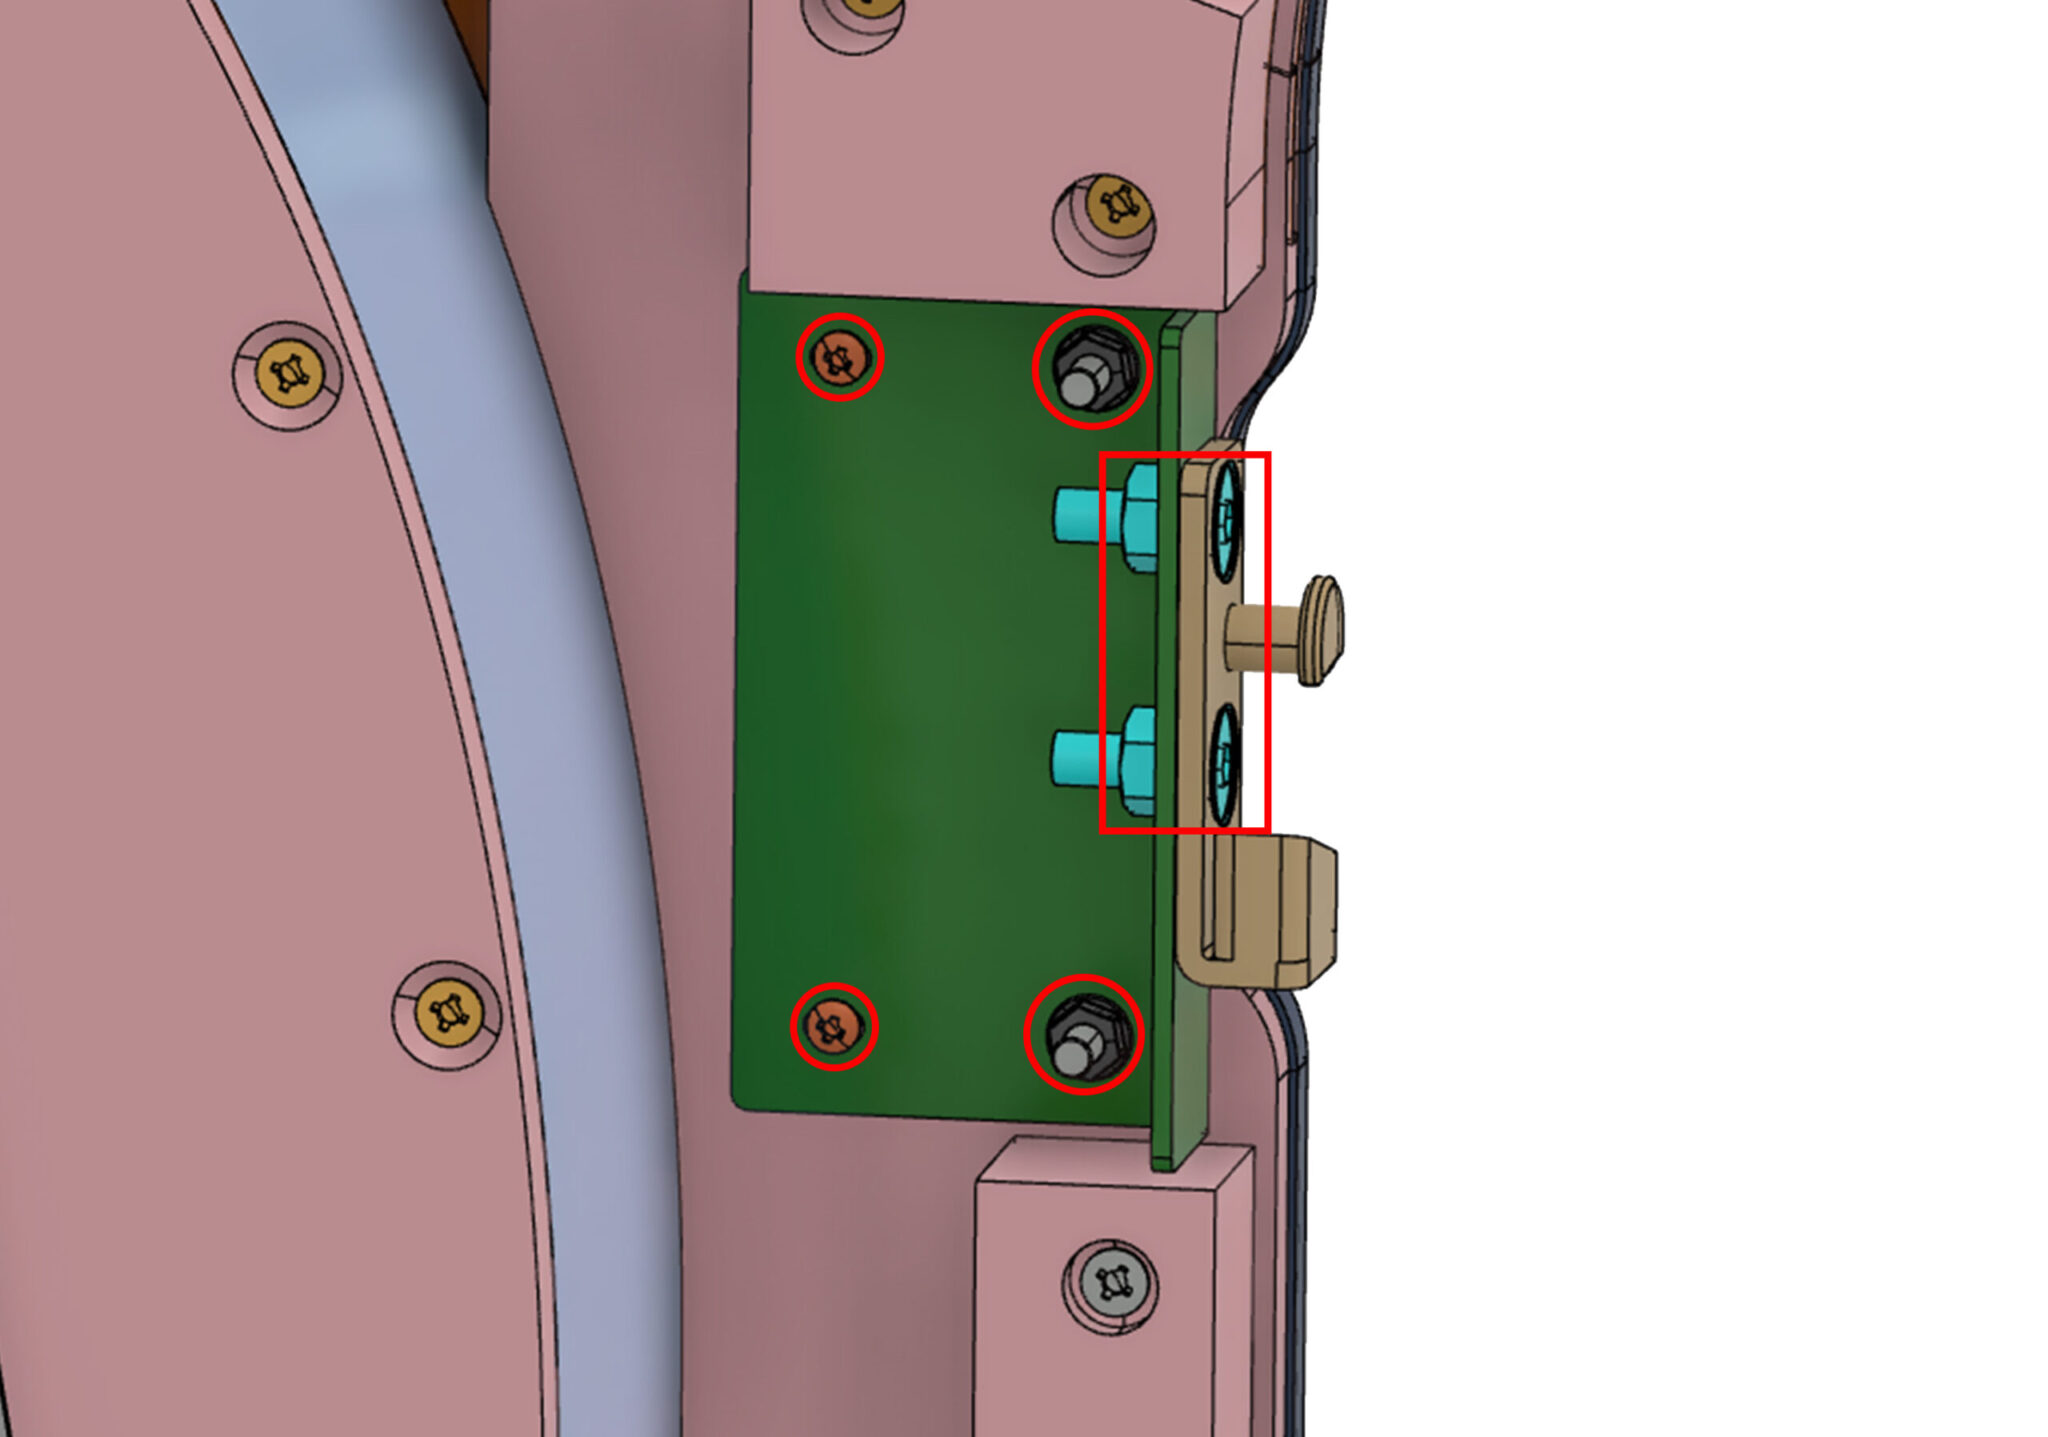
- Fix the latch mount bracket with x2 m4x20mm dome head wood screw (MGS04010) & x2 m6 k-nuts (MGN0024)
- Now the striker plate assembly central to the holes using x2 m8x20mm countersunk bolts (U541013)
- This assembly will be moved around during the door setting process.

- Attach the door beam to the hinge using x2 m8 nyloc nuts (F011028) in the areas squared and x2 m8x20mm flanged hex bolts (U010027) in the areas circled.
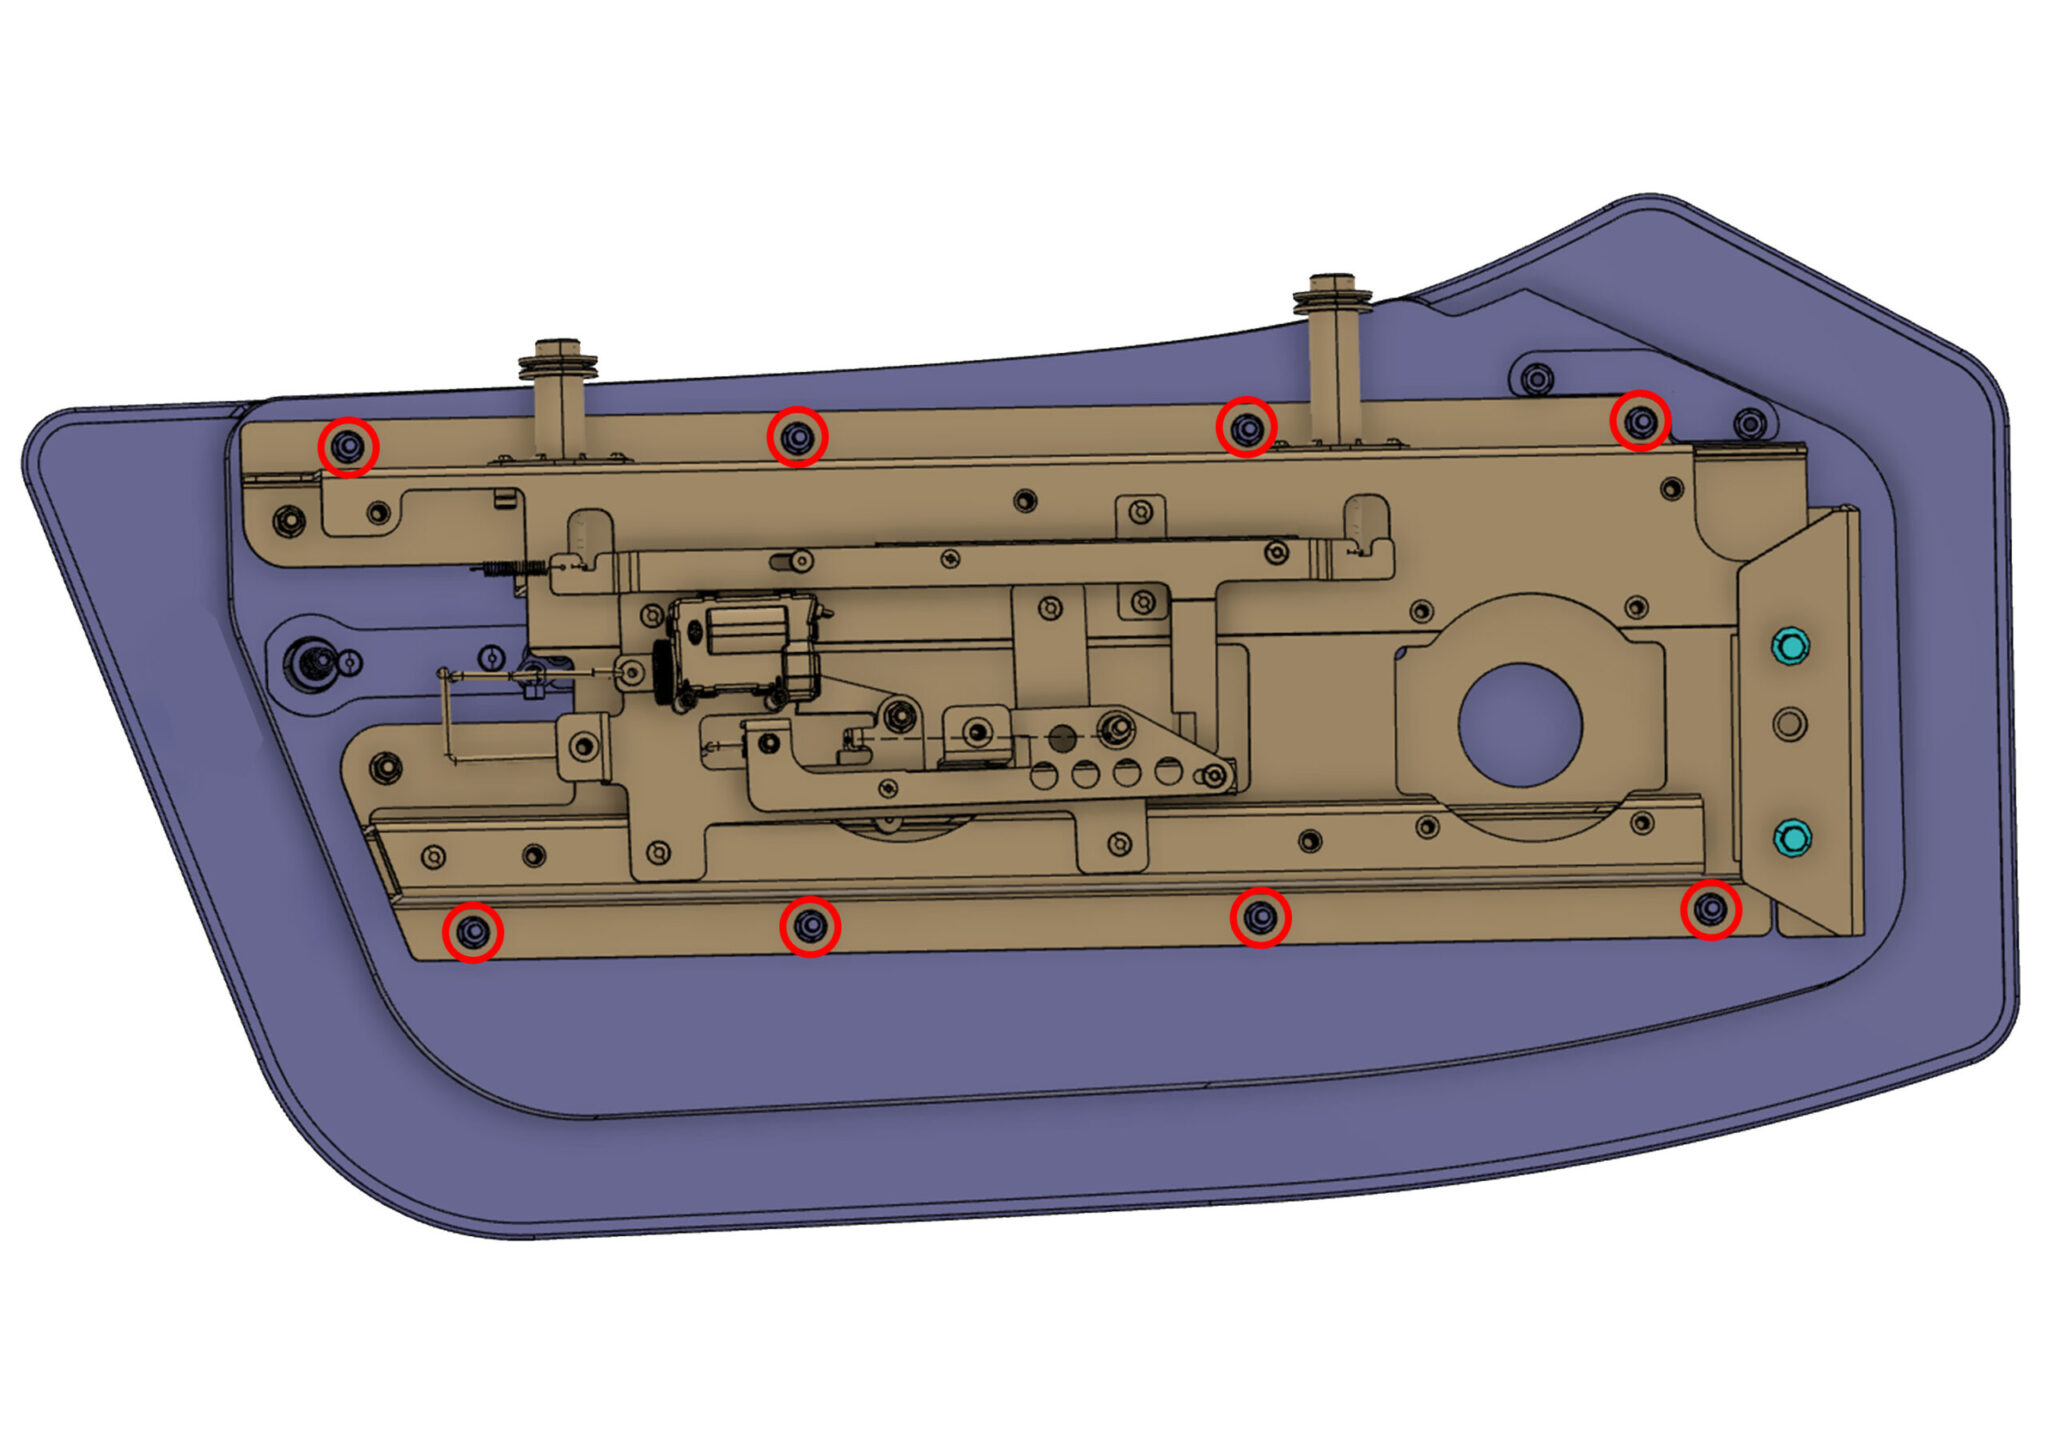
- Fix the door skin assembly to the beam in the points circled with x8 m6 flanged serrated nuts (MGN0024)
- CARE POINT: Fit the top fixings as to make fitment of the door skin safer.
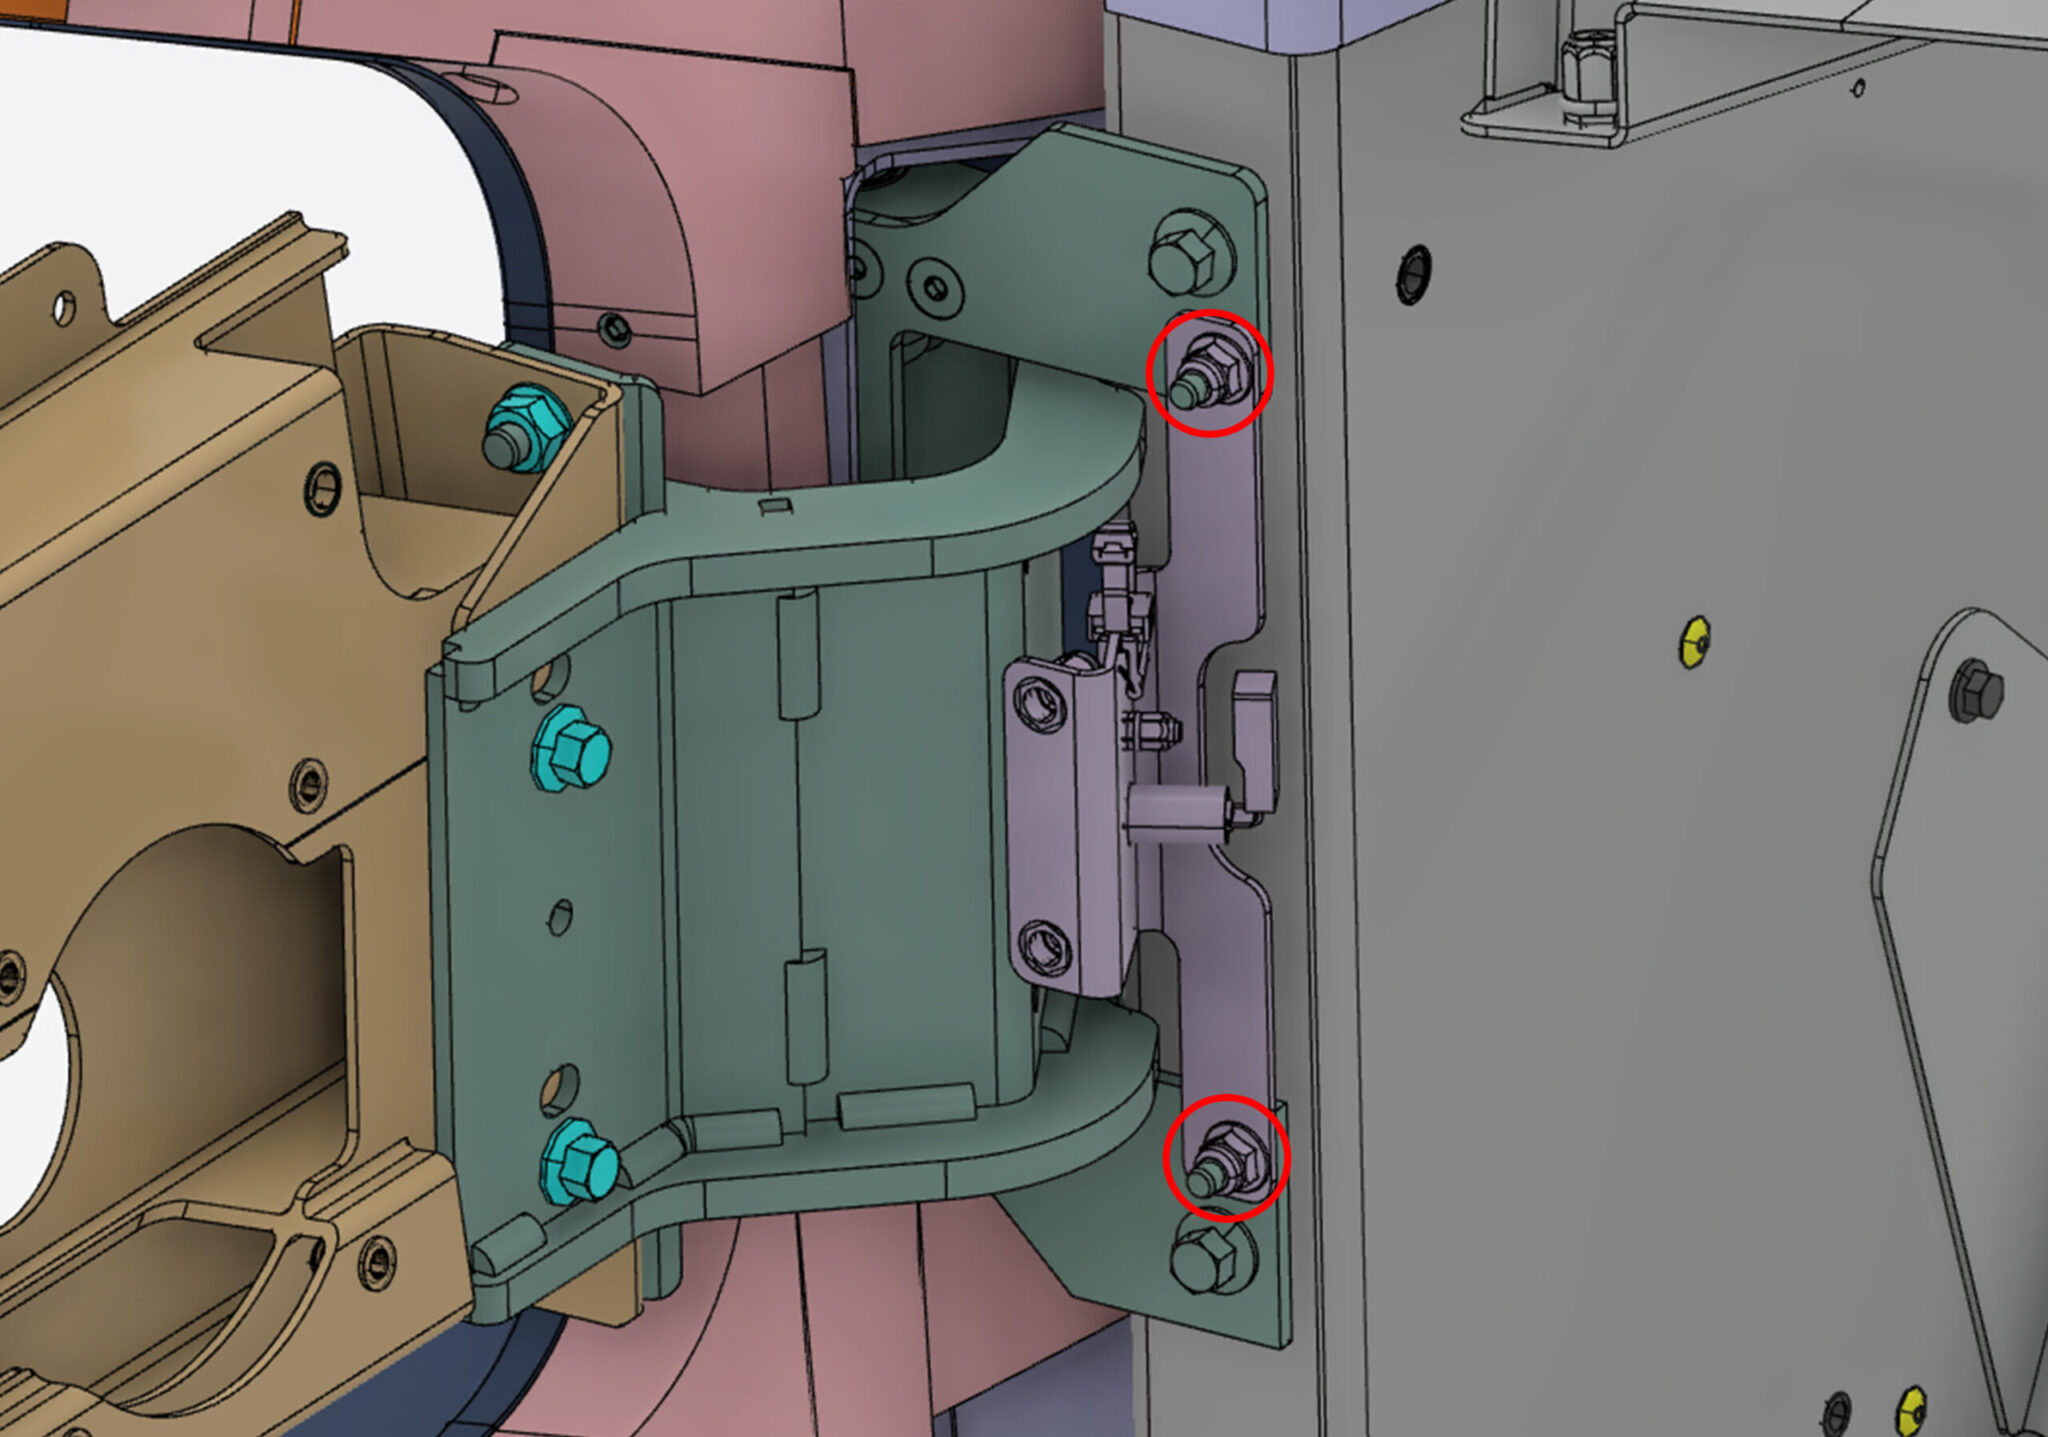
- Finally fit the door switch assembly in the areas circled with x2 m6 flanged nylock nuts (U510046)