HARDTOP FITMENT
Document Number: SS63
Author: Thomas Sloan Kirton
Date Created:
Revision Number: v1.0.0
Document Approved by:
NOTE. Document is uncontrolled if printed
All instructions in this manual must be adhered to for this stage. Read all instructions carefully and study the photographs. While learning this procedure, quality of work is more important than speed of assembly.

- CARE POINT: Ensure the hardtop is fitted with x2 operatives to minimise any potential for damage during fitment.
- Drop hardtop onto the car. Ensure all pins locate in the correct locations and foam seals are not caught and torn during fitment.
- Use image for reference.
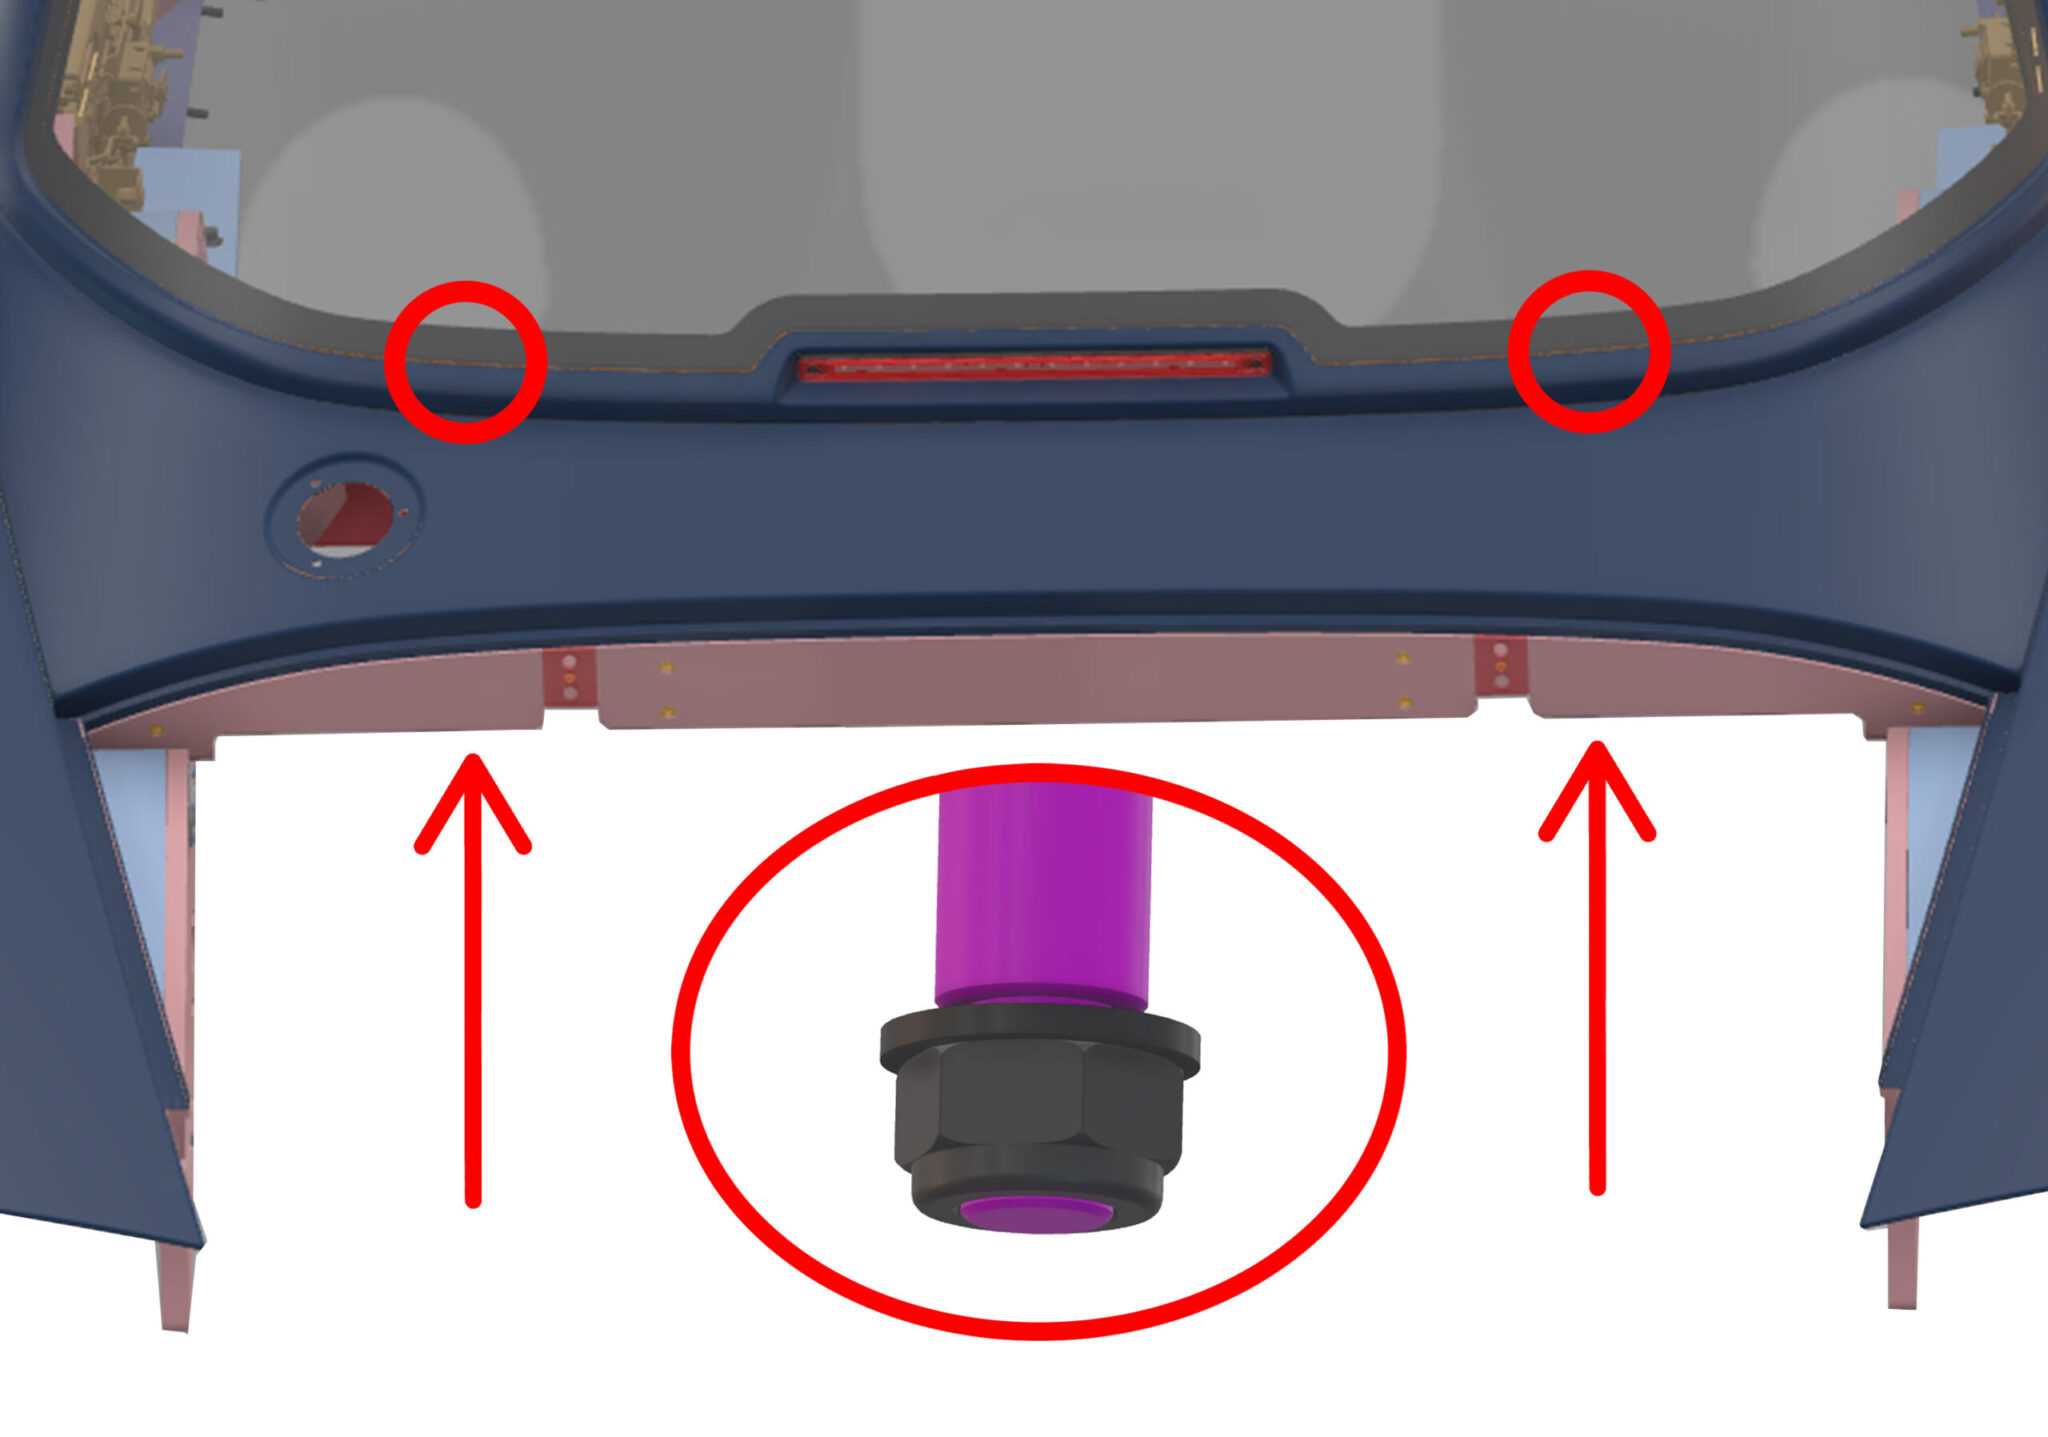
- Fix the rear of the hardtop in place loosely with x2 m10 nyloc nuts (MGN0250) & x2 m10 stainless steel washer (U521029).
- Once all other hardtop contact points are fixed all points can be tightened.
- Repeat process to both sides.
- Use image for reference.

- Fix the B-Pillar sections of the hardtop in place loosely with x3 m6 flanged nyloc nut (U510046).
- Once all other hardtop contact points are fixed all points can be tightened.
- Repeat process to both sides.
- Use image for reference.

- Latch down the front section of the hardtop to the windscreen.
- Now all fixings areas of the hardtop can be tightened.
- Repeat process to both sides.
- Use image for reference.

- Fit the hardtop trim finisher in the area shown with x2 m5 steel flange nut (MGN0013).
- Use image for reference.